Signing up and the wizard
Everything between deciding you want the system and having one running: the account, the wizard's one screen, the payment, and the automatic build.
Before you begin
The whole thing takes about five minutes if you have these ready.
- Your company name, spelled exactly as it should appear on your invoices.
- A payment card. Nothing is charged during the trial, but a card is needed to start it. Paddle, our payment company, also offers PayPal and some local payment methods.
Your logo, your colleagues and your tax numbers are not needed yet: you add them once your ERP is running (see After your ERP is live below).
Creating your control panel account
This account is your key to the control panel, and it is the account the subscription belongs to.
- Open app.nezmaro.com in your browser.
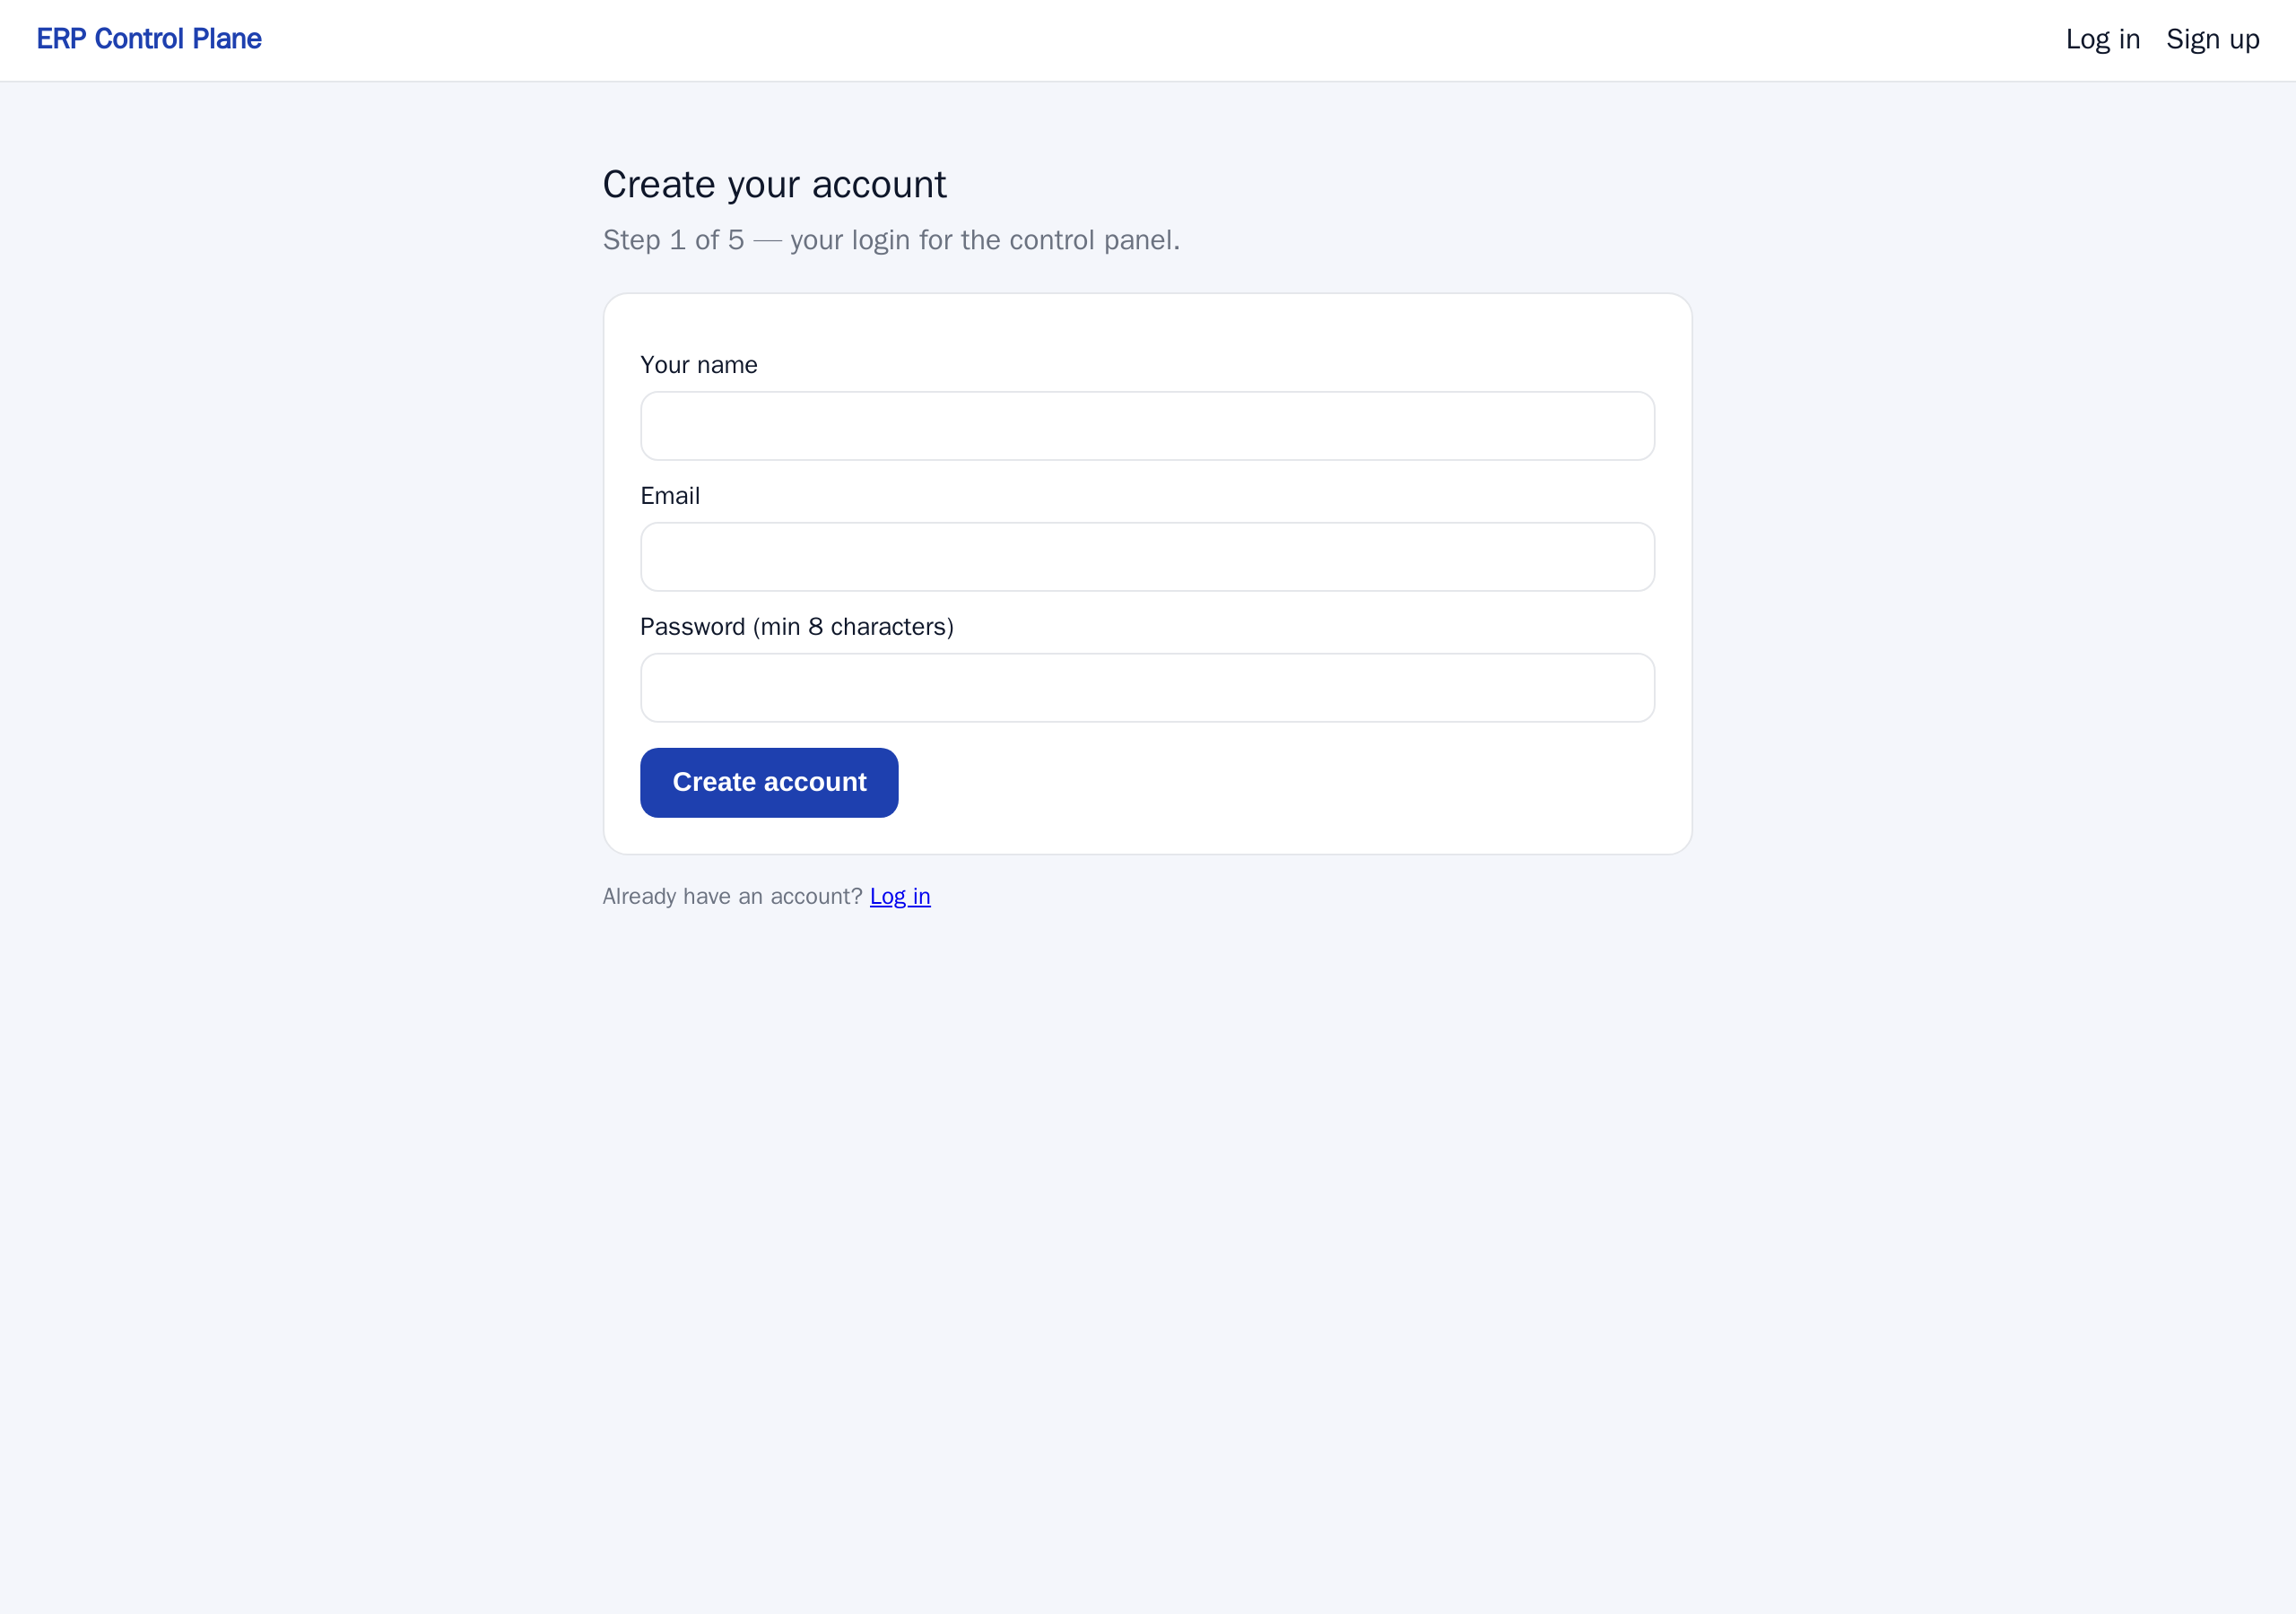
- Click Start your 7-day free trial. The page Create your account opens.
- Fill in Your name, Email and a Password of at least 12 characters.
- Click Create account. You are signed in immediately and the first wizard screen opens by itself.
- Open the confirmation email we send within a minute or two, and click the link in it. The link lasts 24 hours, and the payment screen stays closed until your address is confirmed. If you mistyped the address, correct it on that page and we send a new link to the new one.
This is a control panel account. It is not the same thing as a person inside your ERP: the same email address can be used in both places, but they are two separate sign-ins with two separate passwords. The control panel is where you manage the subscription; your ERP is where the work happens.
The wizard
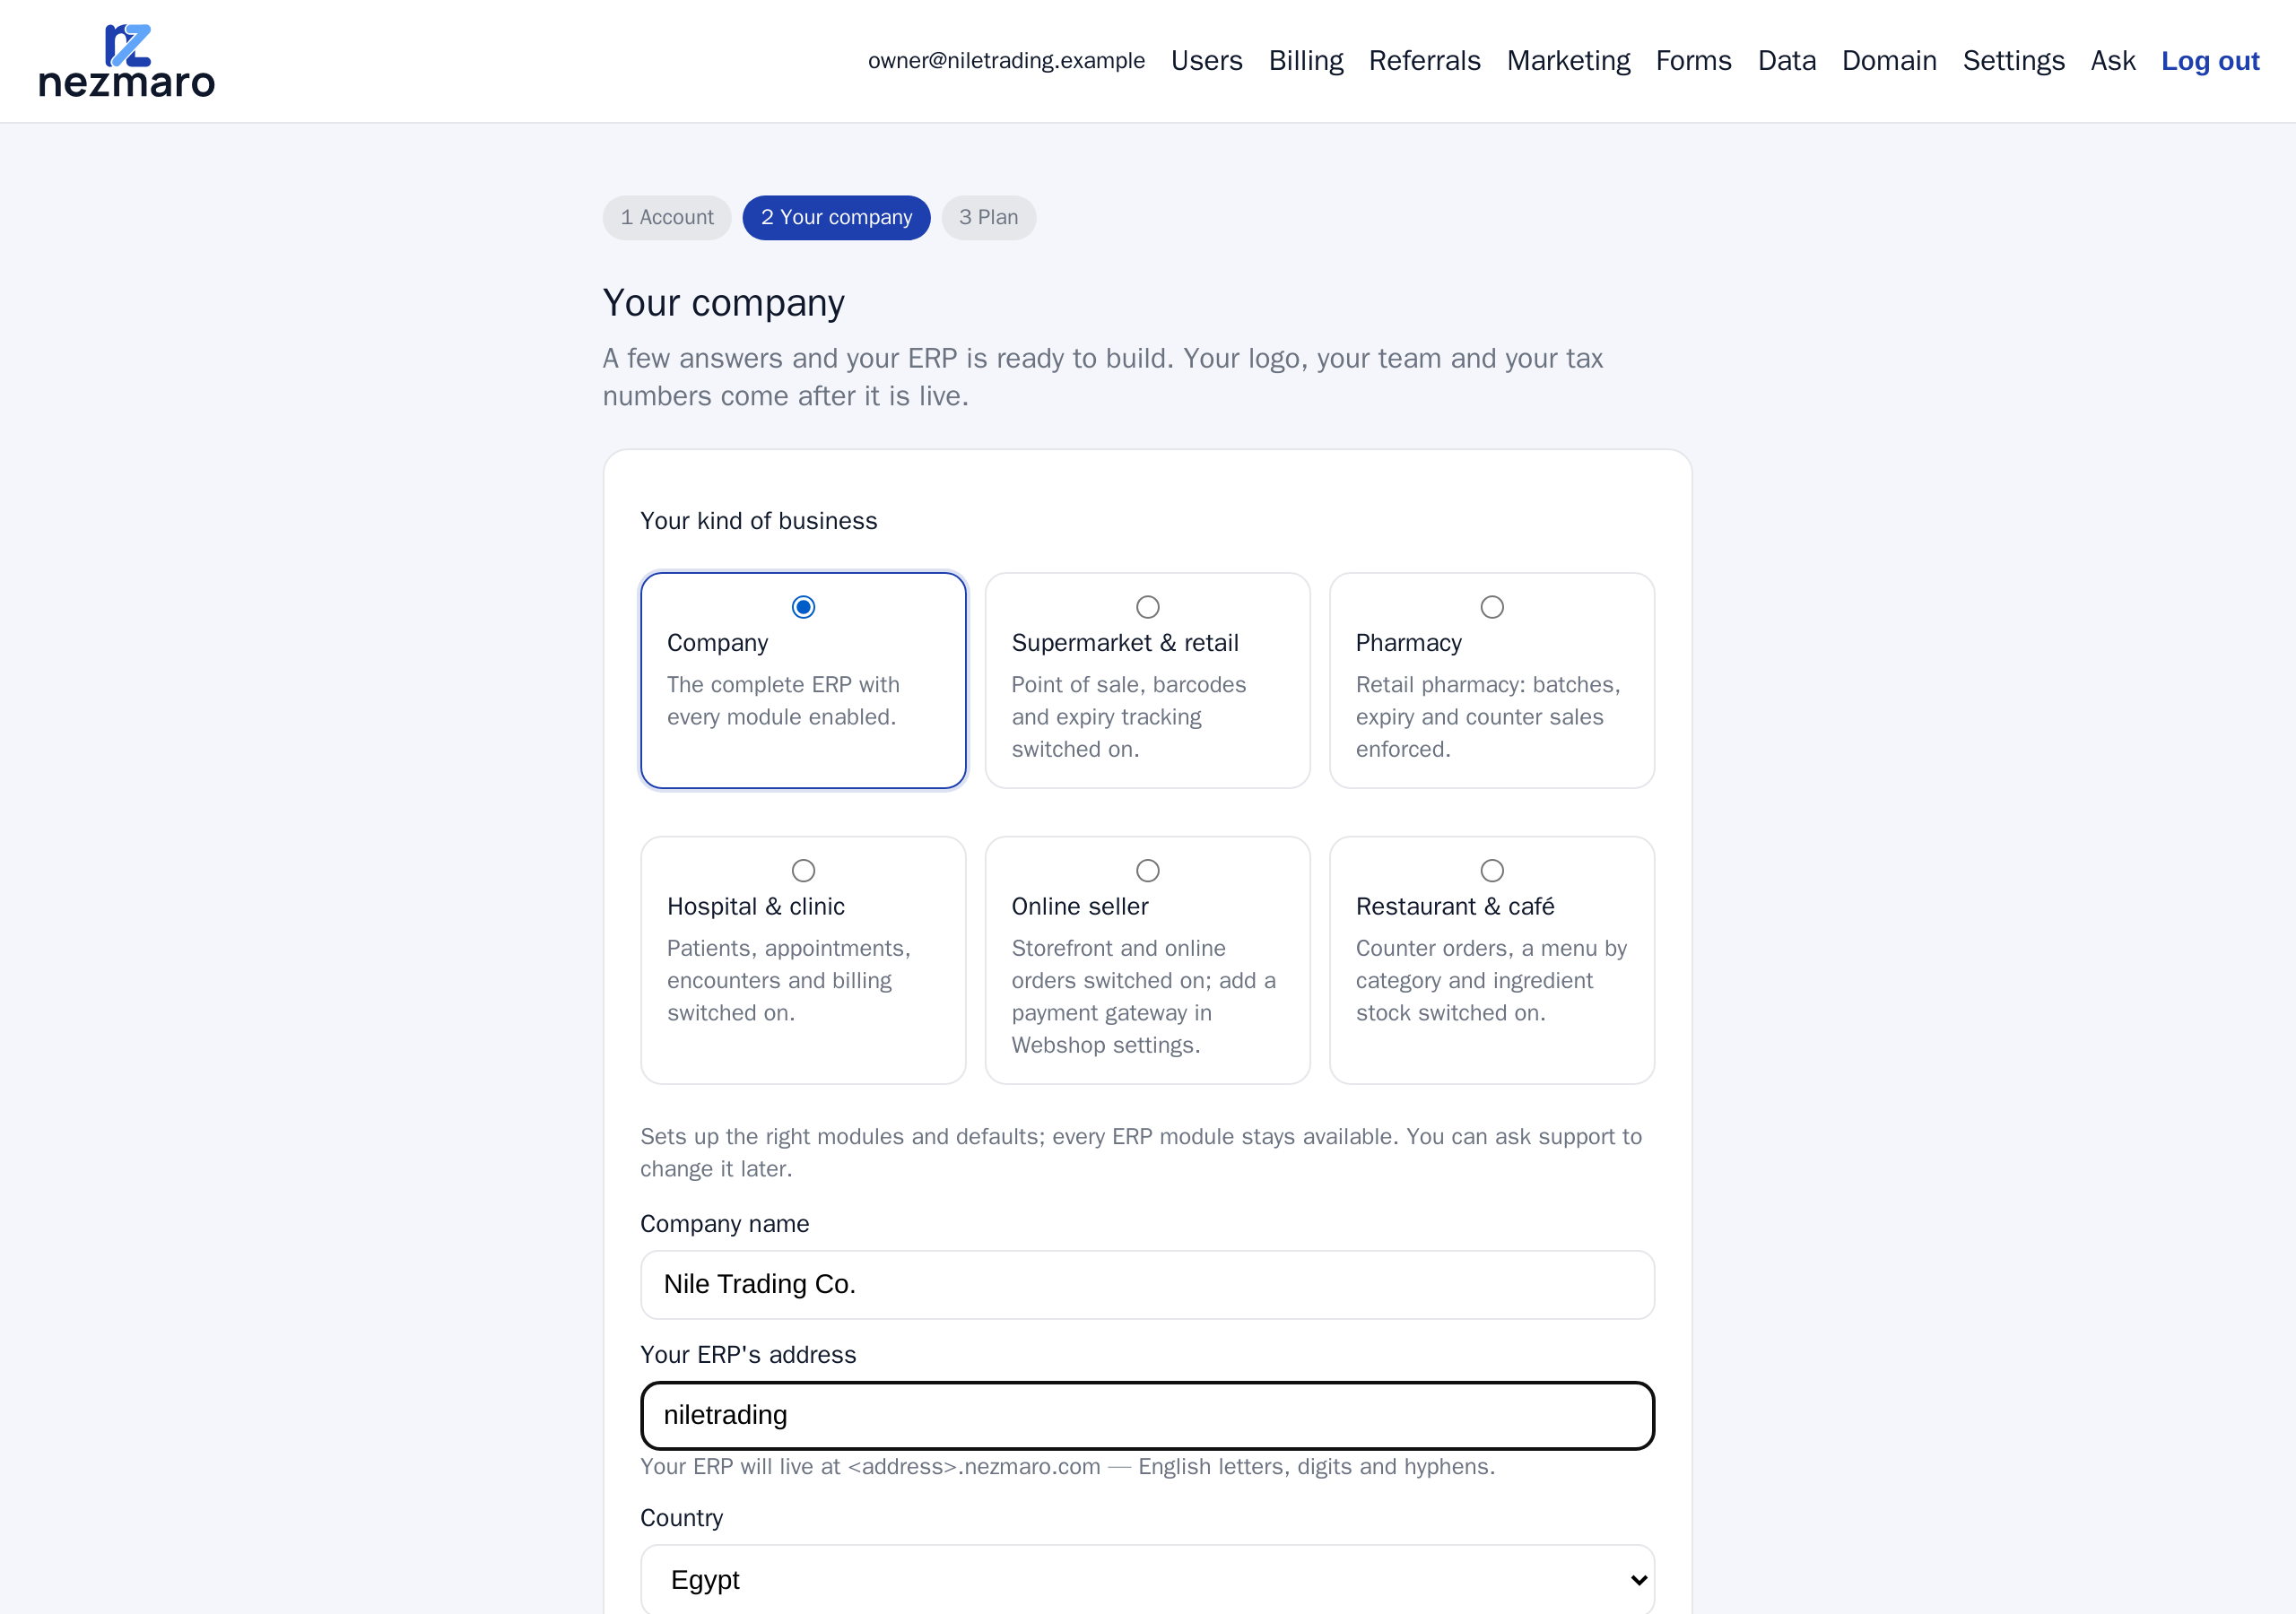
The wizard is two screens — Your company and Plan. The strip at the top of the page counts your account as the first step, so it reads “2 Your company”, “3 Plan”.
To go back and change something, use your browser's Back button; whatever you already entered is still in the fields. Your ERP itself is not built until the payment at the end, so there is no hurry.
Your company
What you choose here decides your web address and how your ERP is set up, and three of the answers cannot be changed once it is built — so it is the screen worth slowing down on.
- Choose your kind of business: Company (the full ERP), Supermarket & retail, Pharmacy, Hospital & clinic, Online seller or Restaurant & café. It sets up the right modules and defaults for you — a supermarket gets barcodes and a ready point-of-sale counter, a pharmacy sells batches earliest-expiry first, an online seller gets a storefront — and everything else in the ERP stays available. Support can change it later.
- In Company name, type the legal or trading name of your business. It appears on printed invoices, and you can edit it inside your ERP later.
- Check Your ERP's address. When your company name is in English letters, the
field fills itself with a suggestion — type
Nile Tradingand it offersniletrading, so your ERP would live atniletrading.nezmaro.com. Change it to anything you prefer; a grey line under the field tells you, as you type, whether the name is free. For an Arabic company name, type the address yourself. - Choose your Country. It sets your chart of accounts, your currency, your timezone and your tax rules, and it switches on country e-invoicing where we support it. It cannot be changed after your ERP is built, so check it even when the default already looks right.
- Check ERP language. For Egypt and Saudi Arabia it starts on العربية, which also runs the whole screen right to left; for other countries it starts on English. Pick the other one if it suits your company better. It is your company's starting language and cannot be changed after your ERP is built — but every person can still choose their own under My Settings.
- Click Save & continue.
A good address is short (your team types it daily), recognisable (your company name or an abbreviation everyone already uses), plain (lowercase English letters, digits and hyphens only — no spaces, dots or Arabic letters) and durable (not tied to one product, one branch or one year).
Plan
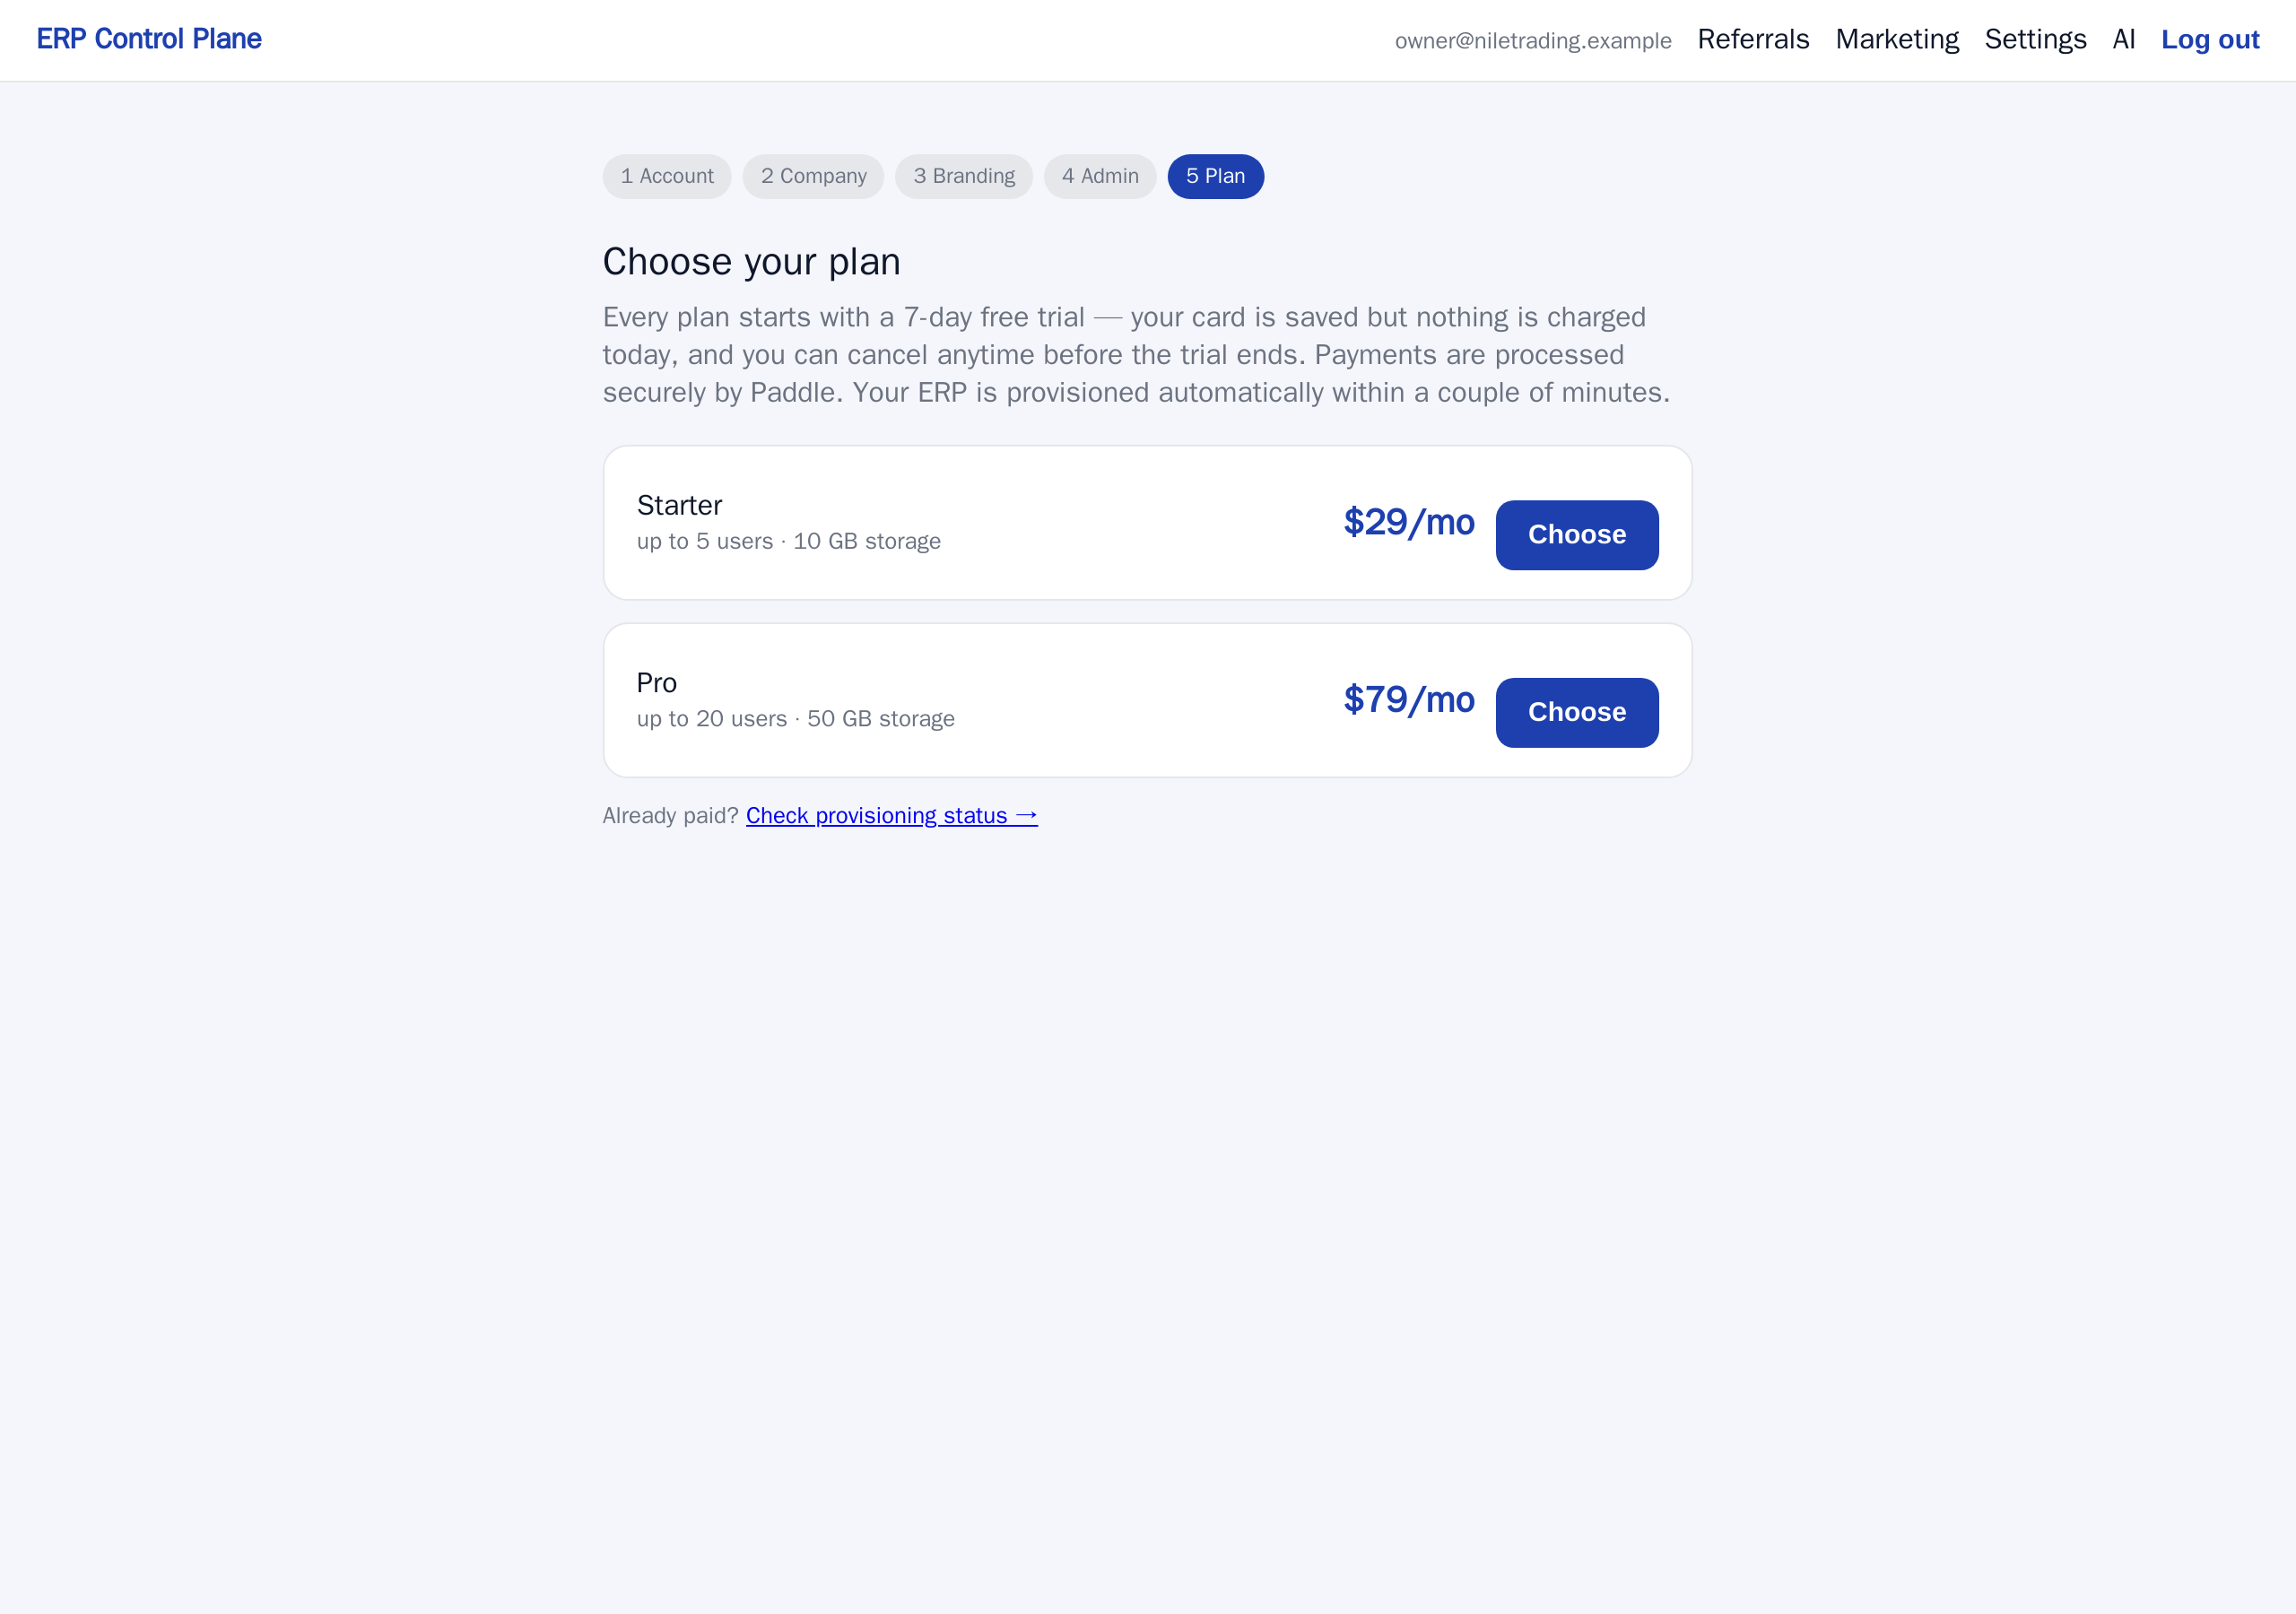
Both plans give you the complete system — every part of it, your own private copy, backups and support. They differ only in how many people may sign in and how much you can store.
| Starter | Pro | |
|---|---|---|
| Price before tax | $29 per month | $79 per month |
| People who can sign in | 5 | 20 |
| Storage | 10 GB | 50 GB |
| Suits | A small team putting its books, stock and sales in one place | A growing company with separate sales, warehouse and accounting staff |
Count the people who need to sign in, not the people in the company — a workshop of thirty where only four use the system fits comfortably on Starter. If you are unsure, start on Starter: moving up to Pro later keeps all your data exactly as it is.
Paying and starting the trial
Payment is handled by Paddle, a payment company that sells the subscription on our behalf: it charges your card, adds the VAT or sales tax your country requires, and sends your invoice. We never see or store your card number.
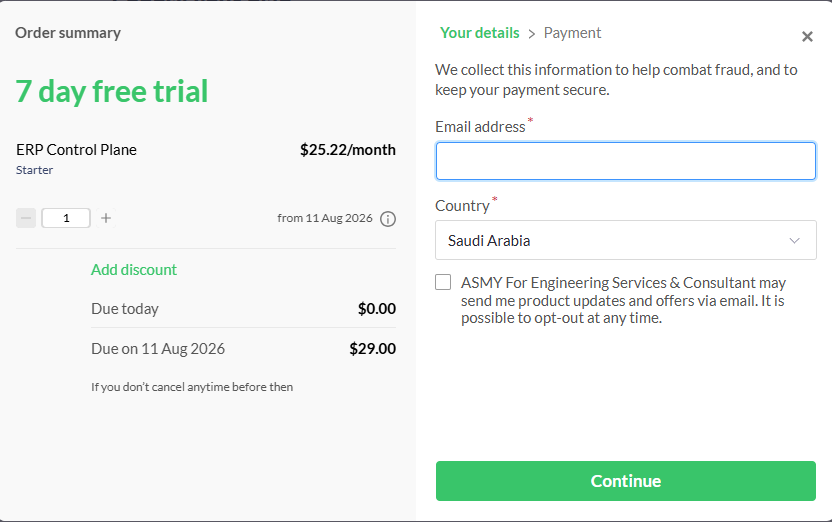
- Click Choose next to the plan you want. A payment window from Paddle opens on top of the page — you do not leave our site.
- Fill in your email, your country and your card details in that window.
- Read the summary before confirming. It should say 7-day free trial, show nothing due today, and show the first charge dated 7 days from now, with tax added.
- Confirm the payment. The window closes by itself and hands you back to the wizard.
What happens after payment
The moment Paddle confirms the payment, your ERP starts being built. Nobody does anything by hand and there is no installation to book.
- The wizard shows a status page that refreshes on its own. The status moves through pending, provisioning and configuring to active.
- This normally takes two to three minutes. You may close the page — the work carries on regardless, on our servers.
- When it reaches active, the page shows your ERP address:
yoursubdomain.nezmaro.com. - An invitation email goes to you, the account owner, with a link to choose a password and sign in to your ERP for the first time. You are its administrator.
Write both addresses down: app.nezmaro.com for billing and settings, yoursubdomain.nezmaro.com/app for daily work.
After your ERP is live
The status page then shows Your first week, a short list that ticks itself off as you go. Two of its items, and one other page, cover what older versions of this wizard asked before payment:
- Upload your logo — opens the Branding page: your logo and your brand colour. Saving puts them straight onto your letterhead, your printed documents and the top of your ERP's screens.
- Add your team — opens the Users page, where you invite colleagues and choose what each of them may do. Hand the administration to someone else here if you prefer.
- Your VAT number, CR number and address — in Saudi Arabia and Egypt, the e-invoicing page asks for them (My business → ZATCA or E-receipts) when you switch it on. In other countries, enter them on your company record inside your ERP (search for Company).
If something does not arrive
- No invitation email after ten minutes — look in the spam folder, then check that it went to the address you signed up with. If something is wrong, email us and we will send a new invitation.
- The status page still says pending or provisioning after ten minutes — nothing is lost. Give it a few more minutes; if it has still not finished, or it says the build hit a problem, contact us and we will look at it.
- You paid but the page closed — sign back in at app.nezmaro.com. Your progress is saved and the status page comes back.
- You picked the wrong address — tell us before your team starts using the system. It cannot be renamed, but the sooner you say so, the easier it is to move you to a fresh one.
- You want to change plan — email us and we will move you. Your data stays exactly where it is.
Support is at support@nezmaro.com. Always include your subdomain so we can find your system quickly.