User Manual
Everything you need to run your company on your own ERP — from signing up to daily sales, purchasing, stock and accounting work.
Getting started
What you have bought, how it gets built for you, and the two web addresses you will use from now on.
What you get
An ERP is one system that holds the working records of a company: what you sell, what you buy, what you hold in stock, what customers owe you and what you owe suppliers. Instead of one spreadsheet for stock, another for invoices and a folder of receipts, everything sits in one place and the parts feed each other.
Your company gets its own copy of that system — not an account inside software shared with other companies. It runs at its own web address, and your records are stored separately from every other customer's. In plain terms: nobody outside your company can see your data, and nothing you type is visible to another customer of ours.
The system is Nezmaro. It runs on a mature engine used by thousands of companies around the world, and it covers accounting, stock, sales, purchasing, customers, staff records, projects and manufacturing. We create it for you, put your logo and colours on it, back it up, and keep it running.
How your ERP is created
No technician visits you and nothing is installed on your computers, so it helps to know the whole sequence before you begin.
- You create an account at app.nezmaro.com — your name, your work email and a password. This account is for the control panel, and we email you a link to confirm the address — payment stays closed until you click it.
- You answer a short wizard — one screen: your kind of business, your company name, the web address you want, your country and your ERP's language. Your logo and your team come after the system is running.
- You start the trial on the last screen. Your card is saved and nothing is charged during the first 7 days.
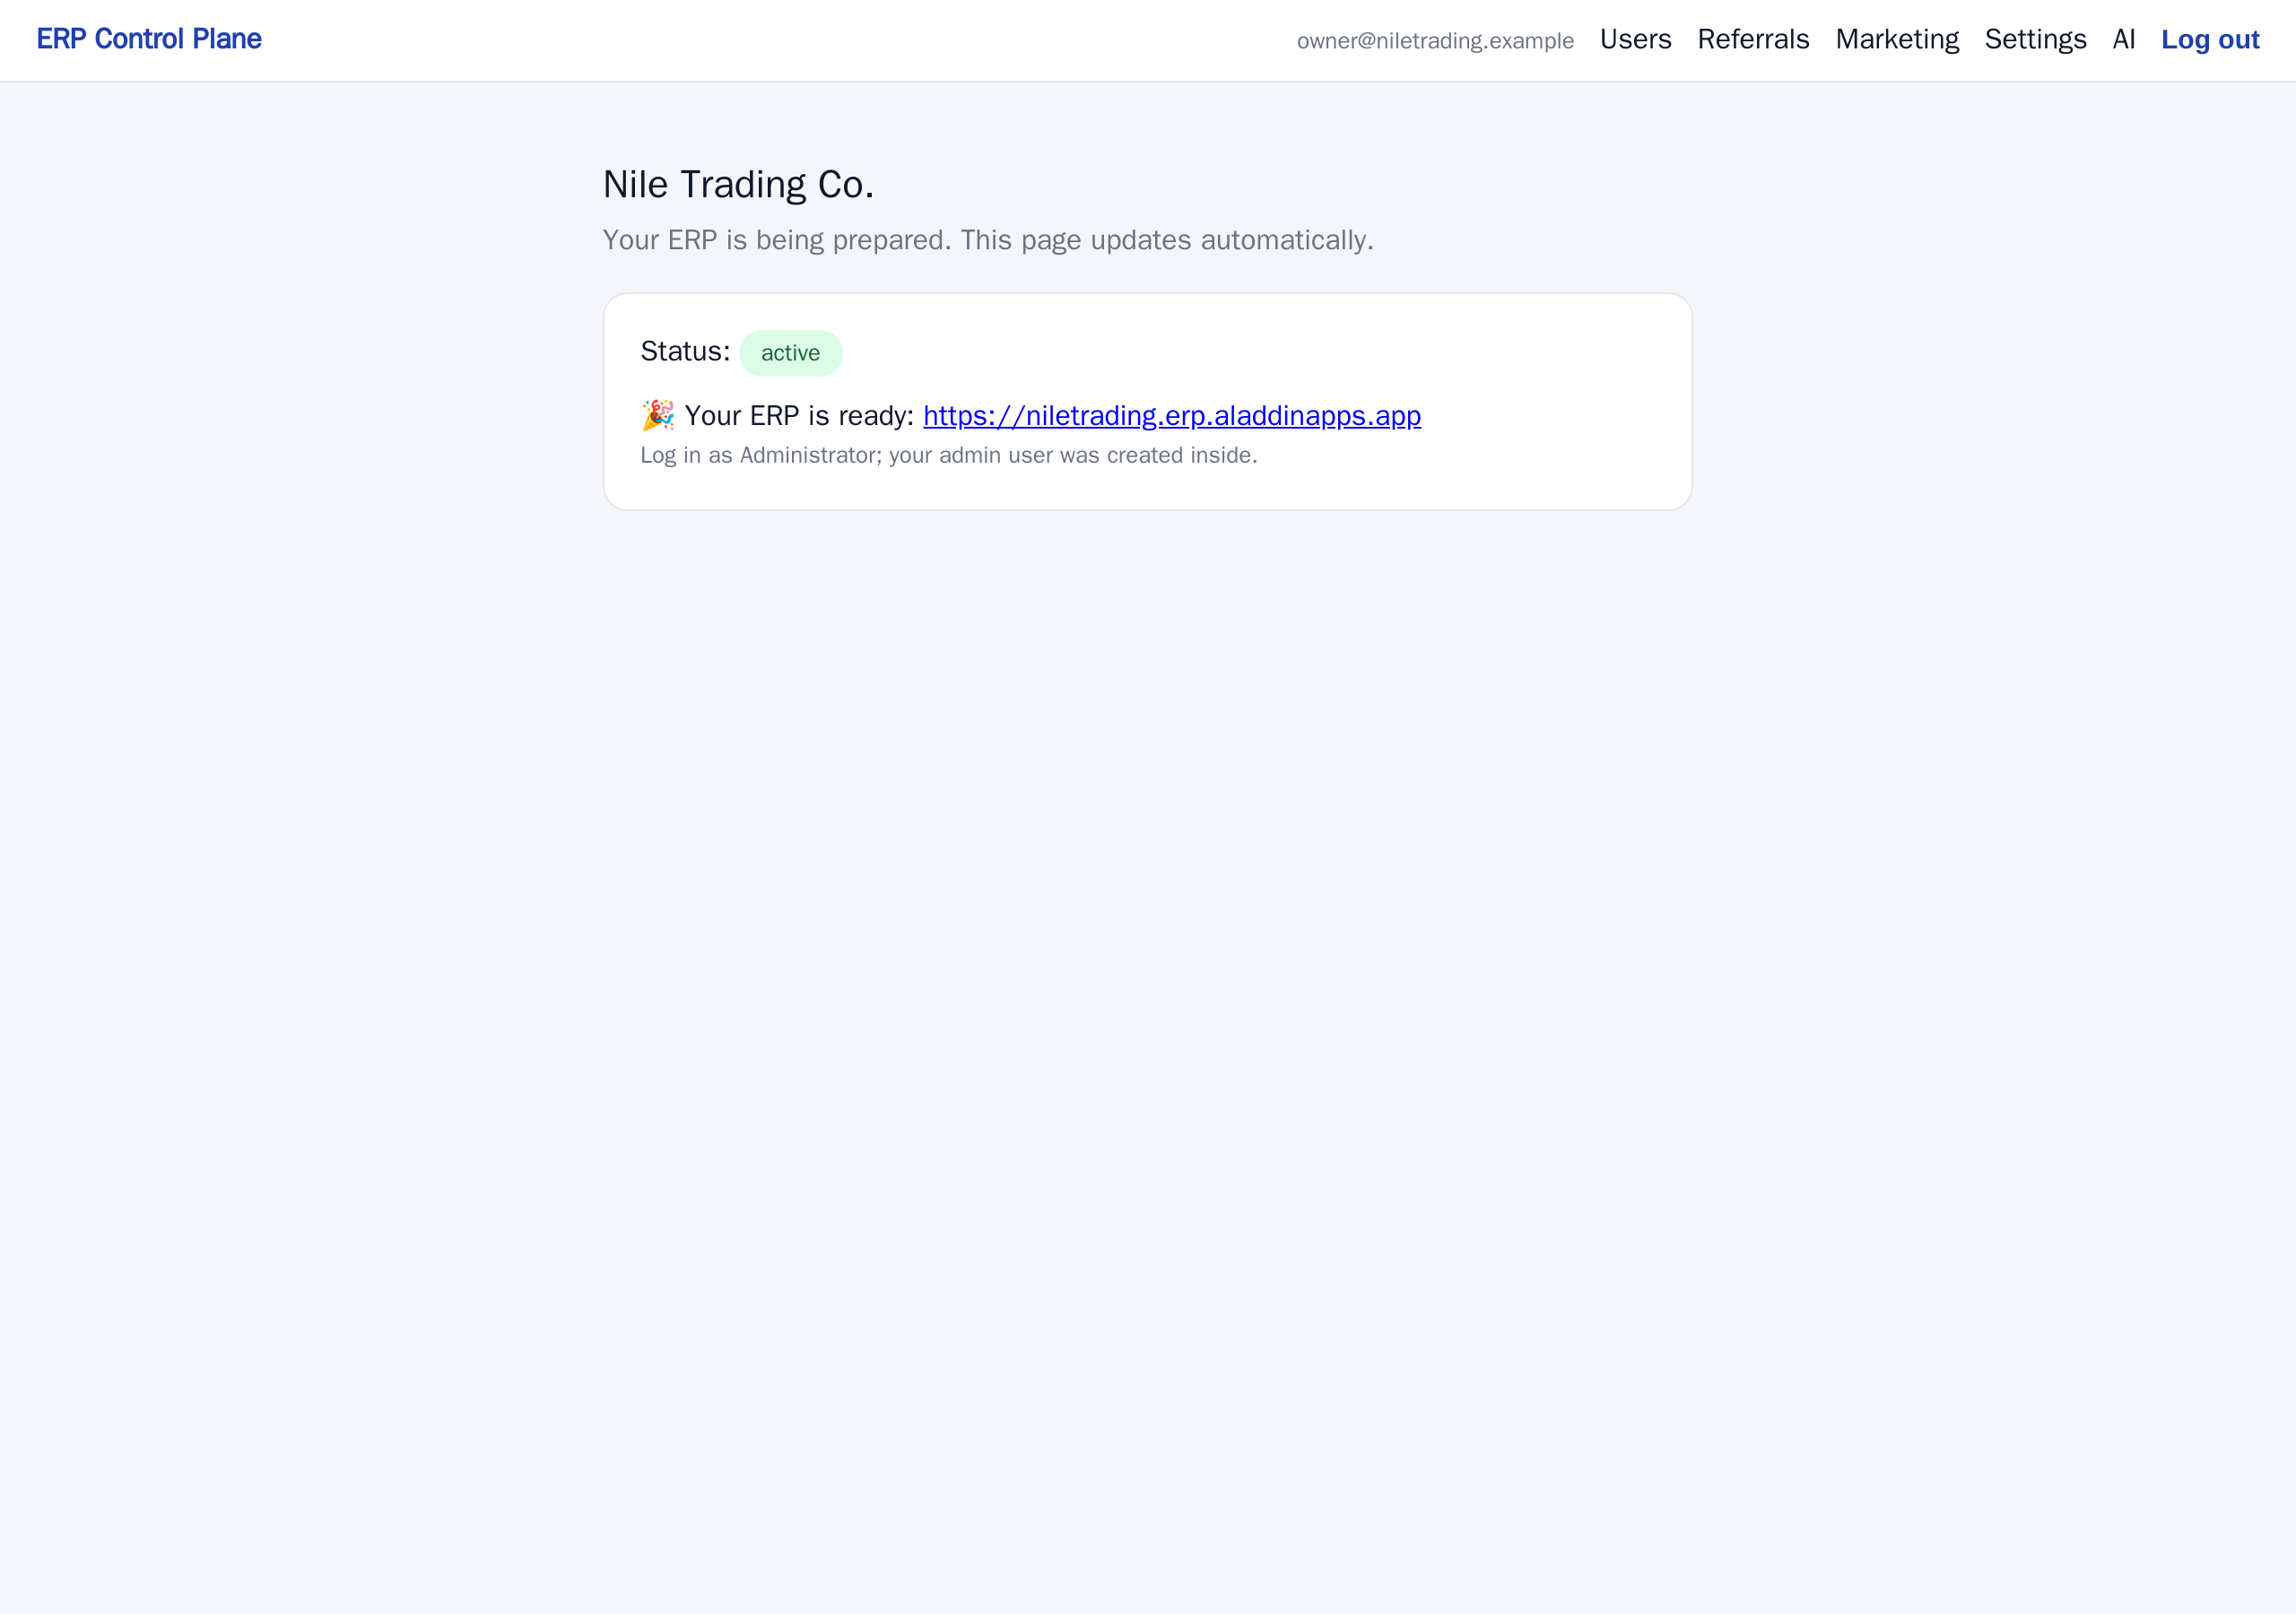
- We build your ERP while a status page updates itself in front of you. This normally finishes in two to three minutes.
- You receive an email with a link to choose your ERP password — you are its administrator. That link is the way in the first time.
The two addresses you will use
New customers get confused here more than anywhere else, so it is worth two minutes now. There are two separate websites, with two separate passwords, and they do different jobs.
| The control panel | Your ERP | |
|---|---|---|
| Address | app.nezmaro.com | yourcompany.nezmaro.com/app |
| What you do there | Add and remove the people who may use your ERP, choose where your backups are kept, set up your outgoing email and the AI assistant | All daily work: invoices, stock, customers, suppliers, payments, reports |
| Who signs in | The account owner — usually you | You and everyone on your team |
| How often | Rarely — a few times a year | Every working day |
Your first sign-in to your ERP
The invitation email is the only way in the first time, because it lets the person you named choose a password that nobody else — including us — ever sees.
- Open the email titled Set your password — your ERP admin account is ready. If it is not in the inbox, look in the spam or junk folder.
- Click the link inside it. A page belonging to your own ERP opens and asks for a new password.
- Enter a password and confirm it. You are signed in and taken straight into your ERP.
- You land on your edition's first screen — Overview for a company, Counter for a shop or pharmacy, Clinic for a hospital, Shop for an online seller, Service for a restaurant: today's figures across the top, a chart, and tiles for the daily jobs. The first three things to do are the same everywhere: create an Item, create a Customer, then your first Sales Invoice. Working through them is the quickest way to see how the system fits together.
- Save the address in your browser's bookmarks while you are on it. From now on you sign in there with your email and the password you chose.
Choosing your own language
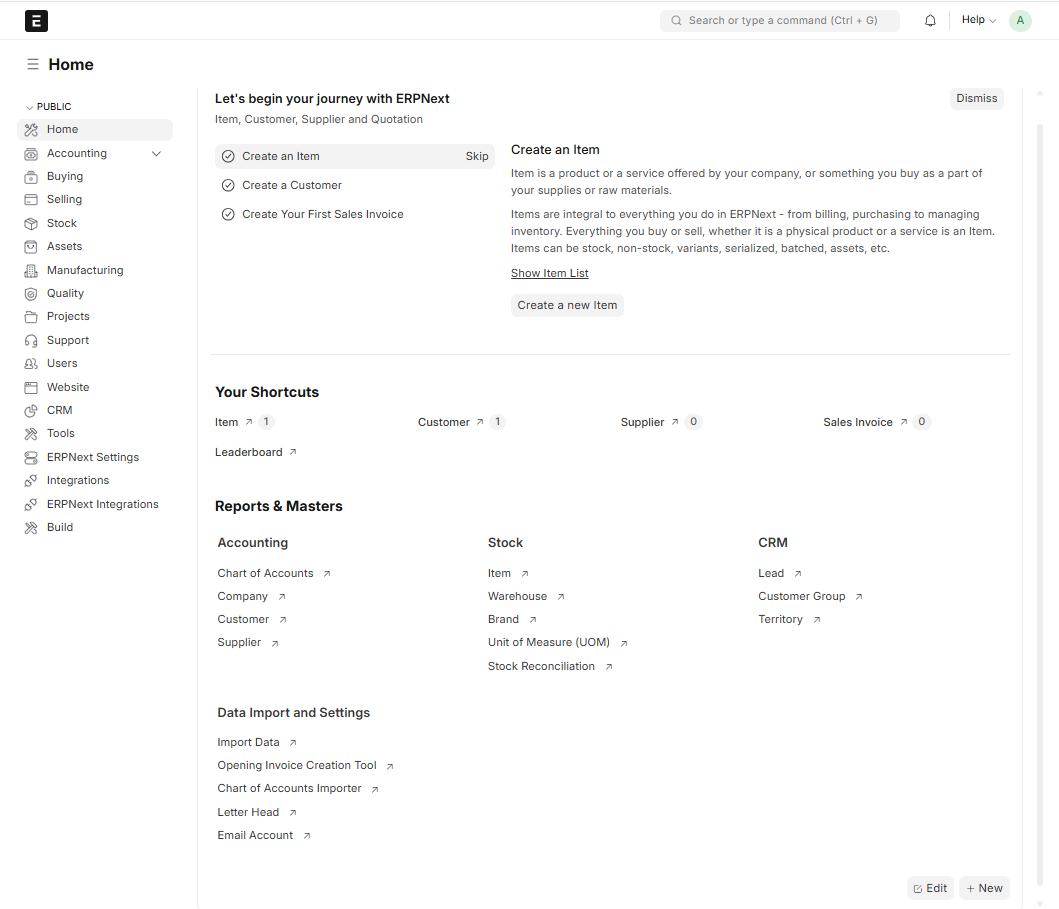
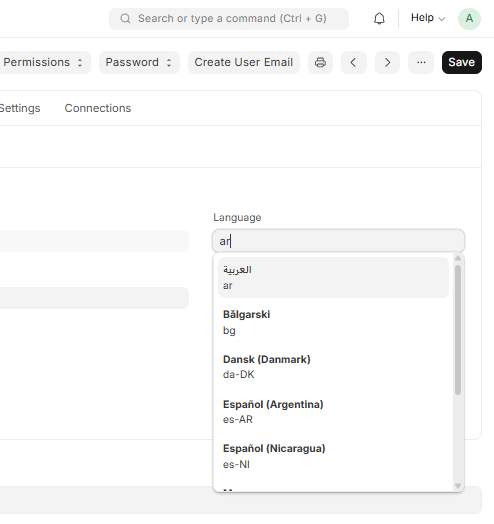
Your ERP starts in the language chosen during signup, but each person sets their own, so one colleague can work in Arabic while another works in English in the same system.
- In your ERP, click the small round button showing your initial, in the top-right corner of the screen.
- Choose My Settings. Your own profile page opens.
- Find the Language field, click it, and type the first letters of the language
you want — typing
arbrings up العربية. Click it in the list. - Click Save at the top-right of the page (or press
Ctrl+S). - Reload the page. Menus, buttons and field names appear in your language, and Arabic also flips the whole screen to run right to left.
Getting help
If something is unclear or looks wrong, email support@nezmaro.com. Include your ERP address so we can find your system quickly, and say what you saw on screen.
Signing up and the wizard
Everything between deciding you want the system and having one running: the account, the wizard's one screen, the payment, and the automatic build.
Before you begin
The whole thing takes about five minutes if you have these ready.
- Your company name, spelled exactly as it should appear on your invoices.
- A payment card. Nothing is charged during the trial, but a card is needed to start it. Paddle, our payment company, also offers PayPal and some local payment methods.
Your logo, your colleagues and your tax numbers are not needed yet: you add them once your ERP is running (see After your ERP is live below).
Creating your control panel account
This account is your key to the control panel, and it is the account the subscription belongs to.
- Open app.nezmaro.com in your browser.
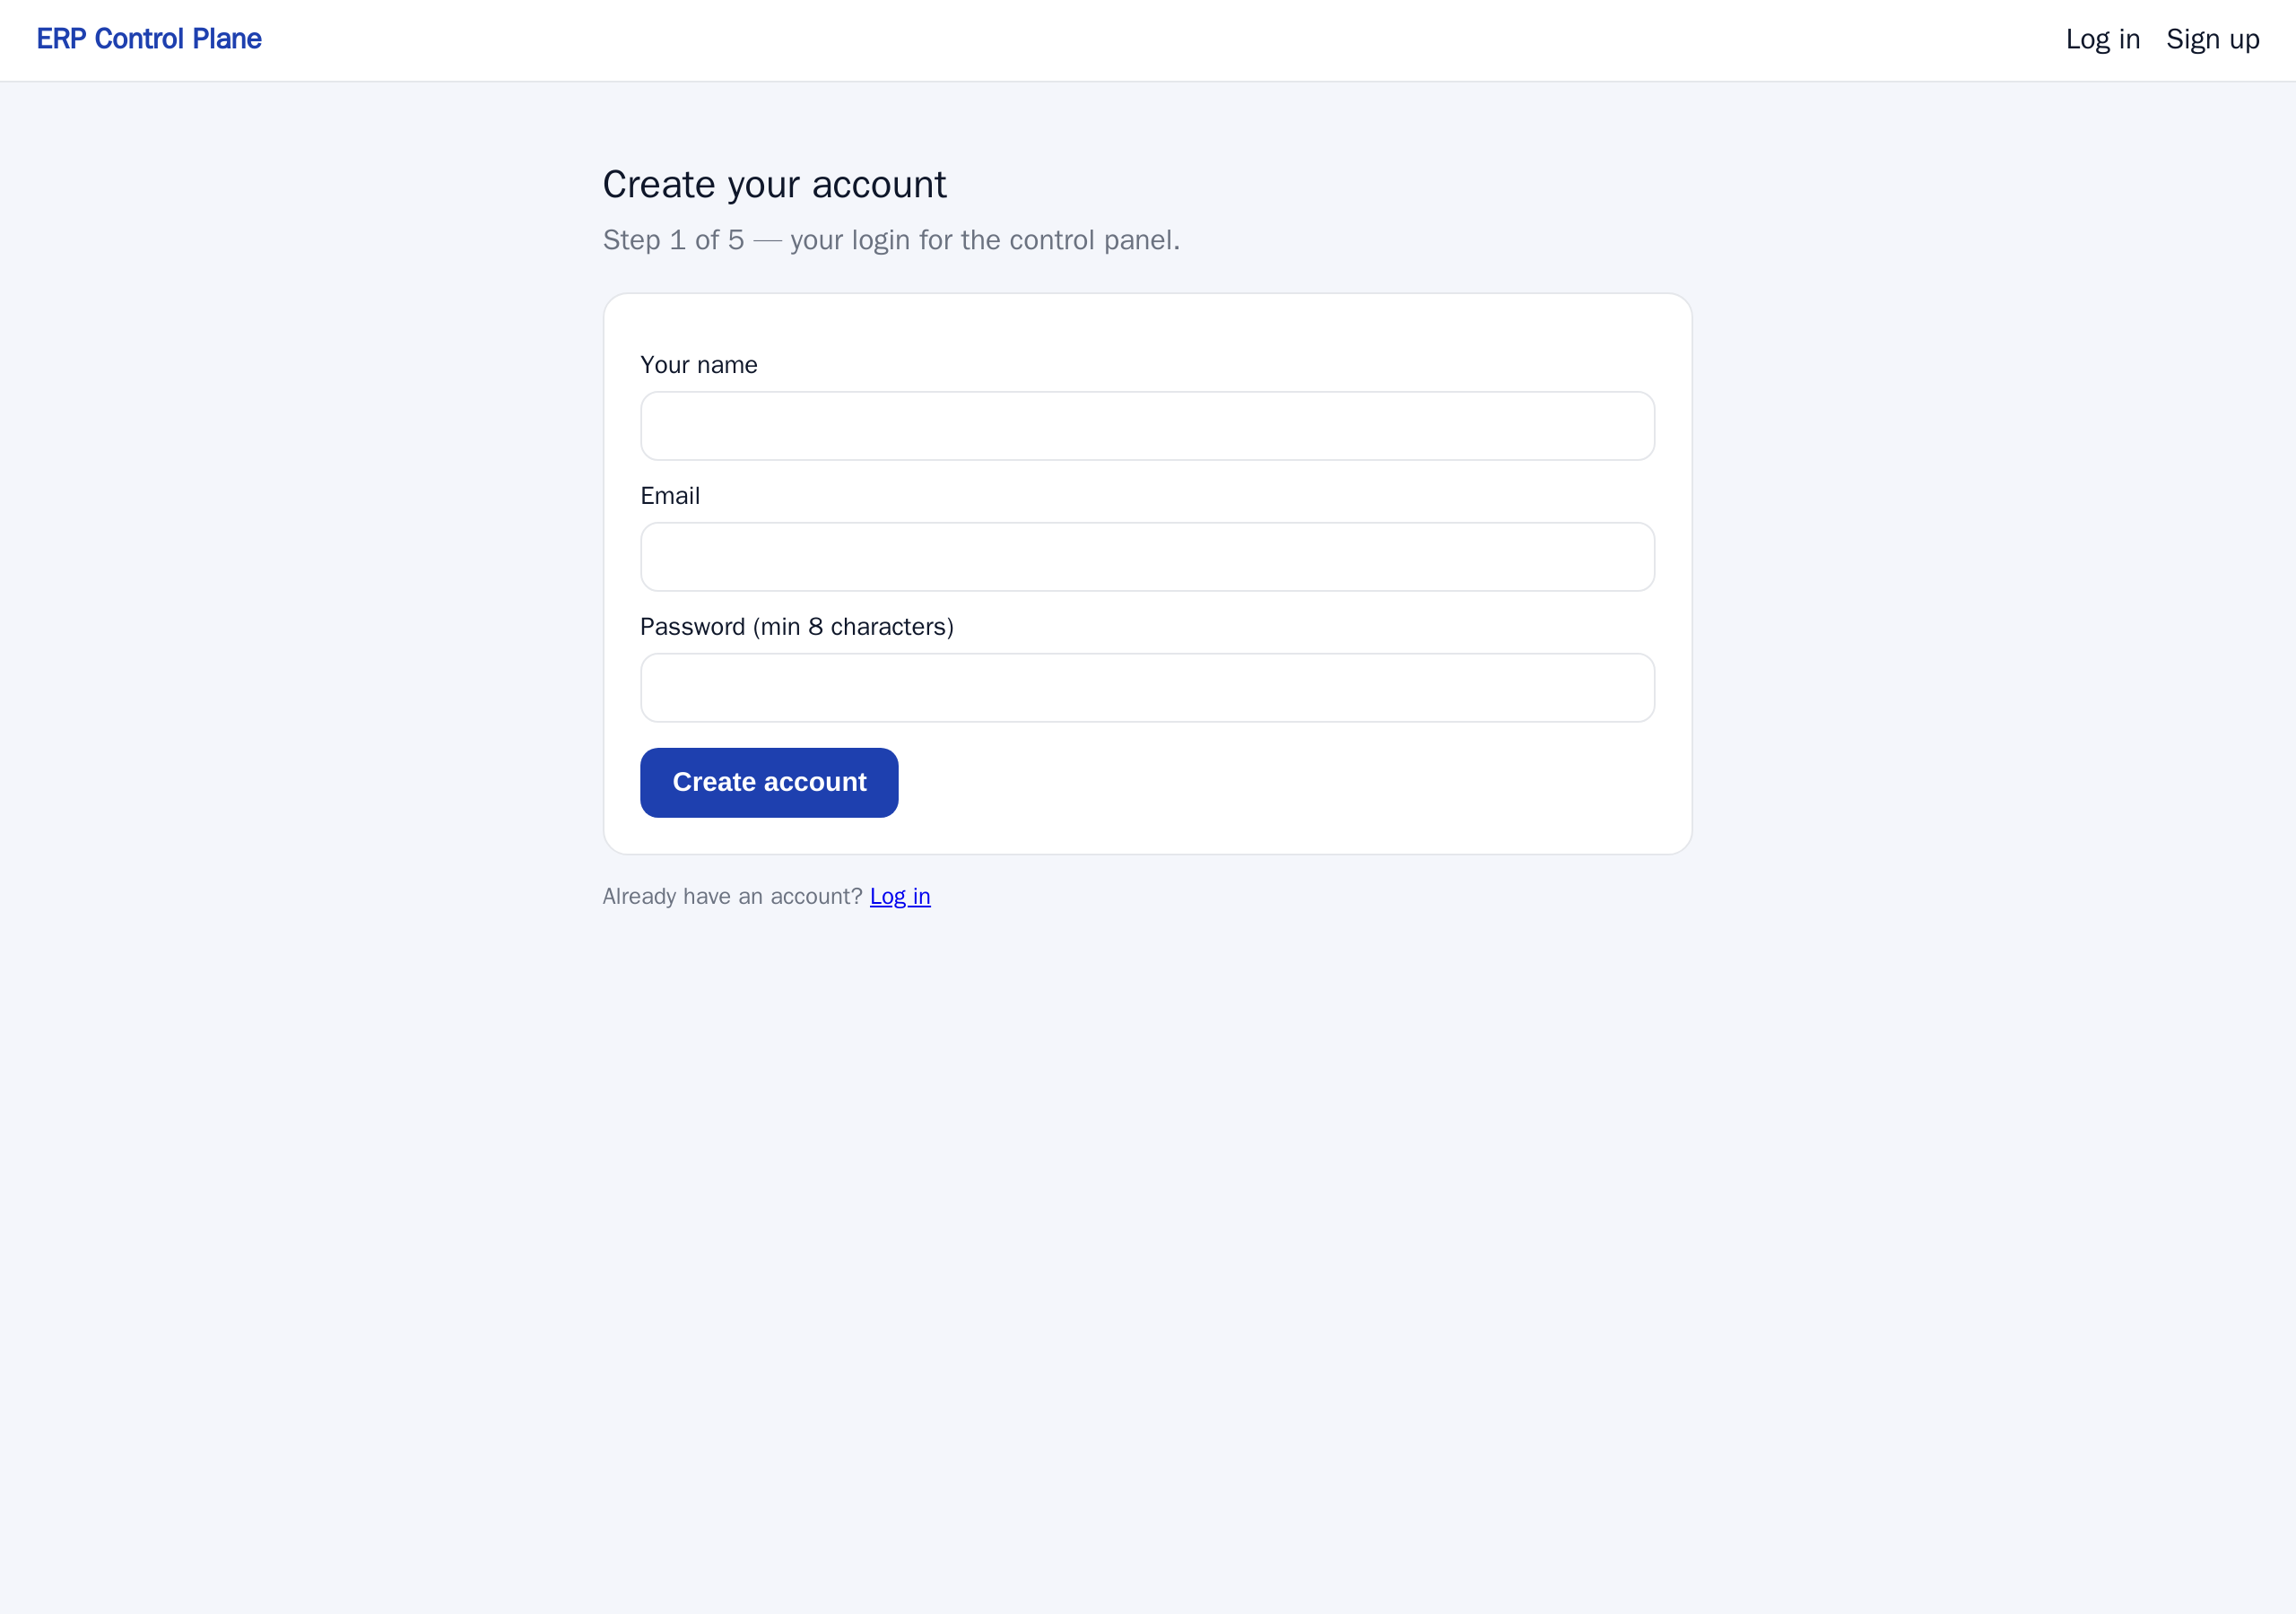
- Click Start your 7-day free trial. The page Create your account opens.
- Fill in Your name, Email and a Password of at least 12 characters.
- Click Create account. You are signed in immediately and the first wizard screen opens by itself.
- Open the confirmation email we send within a minute or two, and click the link in it. The link lasts 24 hours, and the payment screen stays closed until your address is confirmed. If you mistyped the address, correct it on that page and we send a new link to the new one.
This is a control panel account. It is not the same thing as a person inside your ERP: the same email address can be used in both places, but they are two separate sign-ins with two separate passwords. The control panel is where you manage the subscription; your ERP is where the work happens.
The wizard
The wizard is two screens — Your company and Plan. The strip at the top of the page counts your account as the first step, so it reads “2 Your company”, “3 Plan”.
To go back and change something, use your browser's Back button; whatever you already entered is still in the fields. Your ERP itself is not built until the payment at the end, so there is no hurry.
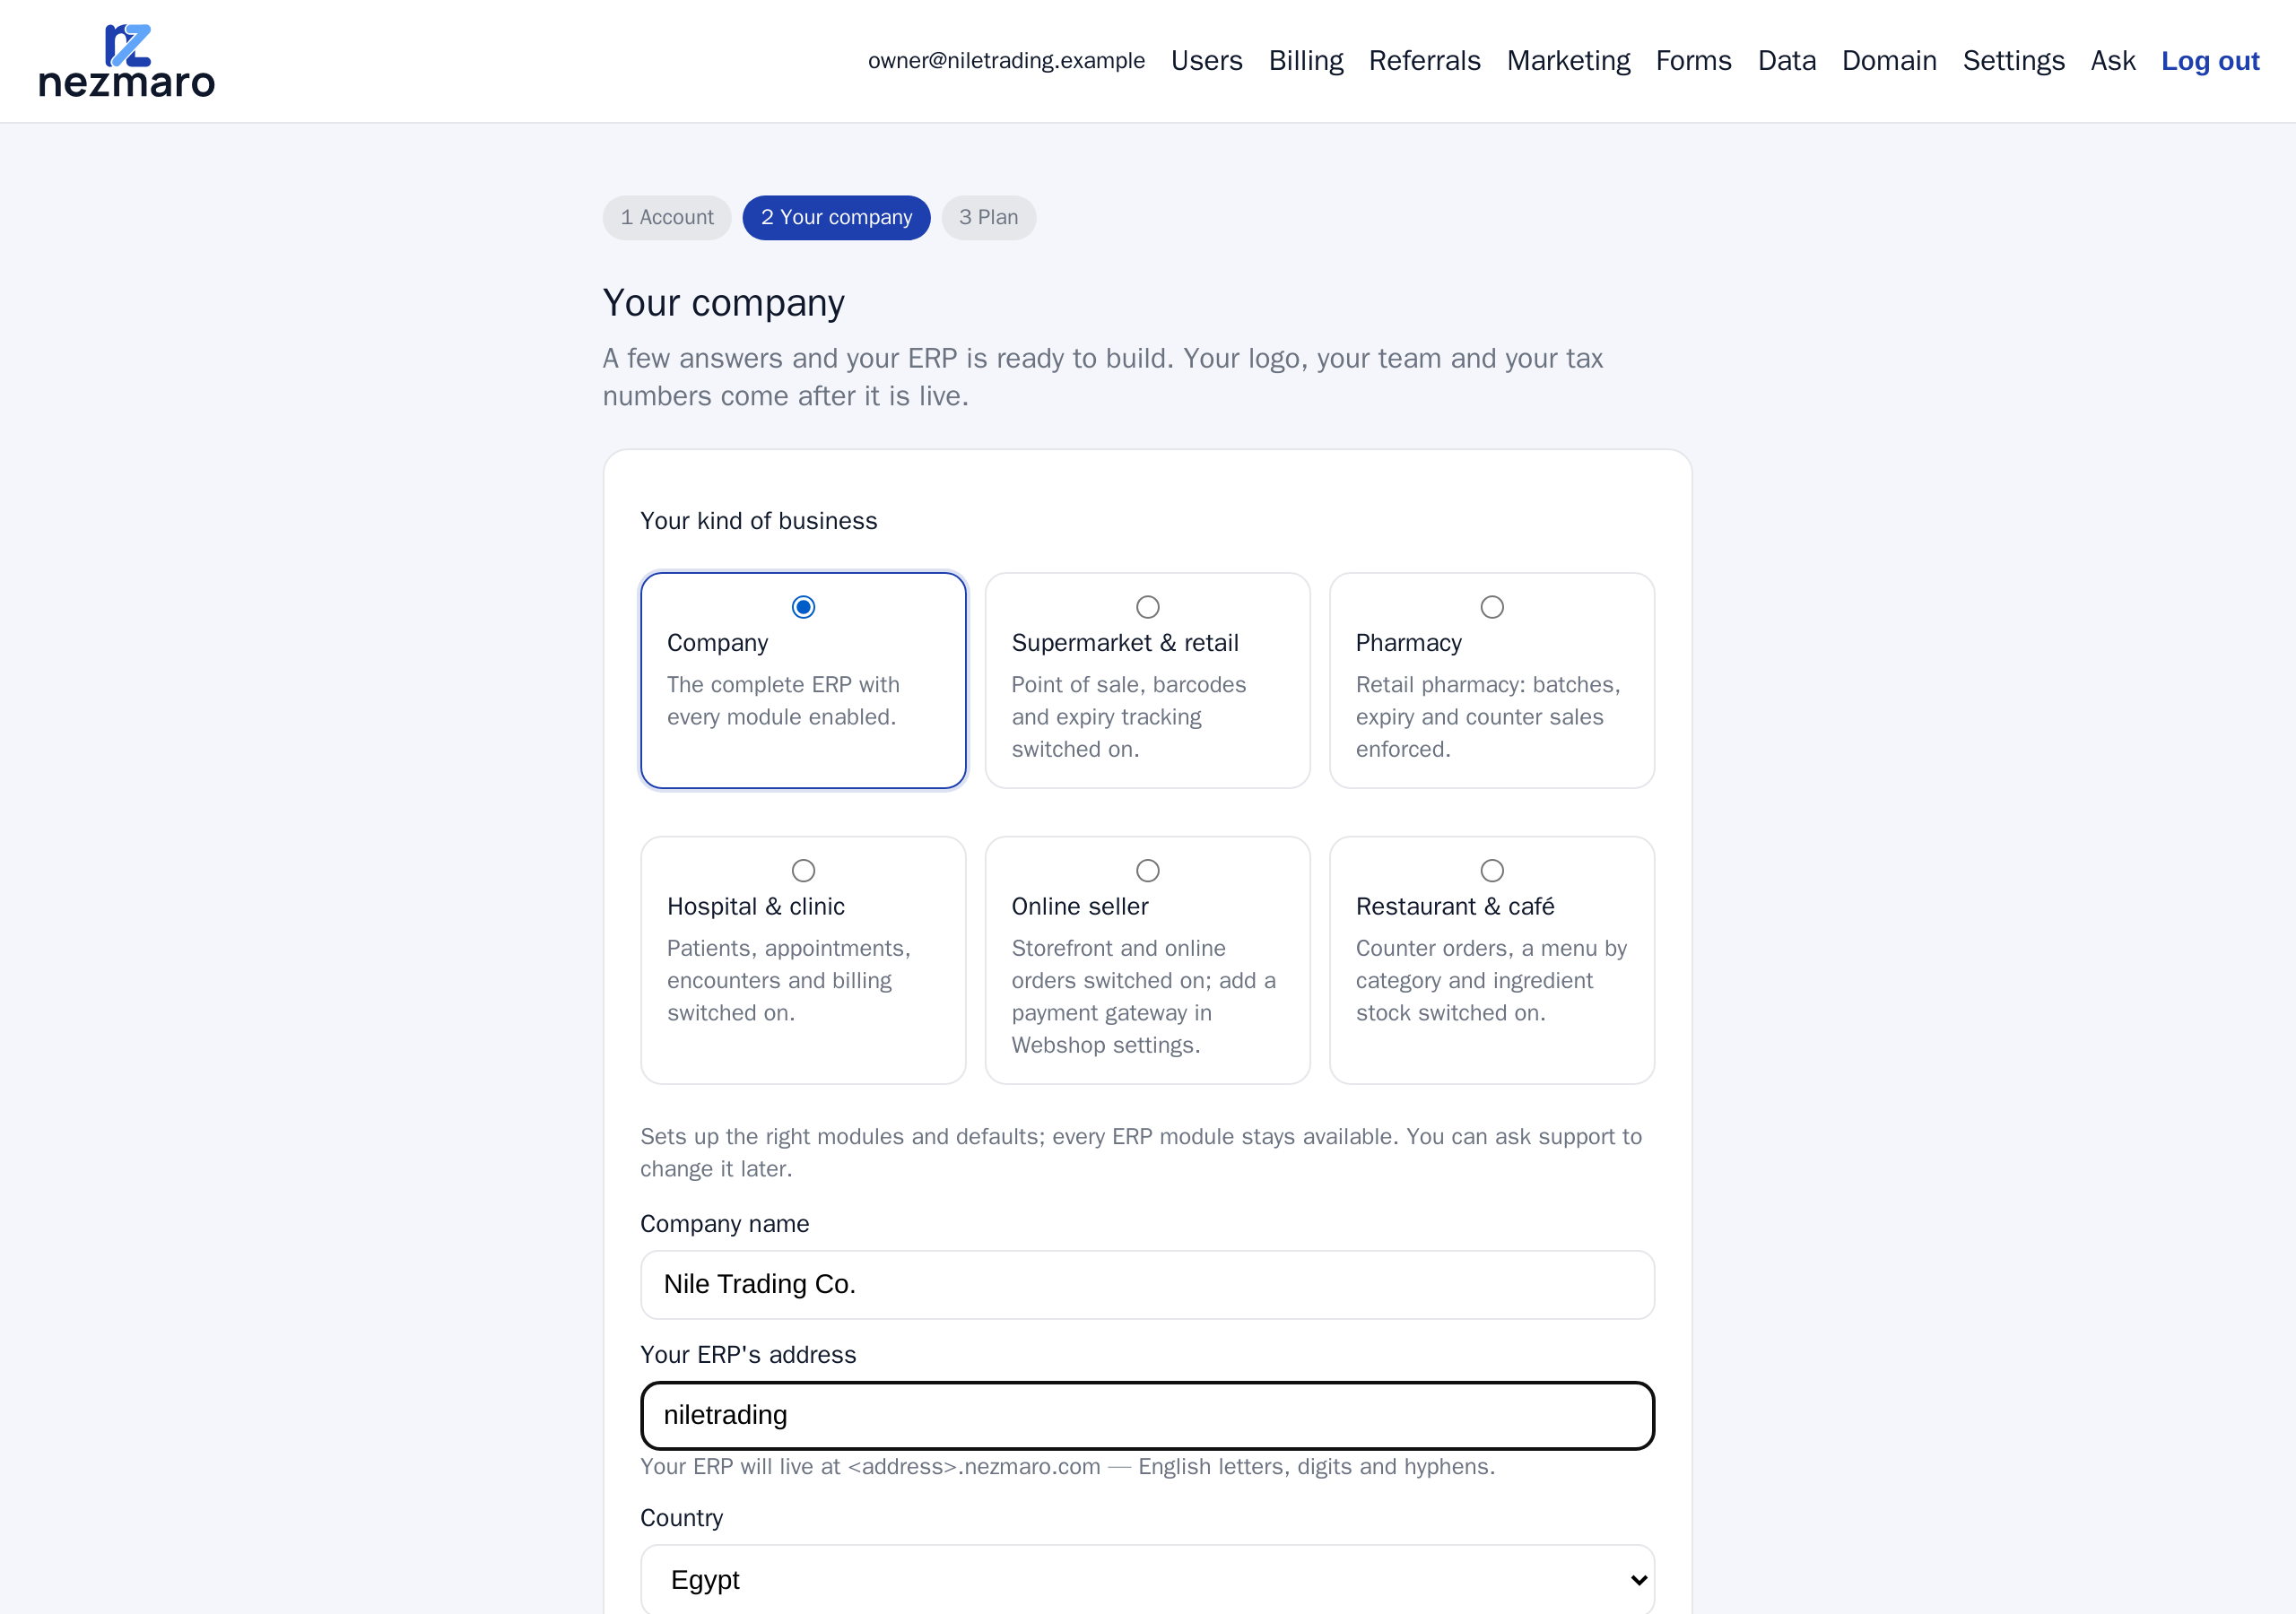
Your company
What you choose here decides your web address and how your ERP is set up, and three of the answers cannot be changed once it is built — so it is the screen worth slowing down on.
- Choose your kind of business: Company (the full ERP), Supermarket & retail, Pharmacy, Hospital & clinic, Online seller or Restaurant & café. It sets up the right modules and defaults for you — a supermarket gets barcodes and a ready point-of-sale counter, a pharmacy sells batches earliest-expiry first, an online seller gets a storefront — and everything else in the ERP stays available. Support can change it later.
- In Company name, type the legal or trading name of your business. It appears on printed invoices, and you can edit it inside your ERP later.
- Check Your ERP's address. When your company name is in English letters, the
field fills itself with a suggestion — type
Nile Tradingand it offersniletrading, so your ERP would live atniletrading.nezmaro.com. Change it to anything you prefer; a grey line under the field tells you, as you type, whether the name is free. For an Arabic company name, type the address yourself. - Choose your Country. It sets your chart of accounts, your currency, your timezone and your tax rules, and it switches on country e-invoicing where we support it. It cannot be changed after your ERP is built, so check it even when the default already looks right.
- Check ERP language. For Egypt and Saudi Arabia it starts on العربية, which also runs the whole screen right to left; for other countries it starts on English. Pick the other one if it suits your company better. It is your company's starting language and cannot be changed after your ERP is built — but every person can still choose their own under My Settings.
- Click Save & continue.
A good address is short (your team types it daily), recognisable (your company name or an abbreviation everyone already uses), plain (lowercase English letters, digits and hyphens only — no spaces, dots or Arabic letters) and durable (not tied to one product, one branch or one year).
Plan
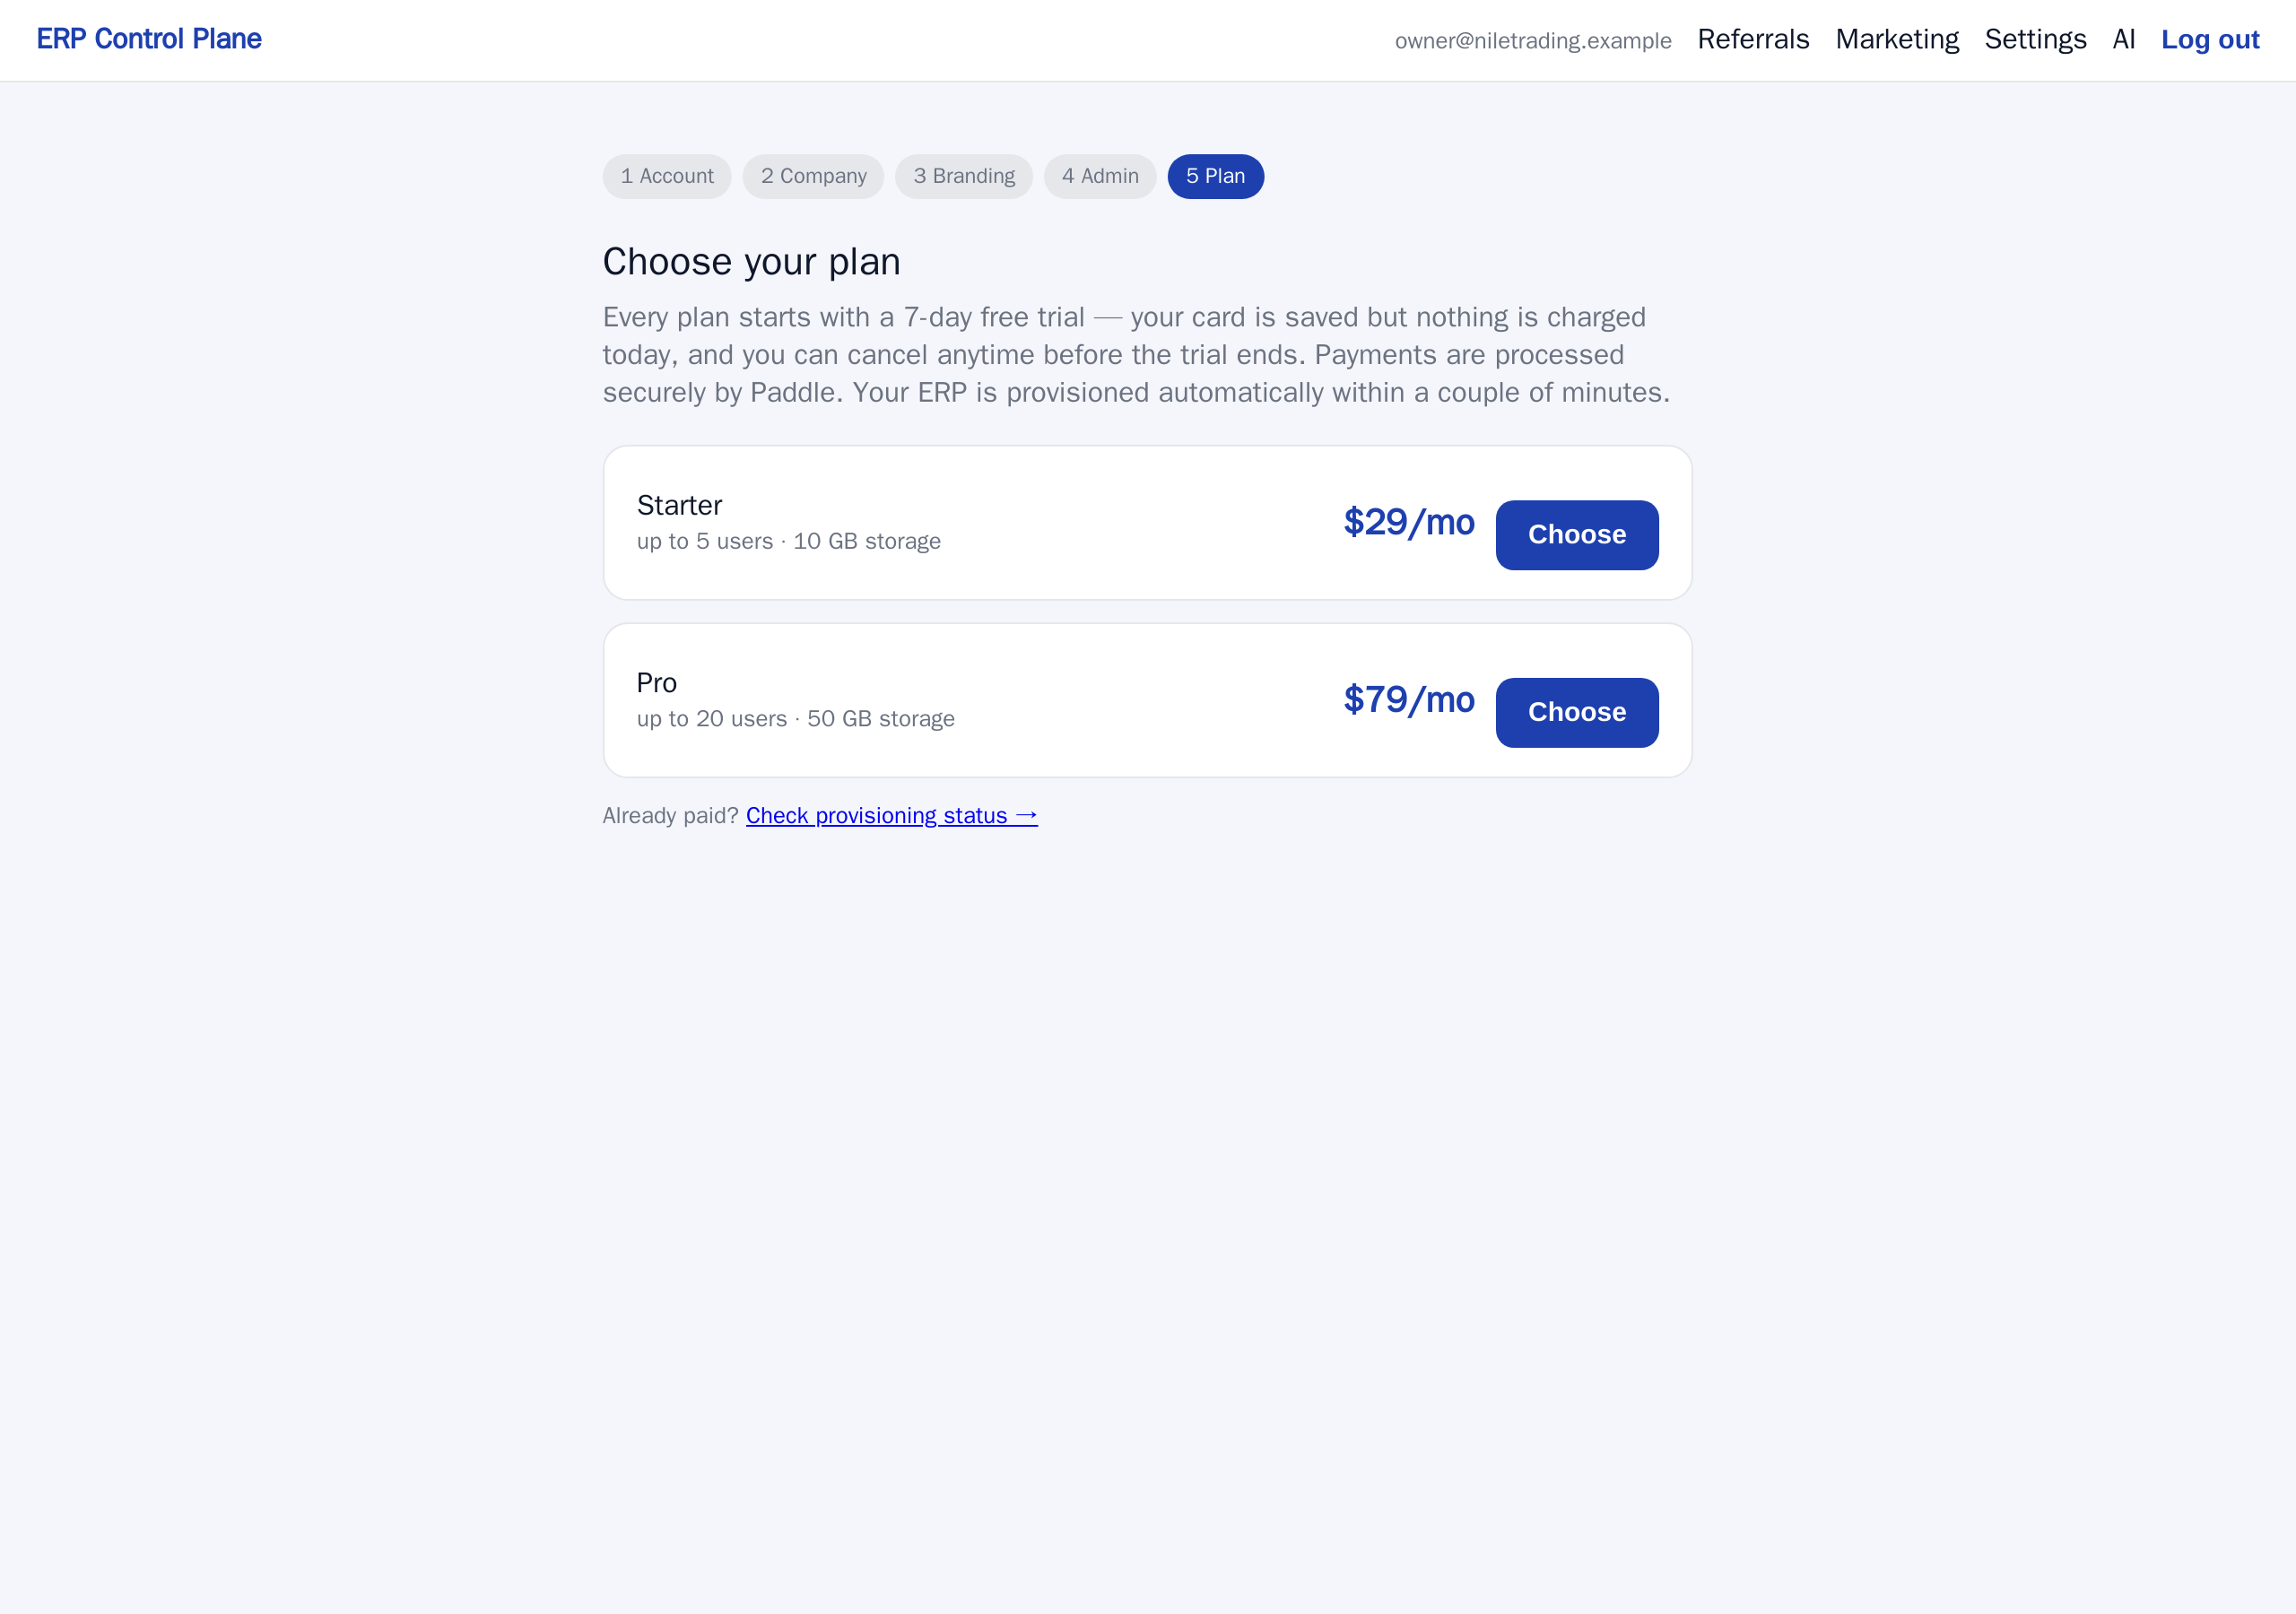
Both plans give you the complete system — every part of it, your own private copy, backups and support. They differ only in how many people may sign in and how much you can store.
| Starter | Pro | |
|---|---|---|
| Price before tax | $29 per month | $79 per month |
| People who can sign in | 5 | 20 |
| Storage | 10 GB | 50 GB |
| Suits | A small team putting its books, stock and sales in one place | A growing company with separate sales, warehouse and accounting staff |
Count the people who need to sign in, not the people in the company — a workshop of thirty where only four use the system fits comfortably on Starter. If you are unsure, start on Starter: moving up to Pro later keeps all your data exactly as it is.
Paying and starting the trial
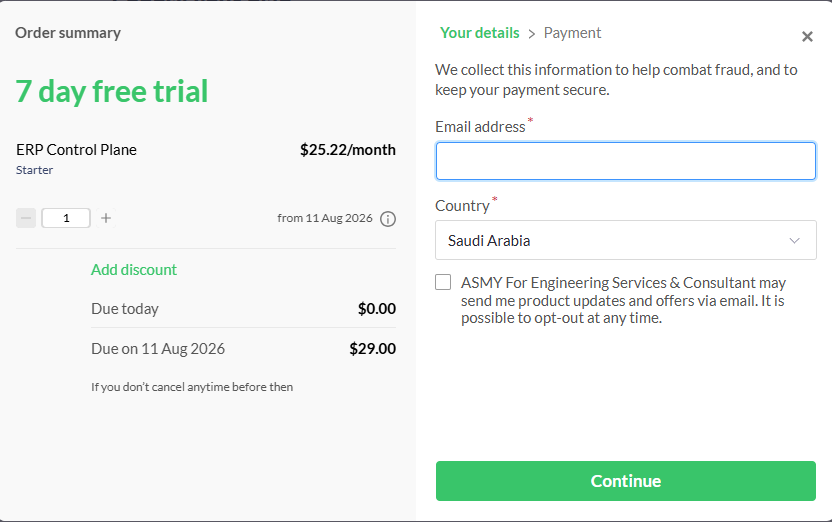
Payment is handled by Paddle, a payment company that sells the subscription on our behalf: it charges your card, adds the VAT or sales tax your country requires, and sends your invoice. We never see or store your card number.
- Click Choose next to the plan you want. A payment window from Paddle opens on top of the page — you do not leave our site.
- Fill in your email, your country and your card details in that window.
- Read the summary before confirming. It should say 7-day free trial, show nothing due today, and show the first charge dated 7 days from now, with tax added.
- Confirm the payment. The window closes by itself and hands you back to the wizard.
What happens after payment
The moment Paddle confirms the payment, your ERP starts being built. Nobody does anything by hand and there is no installation to book.
- The wizard shows a status page that refreshes on its own. The status moves through pending, provisioning and configuring to active.
- This normally takes two to three minutes. You may close the page — the work carries on regardless, on our servers.
- When it reaches active, the page shows your ERP address:
yoursubdomain.nezmaro.com. - An invitation email goes to you, the account owner, with a link to choose a password and sign in to your ERP for the first time. You are its administrator.
Write both addresses down: app.nezmaro.com for billing and settings, yoursubdomain.nezmaro.com/app for daily work.
After your ERP is live
The status page then shows Your first week, a short list that ticks itself off as you go. Two of its items, and one other page, cover what older versions of this wizard asked before payment:
- Upload your logo — opens the Branding page: your logo and your brand colour. Saving puts them straight onto your letterhead, your printed documents and the top of your ERP's screens.
- Add your team — opens the Users page, where you invite colleagues and choose what each of them may do. Hand the administration to someone else here if you prefer.
- Your VAT number, CR number and address — in Saudi Arabia and Egypt, the e-invoicing page asks for them (My business → ZATCA or E-receipts) when you switch it on. In other countries, enter them on your company record inside your ERP (search for Company).
If something does not arrive
- No invitation email after ten minutes — look in the spam folder, then check that it went to the address you signed up with. If something is wrong, email us and we will send a new invitation.
- The status page still says pending or provisioning after ten minutes — nothing is lost. Give it a few more minutes; if it has still not finished, or it says the build hit a problem, contact us and we will look at it.
- You paid but the page closed — sign back in at app.nezmaro.com. Your progress is saved and the status page comes back.
- You picked the wrong address — tell us before your team starts using the system. It cannot be renamed, but the sooner you say so, the easier it is to move you to a fresh one.
- You want to change plan — email us and we will move you. Your data stays exactly where it is.
Support is at support@nezmaro.com. Always include your subdomain so we can find your system quickly.
A tour of your ERP
How the screen is laid out, the fastest way to reach anything, and the one idea — draft, submitted, cancelled — that explains most of what the system does.
The working screen, and the page for your customers
Your ERP answers on one address but shows two very different pages depending on how the address ends, and knowing which one you are looking at saves a lot of confusion.
| The working screen | The page for customers | |
|---|---|---|
| Address ends with | …nezmaro.com/app | …nezmaro.com (nothing after it) |
| Looks like | A full working screen: a list of business areas down the side, a search bar across the top, lists and forms in the middle | A plain page with little more than My Account and a newsletter box |
| Meant for | You and your staff — all real work happens here | Your customers and suppliers, if you later choose to let them look up their own orders and invoices |
Nearly everyone who reports that the system “looks empty” is on the customer page by
accident. If what you are looking at has no list down the side, add /app to the
end of the address and press Enter.
The list down the left
The system is grouped by area of the business, and clicking an area shows its shortcuts, its reports and its charts. You are not expected to use them all — most companies live in three or four.
| Area | What you will find there |
|---|---|
| Accounting | Sales and purchase invoices, payments, your list of account categories, and the financial reports |
| Buying | Suppliers, purchase orders, and records of goods received |
| Selling | Customers, quotations, sales orders, price lists and sales figures |
| Stock | The things you buy and sell, your warehouses, stock movements, and what you currently hold |
| Assets | Equipment and property the company owns, and their upkeep over time |
| Manufacturing | What each product is made of, production orders and planning |
| Quality | Inspections, quality targets, and records of things that failed a check |
| Projects | Projects, tasks, hours worked, and whether a project made money |
| Support | Complaints and requests from customers, and how quickly they were handled |
| Users | The people who may sign in, and what each of them is allowed to see |
| Website | Public web pages, blog posts and enquiry forms |
| CRM | People who might buy from you and the deals in progress — everything before someone becomes a customer |
| Tools | Notes, to-do lists, files and the email inbox |
What each person sees depends on what they are allowed to do. A warehouse clerk with stock permissions only sees a much shorter list than you do — that is the system working correctly, not a fault.
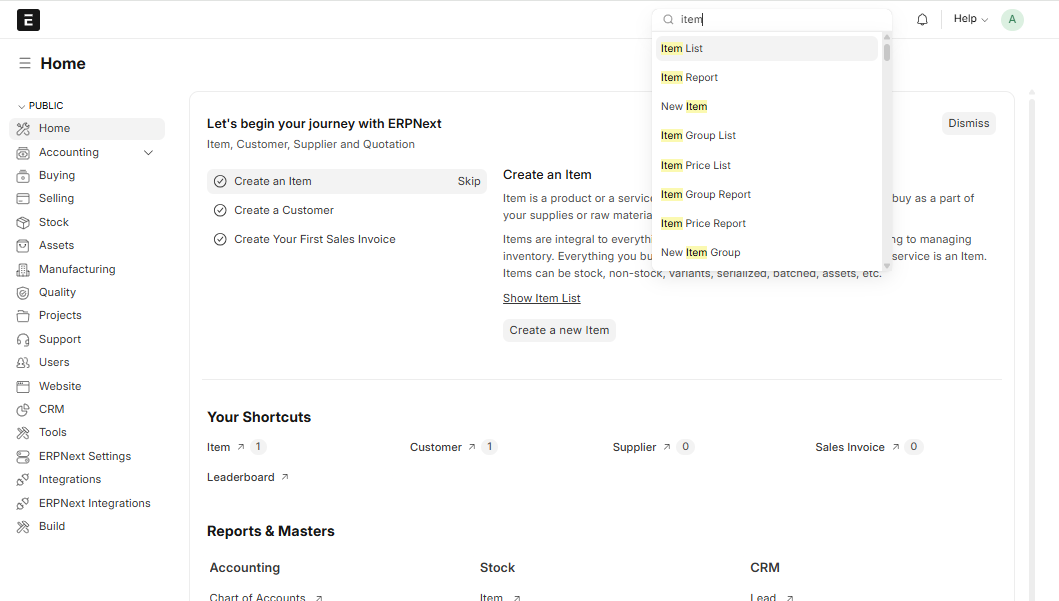
The search bar is the real way to get around
The bar across the top reaches anything in the system in a couple of seconds, which is why experienced users barely touch the list on the side.
- Press
Ctrl+Gfrom anywhere, or click the bar at the top that reads Search or type a command. - Start typing what you want. Suggestions appear underneath as you type.
- Pick one of them:
- A kind of record — Sales Invoice, Item, Customer — opens the list of all of them, or choose New to create one.
- A particular record — an invoice number, a customer name, a product code — opens it directly.
- A report — Accounts Receivable, Stock Balance — runs it.
- A setting — Company, Print Settings — opens it to be changed.
Lists and forms
Every kind of record behaves the same way, which is why learning one screen teaches you all the others.
- A list shows every record of one kind — all your sales invoices, for example. From here you filter, sort, and act on several rows at once.
- A form opens when you click one row. It shows that single record, its fields and its lines, and the buttons that act on it.
To see one customer's invoices, for instance: search for Sales Invoice to open the list, then use the filter row above it to add a filter on Customer and pick the name. A filter you use often can be saved from there and reopened with one click.
Draft, submitted, cancelled — learn this one first
If you understand nothing else about this system, understand this. Every record that touches your money or your stock — invoices, orders, delivery notes, stock movements, payments — passes through three states, and the state decides what the record is allowed to do.
| State | What it means | Can you edit it? | Effect on stock and accounts |
|---|---|---|---|
| Draft | Saved, but not official yet — a working copy | Yes, freely | None at all |
| Submitted | Official and locked | No — only a few harmless fields | Full: stock moves and the accounting entries are made |
| Cancelled | Reversed, but kept on the record | No | Reversed — the entries are undone |
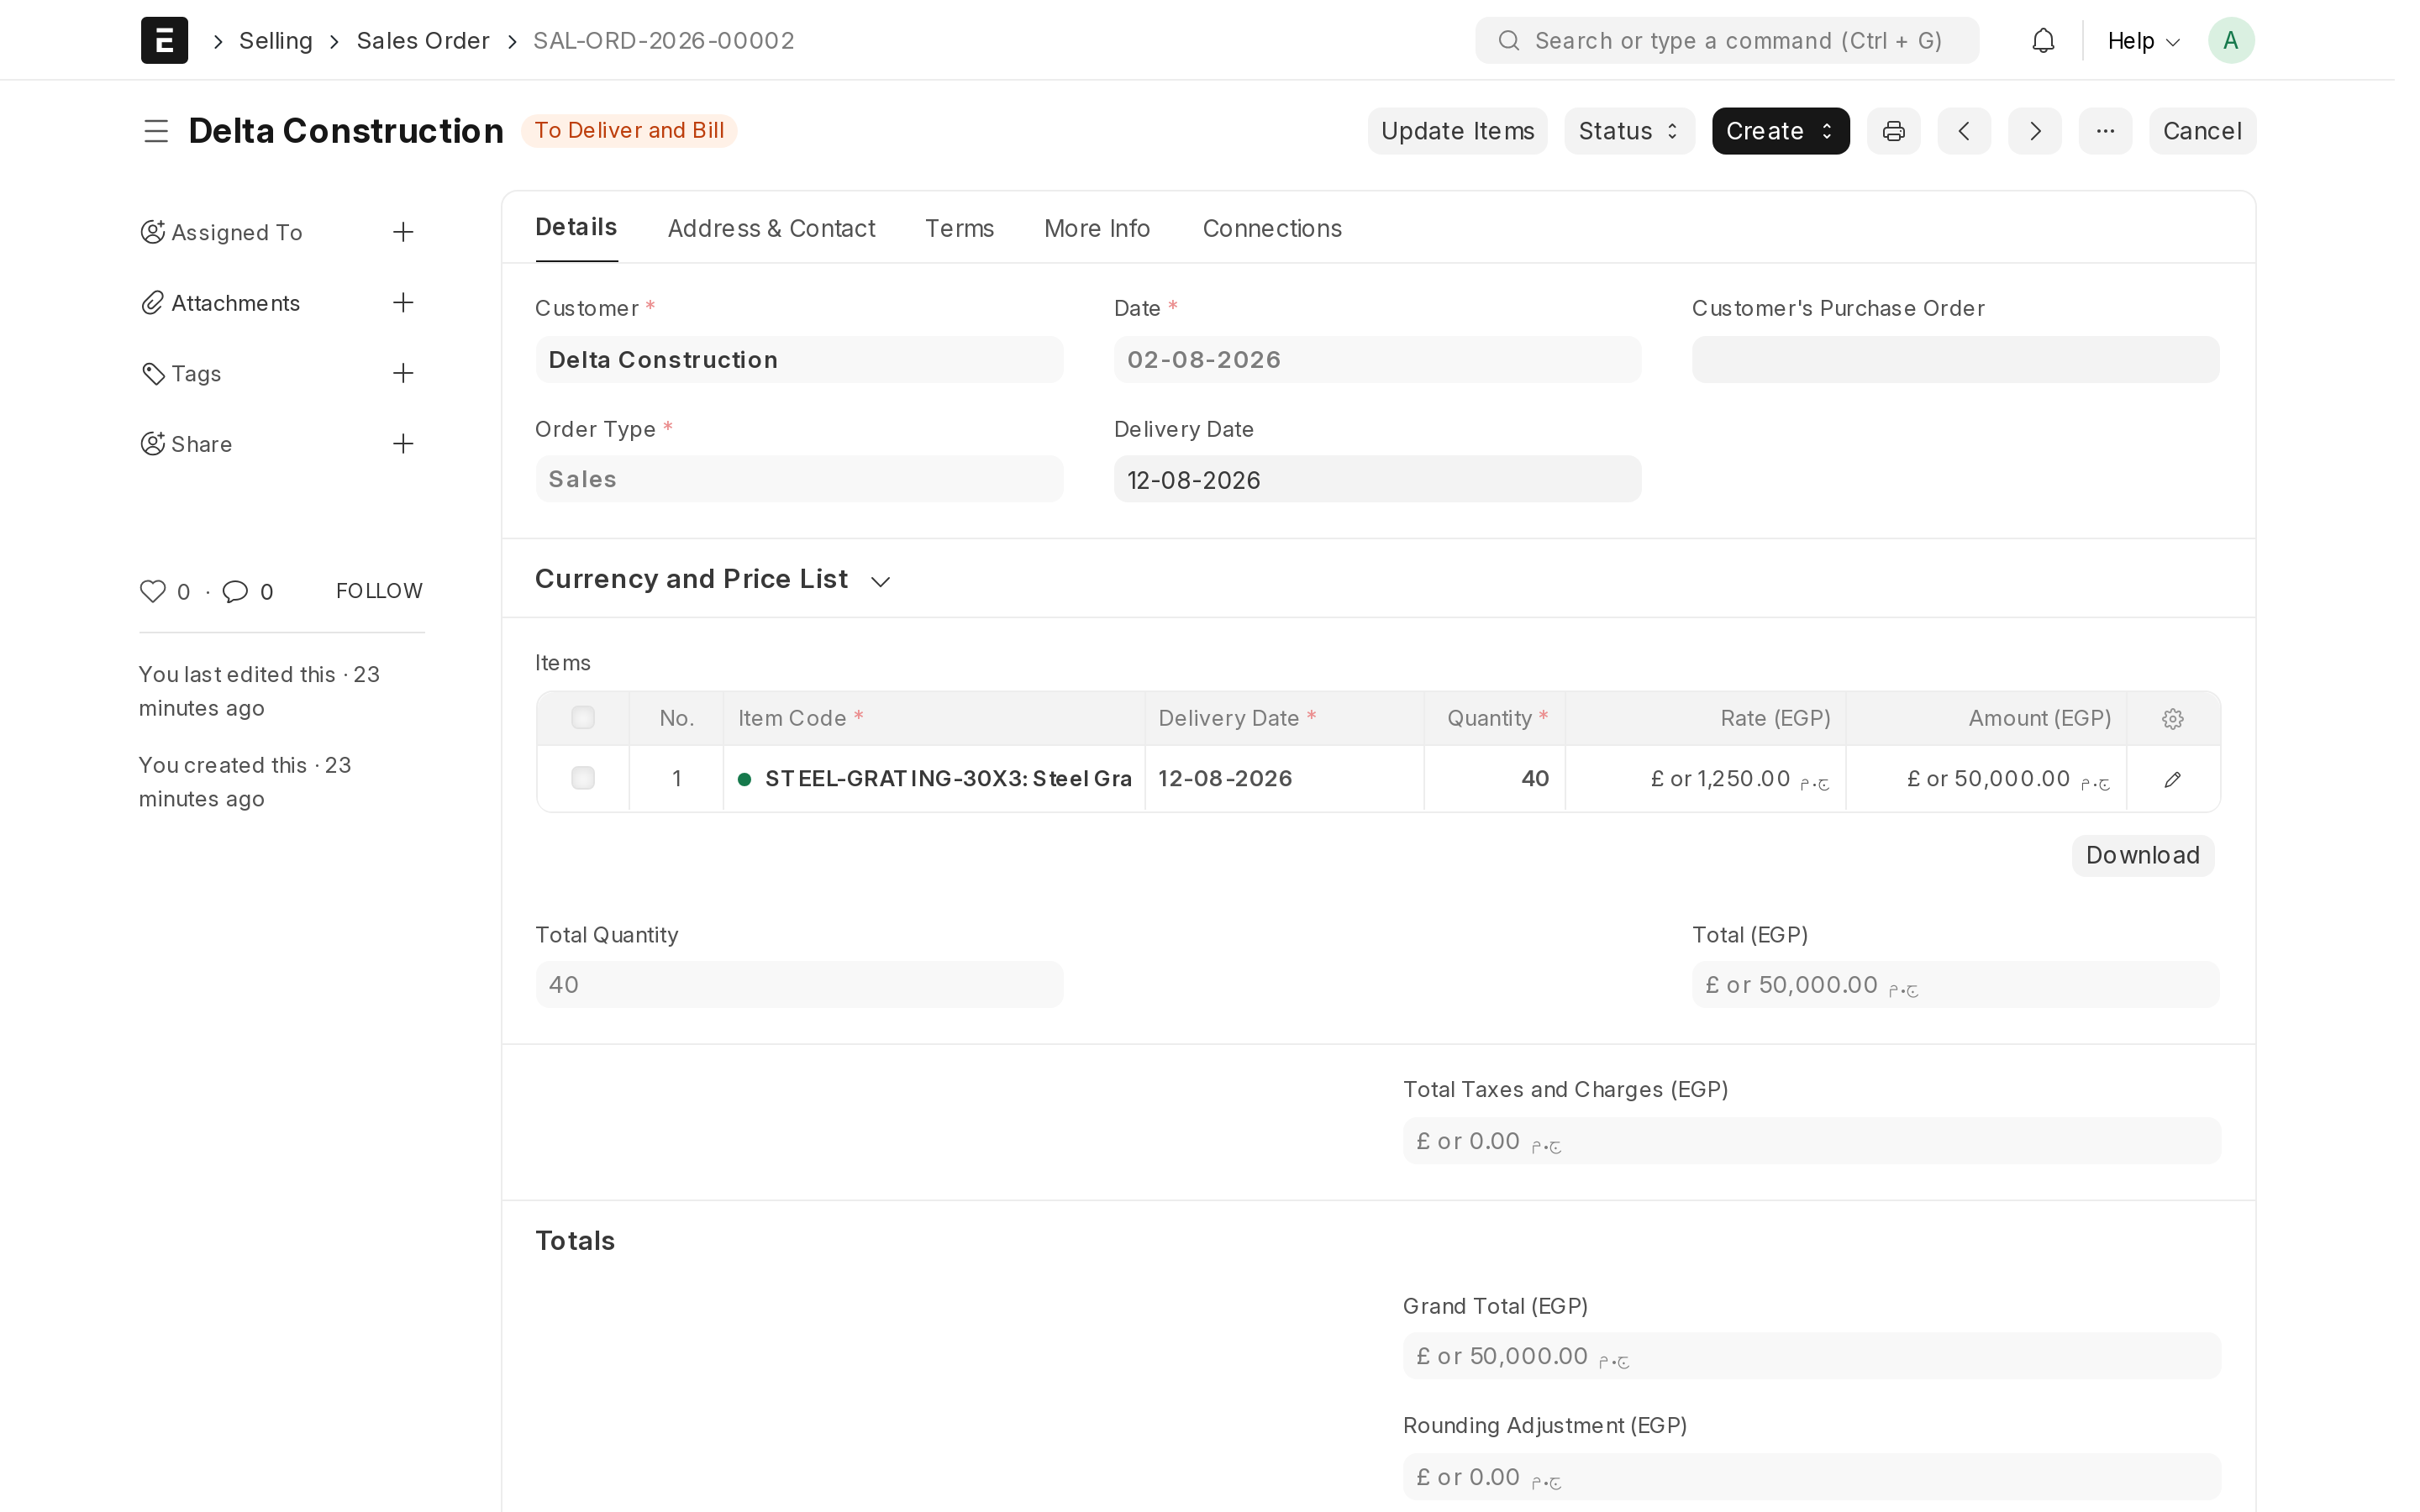
The buttons that move a record between states
- Save (
Ctrl+S) keeps it as a draft. Nothing has happened to your stock or your accounts. Save freely and often; a half-finished invoice sitting as a draft harms nothing. - Submit makes it official. This is the moment stock actually moves and the accounting entries are actually made. Read the record once more before you press it.
- Cancel reverses an official record. It stays in the list, marked cancelled, and its effect on stock and accounts is undone.
- Amend appears after cancelling. It opens a fresh, editable copy of the same record, which you correct and submit again.
Correcting a record you have already submitted
You cannot edit an official record, and you should not delete it. This is the correct route, and it takes under a minute.
- Open the record. The status at the top reads Submitted.
- Click Cancel and confirm. The status changes to Cancelled and its effect on your stock and accounts is reversed.
- Click Amend. A copy opens as a new draft, with a name based on the old one —
ACC-SINV-0007becomesACC-SINV-0007-1. - Fix what was wrong, then press Submit on the corrected copy.
Why the cancelled copy stays in the list
The cancelled record stays visible on purpose. Accounting rules — and any auditor or tax inspector — require that a document which once existed cannot silently disappear. The trail shows what was issued, that it was reversed, and what replaced it. Deleting mistakes instead of cancelling them is exactly what an audit looks for.
Comments, attachments and history
Every record carries its own file of notes and documents, which saves a great deal of searching through email later.
- Comments, at the bottom of the form — write why a discount was given, or what
the customer agreed on the phone. Type
@followed by a colleague's name to notify them. The comment stays attached to the record permanently. - Attachments, in the side panel of the form — the signed purchase order, the delivery photo, the bank transfer receipt. The file lives with the record instead of in somebody's downloads folder.
- History — the system records who created, changed, submitted or cancelled the record, and when. Nobody can edit that trail.
The notification bell
The bell in the top corner collects what needs your attention: comments that mention you, records handed to you, and anything shared with you. Handing work over is the useful part — from any record you can assign it to a colleague, and it appears in their bell and their to-do list instead of in a chat message that gets lost.
Keyboard basics
Three shortcuts cover most of the day.
| Keys | What it does |
|---|---|
Ctrl+G | Jump to the search bar from anywhere |
Ctrl+S | Save the record you are on, as a draft |
Esc | Close the box that is open, or the search suggestions |
In lists and in the lines of an invoice, the Tab key moves from field to field, which is far faster than reaching for the mouse on a twenty-line invoice.
Where to go next
With the layout and the three states clear, the selling chapter follows one real order from quotation through to a paid invoice — and what you learn there applies, under different names, to buying and stock as well.
Your team: users, roles and permissions
How to give each colleague their own login, decide what each of them is allowed to do, and fix the permission problems that come up most often.
How your colleagues get a login
Everyone who works in your ERP needs a login of their own, so that every document carries the name of the person who actually made it.
You create those logins in the control panel at app.nezmaro.com, on the Users page. The control panel creates the matching person inside your ERP at the same moment, so you never enter anybody twice.
You never choose, see or type anyone's password. Your ERP emails each new colleague a link, and they set their own password from it. If they forget it later, they use the Forgot password link on your ERP's sign-in page.
Who sends the sign-in link
Every new person receives an email with a link to set their own password. Nobody is ever sent a password.
- On day one, Nezmaro sends it. Until your ERP has its own outgoing email, the link comes from noreply@nezmaro.com and names your company. A blue box above the form says Sign-in links are sent by Nezmaro for now. There is a daily limit on these, generous for a team and far too small for anything else: per company, and per address.
- Once your own outgoing email is set up, your ERP sends it, from your address. Open Team & messages → Marketing tools and fill in the outgoing email card with the details from your mail provider; the Marketing tools chapter explains every field. You need this anyway for everything else your ERP sends — invoices, statements, campaigns and its own notifications.
Adding a colleague
This is the one procedure you will repeat for every new member of staff.
- In the control panel, open Users. The top of the page shows how many seats you are using, for example Active users: 3 / 5.
- In the Add a user card, type the person's Email. This becomes their login name, so use a real address they can open.
- Type their Name as it should appear on the documents they create.
- Pick one Role from the list — the job they mainly do. The next section explains what each one opens up, and you can add more roles later.
- Click Create user. A green message confirms the person will receive an email from your ERP with a link to set their own password, and their row appears in the table below with the status active.
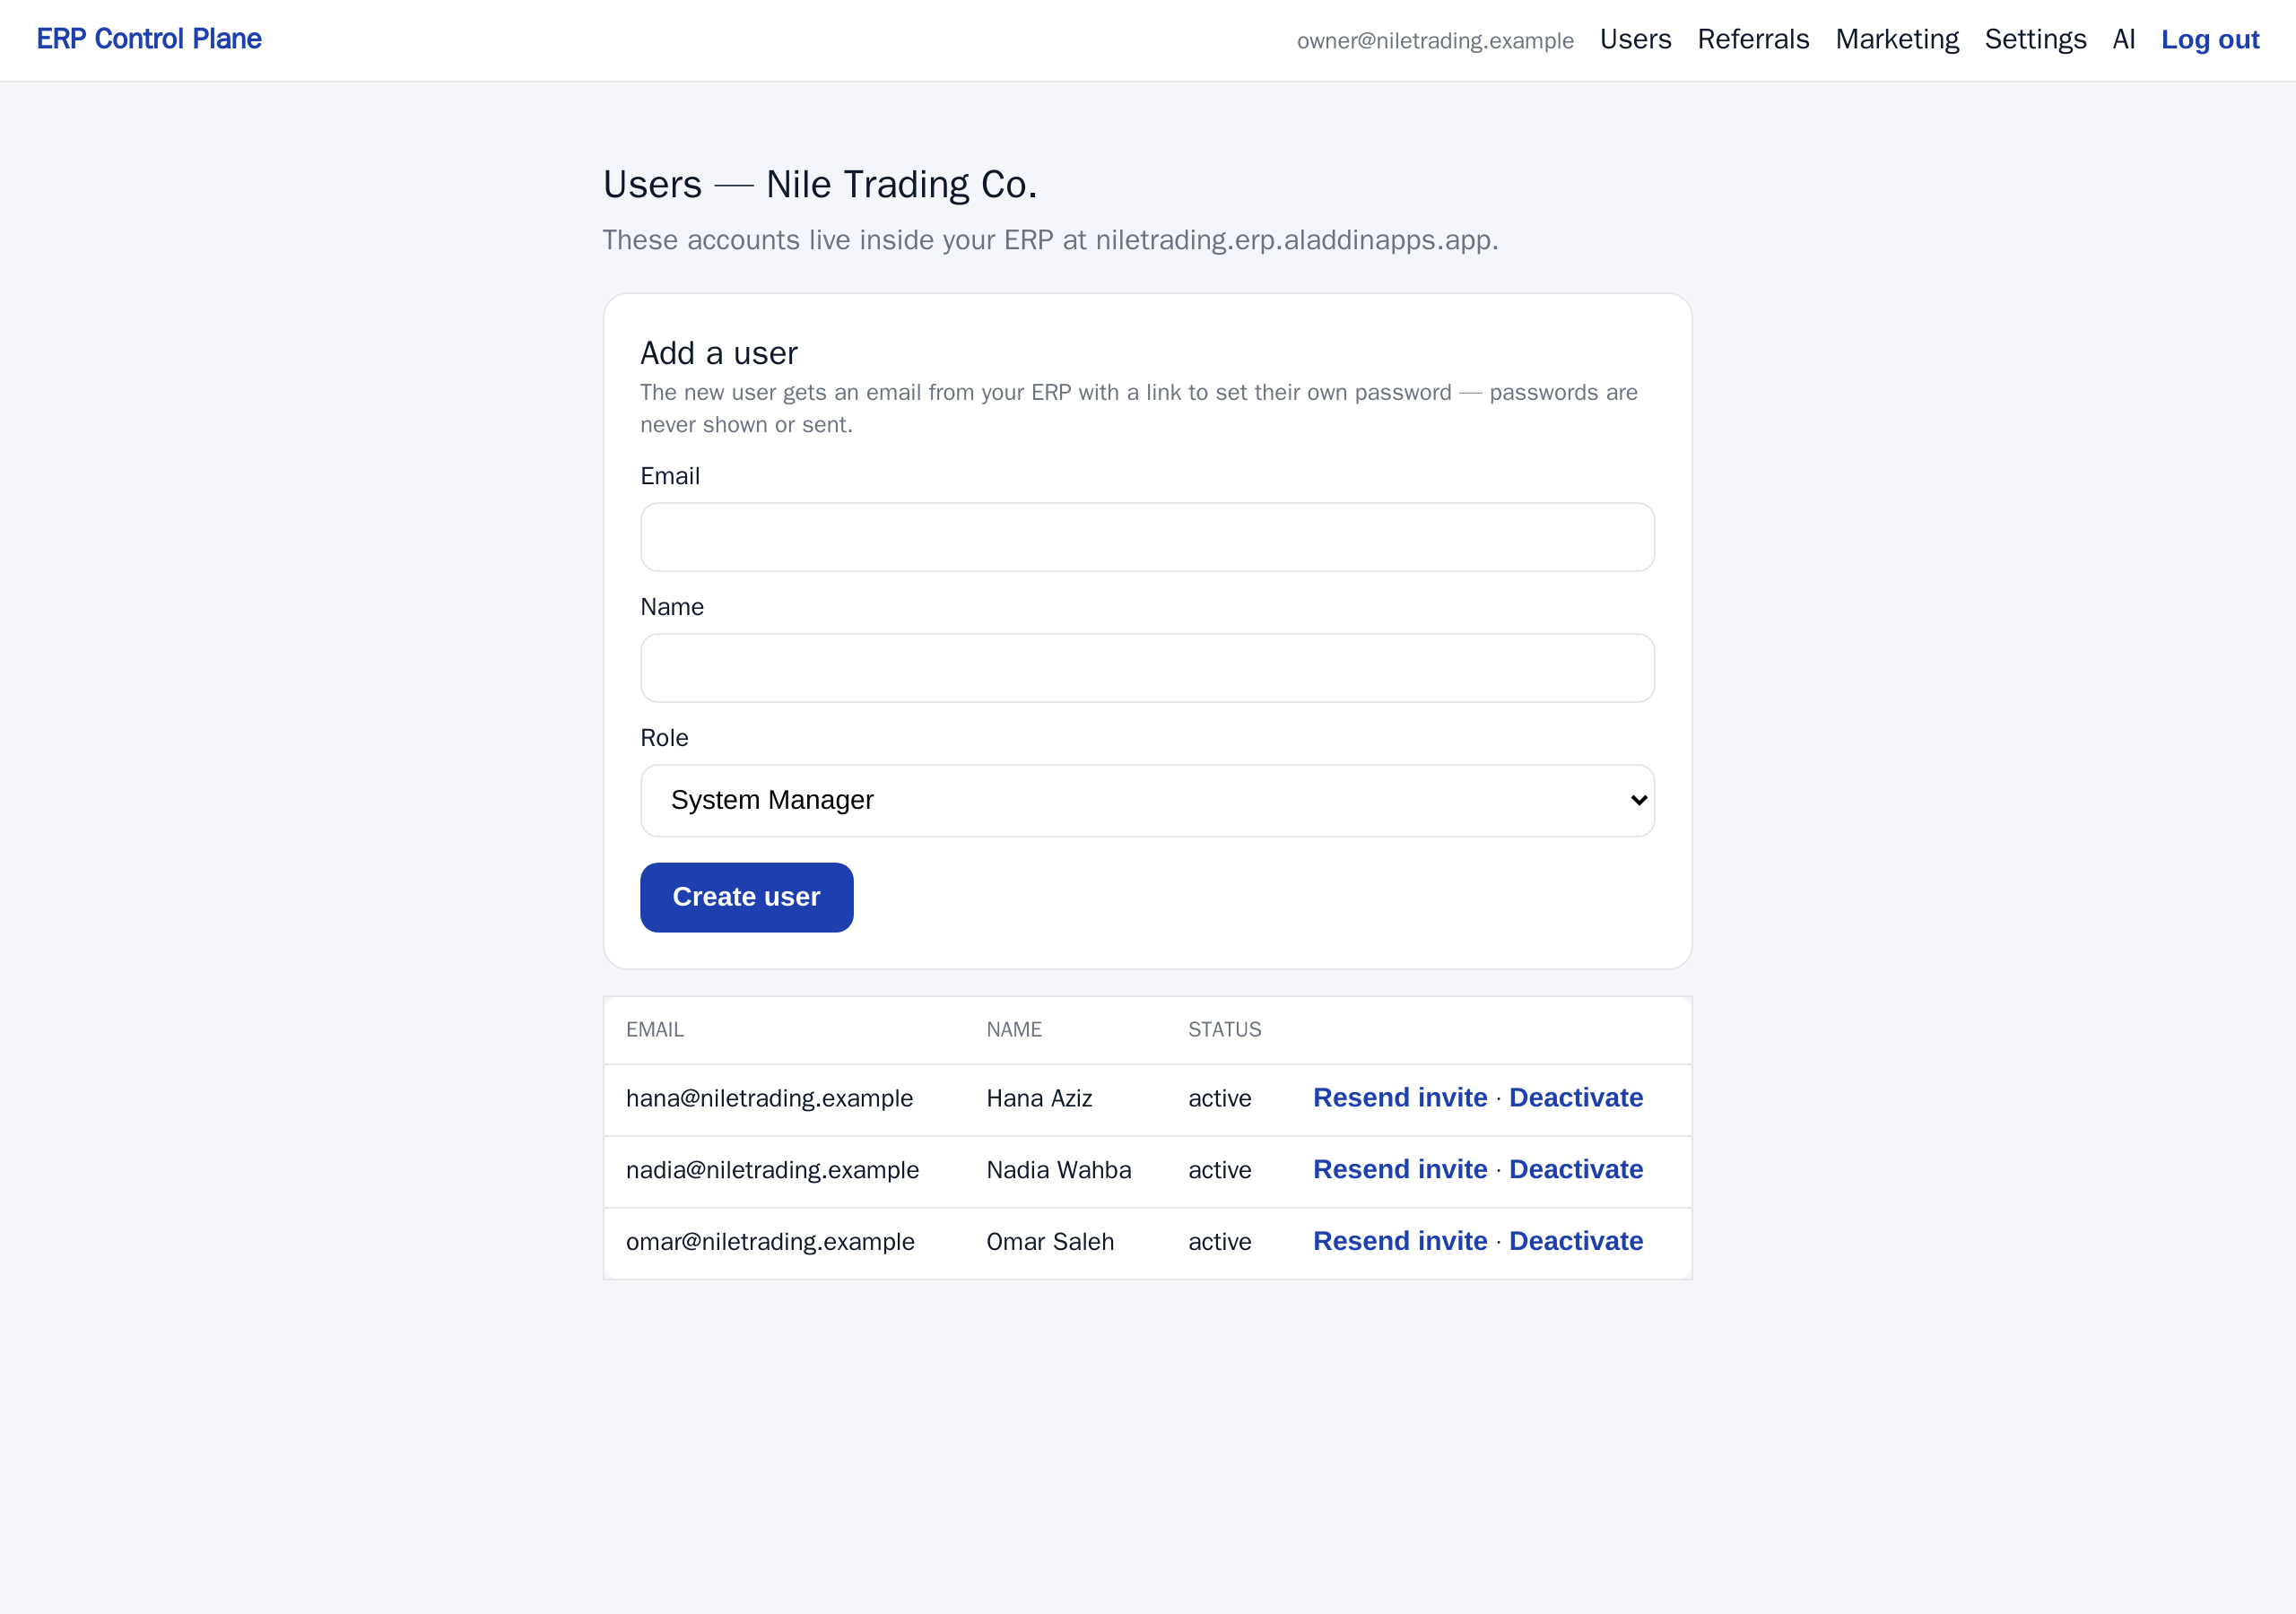
What each role can do
A role is a job description, not a rank. It decides which parts of your ERP a person can open and which documents they can create. Giving people only the roles their job needs keeps their screen simple and prevents accidental damage.
These are the roles the control panel offers when you add someone.
| Role | Suits | What it opens up |
|---|---|---|
| System Manager | The owner only | Full control — settings, users, permissions, every part of the system. Keep this to yourself and at most one trusted deputy. |
| Accounts User | Accountant, bookkeeper | Invoices, payments, accounting corrections and the financial reports. |
| Sales User | Salesperson | Quotations, sales orders, customers, and the list of people who might buy. |
| Purchase User | Whoever buys | Purchase orders, supplier records, and records of goods received. |
| Stock User | Storekeeper, warehouse staff | Stock movements, delivery notes, stock counts and warehouse reports. |
| HR User | HR or office administrator | Employees, attendance, leave requests, payroll records. |
| Projects User | Project or site engineer | Projects, tasks, hours worked, and what each project costs. |
| Employee | Every member of staff | The basics everyone needs: their own profile, leave requests, expense claims. Harmless to add on top of any other role. |
| Sales Manager | Whoever supervises sales | Everything a Sales User can do, plus approvals, larger discounts, and the full sales reports. |
| Newsletter Manager | Marketing | Email campaigns, newsletters and subscriber lists. |
| Website Manager | Marketing | The public website and blog pages that come with the system. |
A typical small company
If your company looks like most of our customers, start from this and adjust it rather than inventing something from scratch.
| Person | Give them | Why |
|---|---|---|
| Owner / manager | System Manager | Someone must be able to change settings and add users. Ideally one person. |
| Accountant | Accounts User + Employee | Full access to the books without the power to reconfigure the system. |
| Salesperson | Sales User + Employee | Can quote and sell, cannot see or change the accounts. |
| Storekeeper | Stock User + Employee | Records what physically moves in and out, nothing financial. |
| HR / office admin | HR User + Employee | Staff records and leave, separate from sales and money. |
Your accountant
Your accountant does not need one of your user seats, and should not be able to change anything. On Users, Invite your accountant: their email and a name. They receive a link from your ERP to set a password and land on the Accounting page with a read-only role of its own: every invoice, payment, entry and ledger to read, filter and export, the General Ledger, Trial Balance, Profit and Loss, Balance Sheet, receivables and payables reports to run — and no button to create, change, submit or delete. When the engagement ends, Deactivate on the Users page.
How many people can use your ERP
Your plan sets the number of seats — people who are allowed to sign in. Knowing how the count works saves you a surprise on the day you hire someone.
| Plan | Price | Users | Storage |
|---|---|---|---|
| Starter | $29 / month | 5 | 10 GB |
| Pro | $79 / month | 20 | 50 GB |
Only active people count. Someone you have deactivated stays in the list and keeps their name on old documents, but does not use a seat. The Users page shows the count at the top, for example Active users: 5 / 5.
When the plan is full, Create user returns a message such as User limit reached: your Starter plan allows 5 active users. Deactivate someone or upgrade. Nothing breaks and nobody is locked out. You have two ways forward:
- Free a seat — deactivate someone who has left the company (see the last section of this chapter). The seat is available immediately.
- Upgrade the plan — move from Starter to Pro by emailing support@nezmaro.com. Plan changes are made by us; there is no upgrade button in the control panel. Once the change goes through, your ERP picks up the higher seat limit automatically.
Giving someone more than one role
The control panel gives a new person one role. Real jobs often need two or three — a salesperson who also handles purchasing, for example. You add the extra roles inside your ERP, not in the control panel.
- Sign in to your ERP with an account that has the System Manager role.
- Press
Ctrl+G, type User List and open it. You see every person on your ERP. - Click the person you want to change. Their record opens.
- Scroll to the Roles section and tick the extra roles they need.
- Click Save (
Ctrl+S). The change applies the next time that person reloads the page.
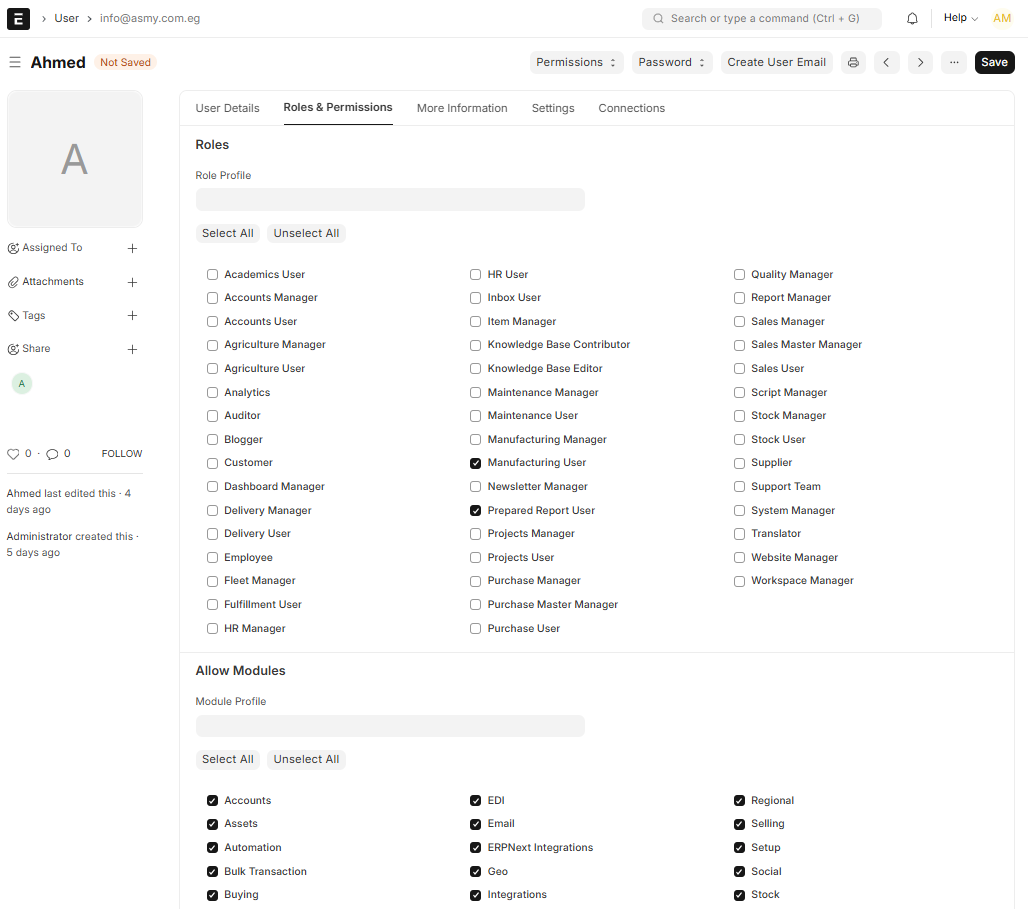
Saving a set of roles for reuse
If you find yourself ticking the same three roles for every new salesperson, save the combination once instead of remembering it. In your ERP, search for Role Profile, create a new one, name it something like Sales staff, and tick the roles. From then on you set that one profile on a person's record, and everyone doing the same job ends up with the same access.
The Role Permission Manager
Underneath roles there is a deeper screen called the Role Permission Manager. It controls, for each role, exactly which kinds of document may be read, changed, created, deleted, submitted or cancelled. You should know it exists.
When someone sees a permission message
Sooner or later a colleague will report that your ERP told them something is not permitted. This is not a fault. It means one thing: that person does not hold a role that gives them access to that kind of document.
- Ask what they were trying to open — the kind of document, such as a sales invoice, a stock movement or an employee record.
- Decide whether that person should be doing it at all. Sometimes the answer is no, and your ERP did exactly its job.
- If the answer is yes, add the matching role to their record using the steps above, then ask them to reload the page and try again.
Staff logins and customer logins are different
Every person on your ERP is one of two types, and mixing them up is the usual reason a new colleague signs in and finds an almost empty screen.
- System User — a member of staff. Signs in to the full working screen (the
address ending in
/app), uses the modules and creates documents. Every colleague you add from the control panel is one of these, and each one uses a seat on your plan. - Website User — a customer or supplier. Signs in only to the public portal to look at their own orders or invoices. They cannot open the working screen or use any module, and they do not appear on the control panel's Users page or use a seat.
If a colleague sets their password correctly but lands on a plain page showing only My Account and no modules, they were created as a Website User. Open their record in the User List inside your ERP and check the User Type field.
When someone leaves
People leave. When they do, deactivate them — do not delete them, so the history of what they did stays intact.
- In the control panel, open Users and find the person in the table.
- Click Deactivate in their row.
- The page reloads with the message User deactivated, their status changes to deactivated, and the seat count at the top drops by one.
They can no longer sign in, but every invoice, order and stock movement they created keeps their name. That trail is the point: a year later you may need to know who issued a credit note, and an accountant or tax inspector will ask. Deleting a person throws that away and can leave documents pointing at somebody who no longer exists.
If they come back, click Reactivate in the same row, provided you have a free seat.
Items, customers and suppliers
The three lists everything else in your ERP is built on — and how to set them up so you are not repairing them a year from now.
The three lists you build once
Three kinds of record are entered once and then reused in every document for years: the things you sell or buy, the people you sell to, and the people you buy from. Getting them right first is what makes everything afterwards quick.
| Record | What it is | Where it is used |
|---|---|---|
| Item | Anything you sell or buy — a product, a raw material, or a service | Every quotation, order, invoice and stock movement |
| Customer | A company or person you sell to | Quotations, sales orders, delivery notes, sales invoices, and the report of who owes you money |
| Supplier | A company or person you buy from | Purchase orders, records of goods received, purchase invoices, and the report of what you owe |
When you type a customer's name onto an invoice, you are not typing text — you are pointing at that customer's record. If the record is a duplicate, sits in the wrong group, or carries the wrong tax number, every document that points at it inherits the problem, and your reports quietly give you the wrong answer.
Creating an item
An item is anything that can appear as a line on a document: a steel plate, an hour of consulting, a spare part, a delivery charge. Without items you cannot write a quotation or an invoice, so this is usually the first list you build.
- In your ERP, press
Ctrl+G, type Item and choose Item List. Look for the thing you are about to create — if it is already there, stop and use the existing one. - Click Add Item (or New). A blank item form opens.
- Enter the Item Name — the name your staff will actually search for. Make it specific enough to tell two similar things apart.
- Choose an Item Group. This is the folder your item lives in; see below.
- Set the Unit of Measure — how you count this item: piece, kg, ton, metre, hour. Read the warning after these steps before you decide.
- Decide whether to tick Maintain Stock. Tick it for physical goods you count in a warehouse. Leave it unticked for services and charges you never hold in a warehouse, otherwise your ERP will keep waiting for stock movements that never happen.
- Enter a default selling price, and a buying price if you buy the item too, so the price fills in by itself on documents. You can still change it on any single line.
- If you already hold some of this item, fill in the Opening Stock — how many you have right now — and the Valuation Rate, which is what one unit cost you. Your first stock report is then true from day one.
- Click Save. The item now appears in the list and can be used on documents.
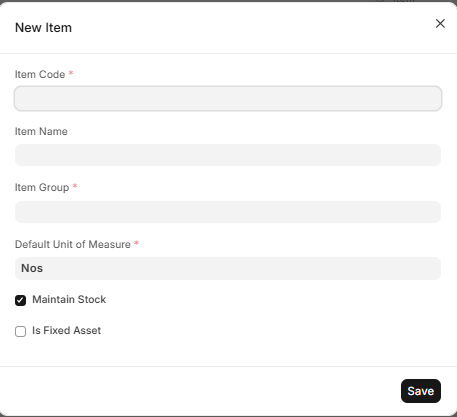
Item groups
An Item Group is a folder for your catalogue: Raw Materials, Finished Goods, Services, Consumables. Groups are what make reports readable — total sales by group tells you something useful, while a flat list of four hundred items tells you nothing.
Keep the structure shallow. Five to ten groups that match how you already talk about
your business are far more useful than a deep tree nobody maintains. To add one, press
Ctrl+G, type Item Group, open it and create a new group.
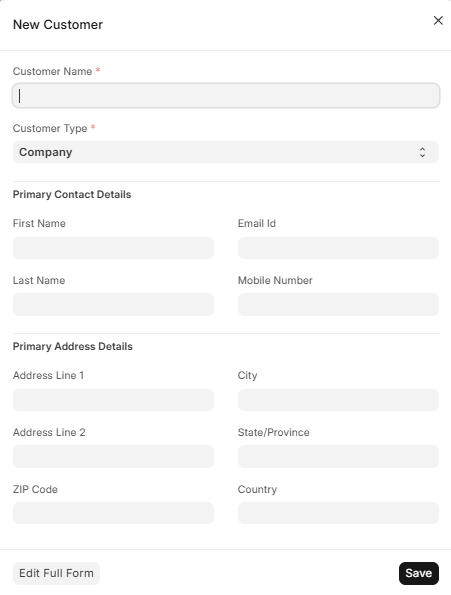
Creating a customer
A customer record is more than a name. It carries the commercial terms you agreed, so every future document applies them without anyone having to remember.
- Press
Ctrl+G, type Customer and open the Customer List. Search for the name first — see the warning below. - Click Add Customer (or New). A blank customer form opens.
- Enter the Customer Name — the legal name that should appear on invoices.
- Choose a Customer Group (for example Wholesale, Retail, Government) and a Territory, meaning the region they belong to. Both exist so you can compare performance later.
- Set a Credit Limit if you want your ERP to warn you — or block a new order — once this customer owes you more than you are comfortable with.
- Set the Payment Terms: how long they have to pay, such as cash, 30 days or 60 days. Every invoice then works out its own due date, and the report of overdue money becomes trustworthy.
- Enter the Tax ID and any registration number required where you operate. It prints on the invoice.
- Click Save. Two links then appear on the record for Contacts — the people you deal with, with phone and email — and Addresses, where the billing and delivery address can differ.
Creating a supplier
A supplier record does for buying exactly what a customer record does for selling: it holds the terms so your ERP can tell you what you owe and when.
- Press
Ctrl+G, type Supplier and open the Supplier List. Search for the name first, for the same reason as with customers. - Click Add Supplier (or New).
- Enter the Supplier Name and choose a Supplier Group.
- Set the Payment Terms you have with them, and enter their Tax ID.
- Click Save, then add their Contacts and Addresses.
Supplier payment terms are what let your ERP list what you owe and how soon it is due, which is how you avoid both late-payment friction and paying earlier than you needed to.
How the three feed everything else
Once these records exist you rarely type details again, which is the return on the care you took:
- A quotation pulls in the customer, their currency and their agreed prices, then the description and price of each item.
- A sales invoice pulls the payment terms to work out its due date, and the tax number for the printed copy.
- A delivery note pulls the item's unit of measure and reduces stock in that unit.
- A purchase order pulls the supplier and their terms.
- Every report groups by item group, customer group and territory — the fields you filled in once.
Importing many records at once
If you already have hundreds of items or customers in a spreadsheet, do not retype them one by one. The Data Import tool loads the whole file in one go.
- Press
Ctrl+G, type Data Import and choose New. - Set the Document Type to what you are importing: Item, Customer or Supplier.
- Choose Insert New Records, then click Download Template. A spreadsheet arrives with the correct column headings already in place.
- Fill the template with your data. Keep the heading row exactly as it is, and make sure any value that has to match an existing list — item group, unit of measure, customer group — is spelled exactly as it is in your ERP.
- Upload the filled file and click Start Import. The page shows progress as it runs.
- Read the result. Successful rows are created immediately; failed rows are listed with the reason, so you can correct those rows and import only them again.
If an import keeps failing and the reason is not clear, send us the file at support@nezmaro.com together with your ERP address, and we will look at it with you.
Selling: quotation to invoice
The sales cycle is the backbone of daily work. This chapter follows one order from the first quote to a paid invoice.
What you need before you start
A sales document is built out of two records, so both must exist before you can write one:
- an Item — anything you sell: a product, a raw material, or a service;
- a Customer — the company or person you are selling to.
To create either one, press Ctrl+G from anywhere in your ERP, type the
word Item or Customer, open the list and click New. The
Items, customers and suppliers chapter goes through every field.
Save and Submit are not the same thing
This is the single most important thing in the chapter. Every document below has two separate buttons, and confusing them is what causes almost every problem people write to us about.
| Button | What it does | Can you still edit it? | Effect |
|---|---|---|---|
Save (Ctrl+S) |
Keeps your work as a draft | Yes, freely | None — no stock moves, no accounting entry |
| Submit | Makes the document official and locks it | No | Real — stock moves, accounting entries are made |
Save as often as you like; a half-finished invoice sitting as a draft harms nothing. Read the document once more before you press Submit.
The four documents
Your ERP treats a sale as a chain of four documents. Each one creates the next with a single button, so you never retype the lines, and at any moment you can see how far an order has got.
| Document | What it means | What Submit does |
|---|---|---|
| Quotation | Your offer to the customer | Nothing to stock or accounts |
| Sales Order | The customer accepted your offer | Records the commitment; still no accounting entry |
| Delivery Note | The goods left your warehouse | Reduces your stock |
| Sales Invoice | You are asking the customer to pay | Records the sale in your accounts: the income, and the money this customer now owes you |
If you sell services, or invoice on the spot over the counter, go straight to the sales invoice. The chain is there to help you track commitments, not to force paperwork on you.
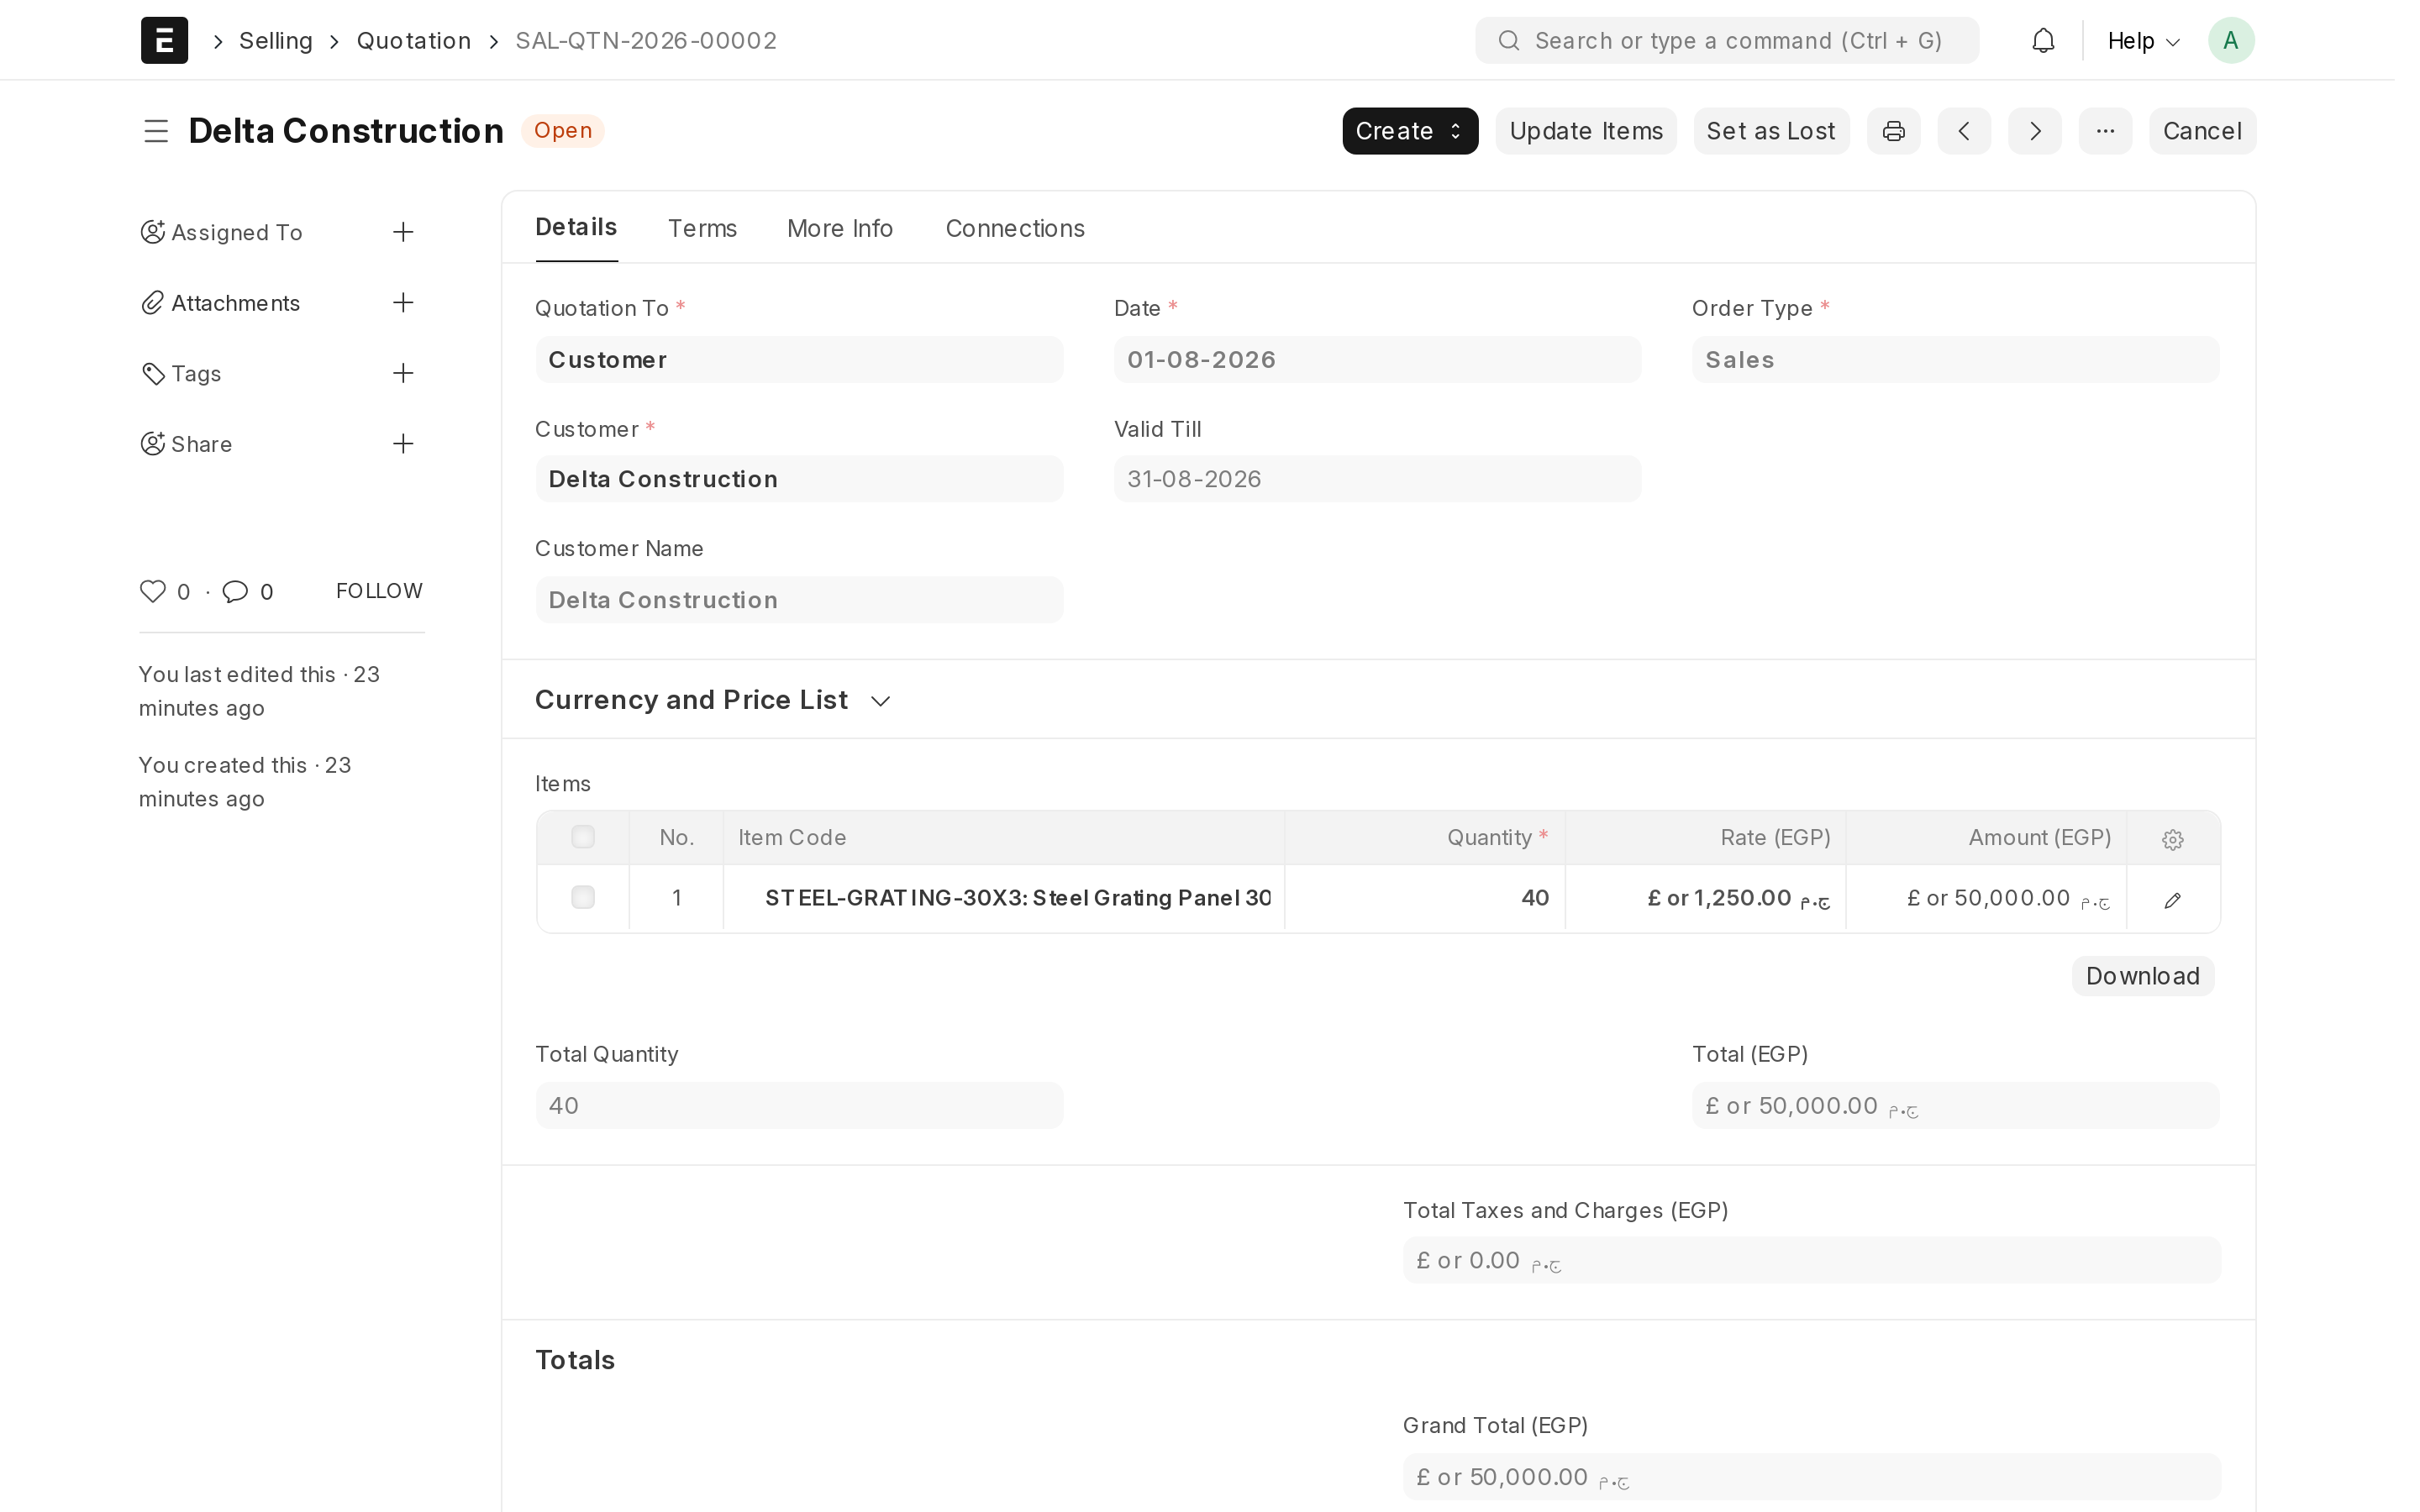
Step 1 — Quotation
The quotation is the offer you send the customer, and it is where the prices and quantities are agreed, so everything later copies from it.
- Press
Ctrl+G, type Quotation and choose New. A blank quotation opens. - Leave Quotation To set to Customer, then pick the customer. Their currency and agreed prices fill in by themselves.
- In the items table, add a row for each thing you are offering: choose the item, then enter the quantity and the rate. The description and default price appear on their own; change the rate here if you agreed a different one.
- Check the Valid Till date — how long your prices stand — and the taxes at the bottom.
- Click Save. The document gets a number and sits as a draft you can still change.
- When you are satisfied, click Submit. The status changes and the document is now locked.
- Use Print to produce a PDF, or Email to send it to the customer straight from your ERP.
Step 2 — Sales Order
The sales order is the record that the customer said yes, which is what lets you see what you have promised and not yet delivered.
- Open the submitted quotation.
- Click Create in the top right, then Sales Order. A new order opens with the customer and all the item rows already filled in.
- Confirm the Delivery Date you are promising.
- Click Save, then Submit.
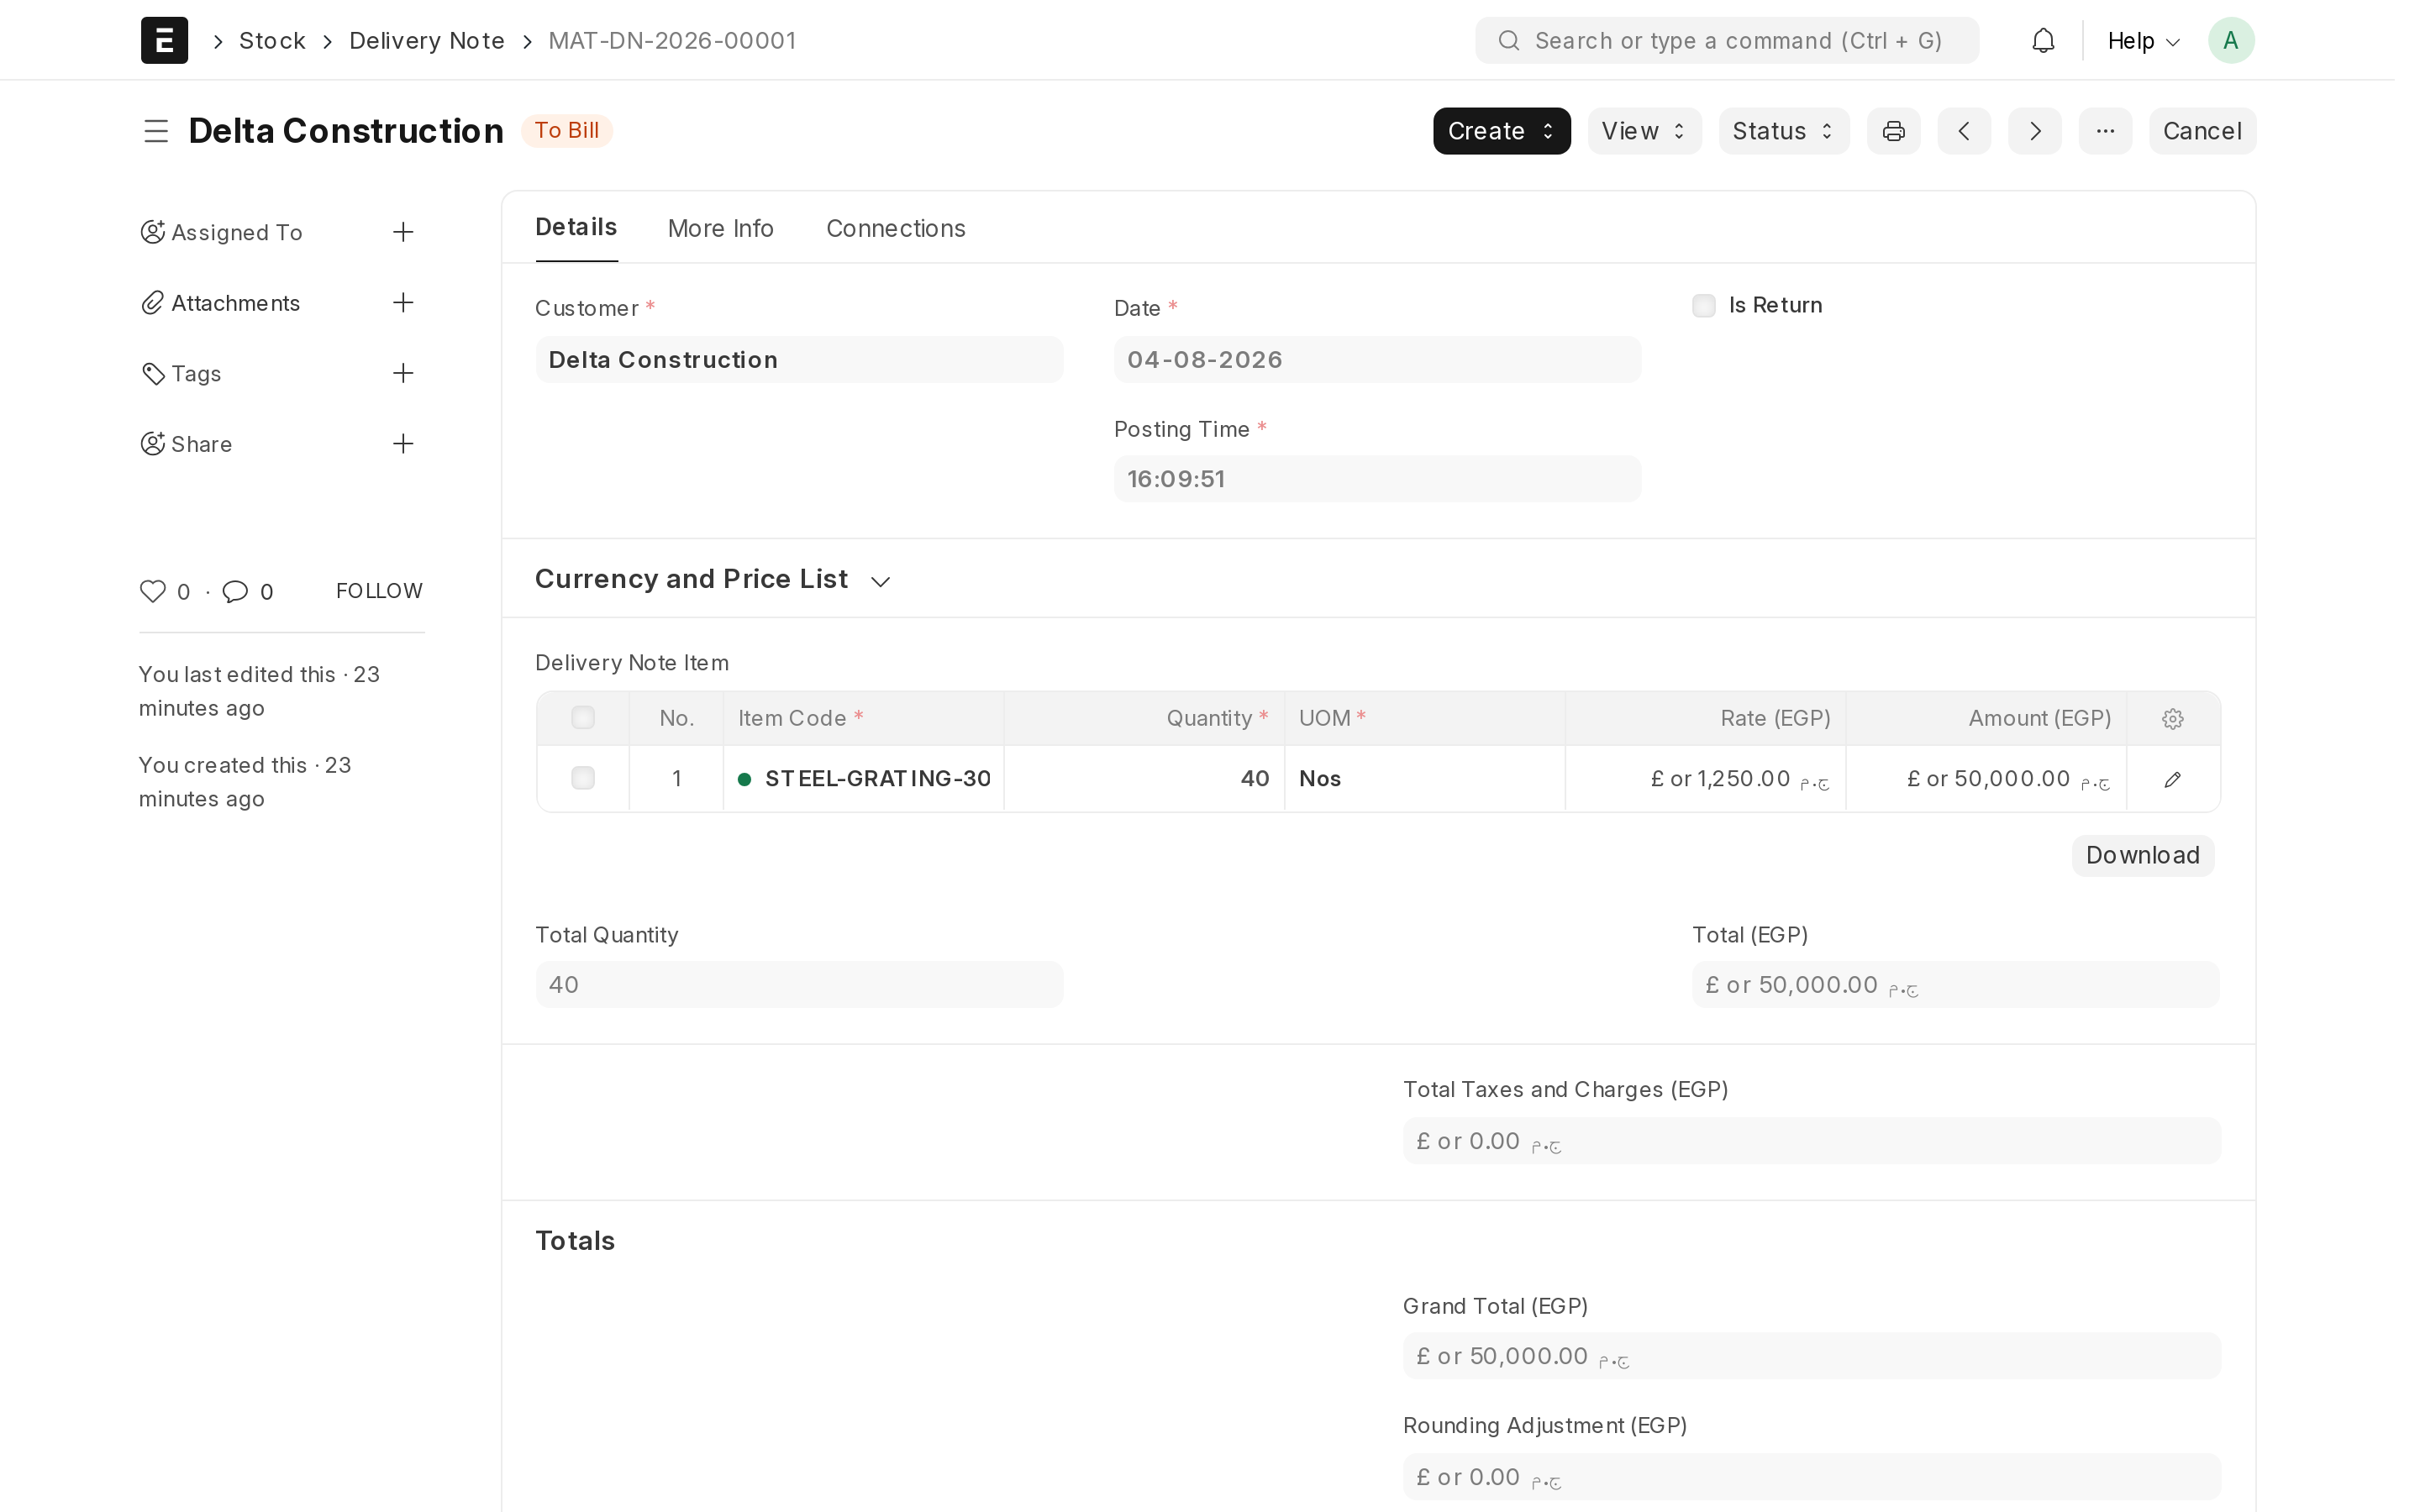
Step 3 — Delivery Note
The delivery note records that the goods physically left, which is what keeps your stock figures matching what is actually on the shelves. Skip this step entirely if you sell services.
- Open the submitted sales order.
- Click Create, then Delivery Note. The lines carry over.
- Check the quantities against what is actually going out, and check the warehouse named on each row.
- Click Save, then Submit. At that moment the stock is reduced in that warehouse.
- Use Print to give the driver or the customer a copy.
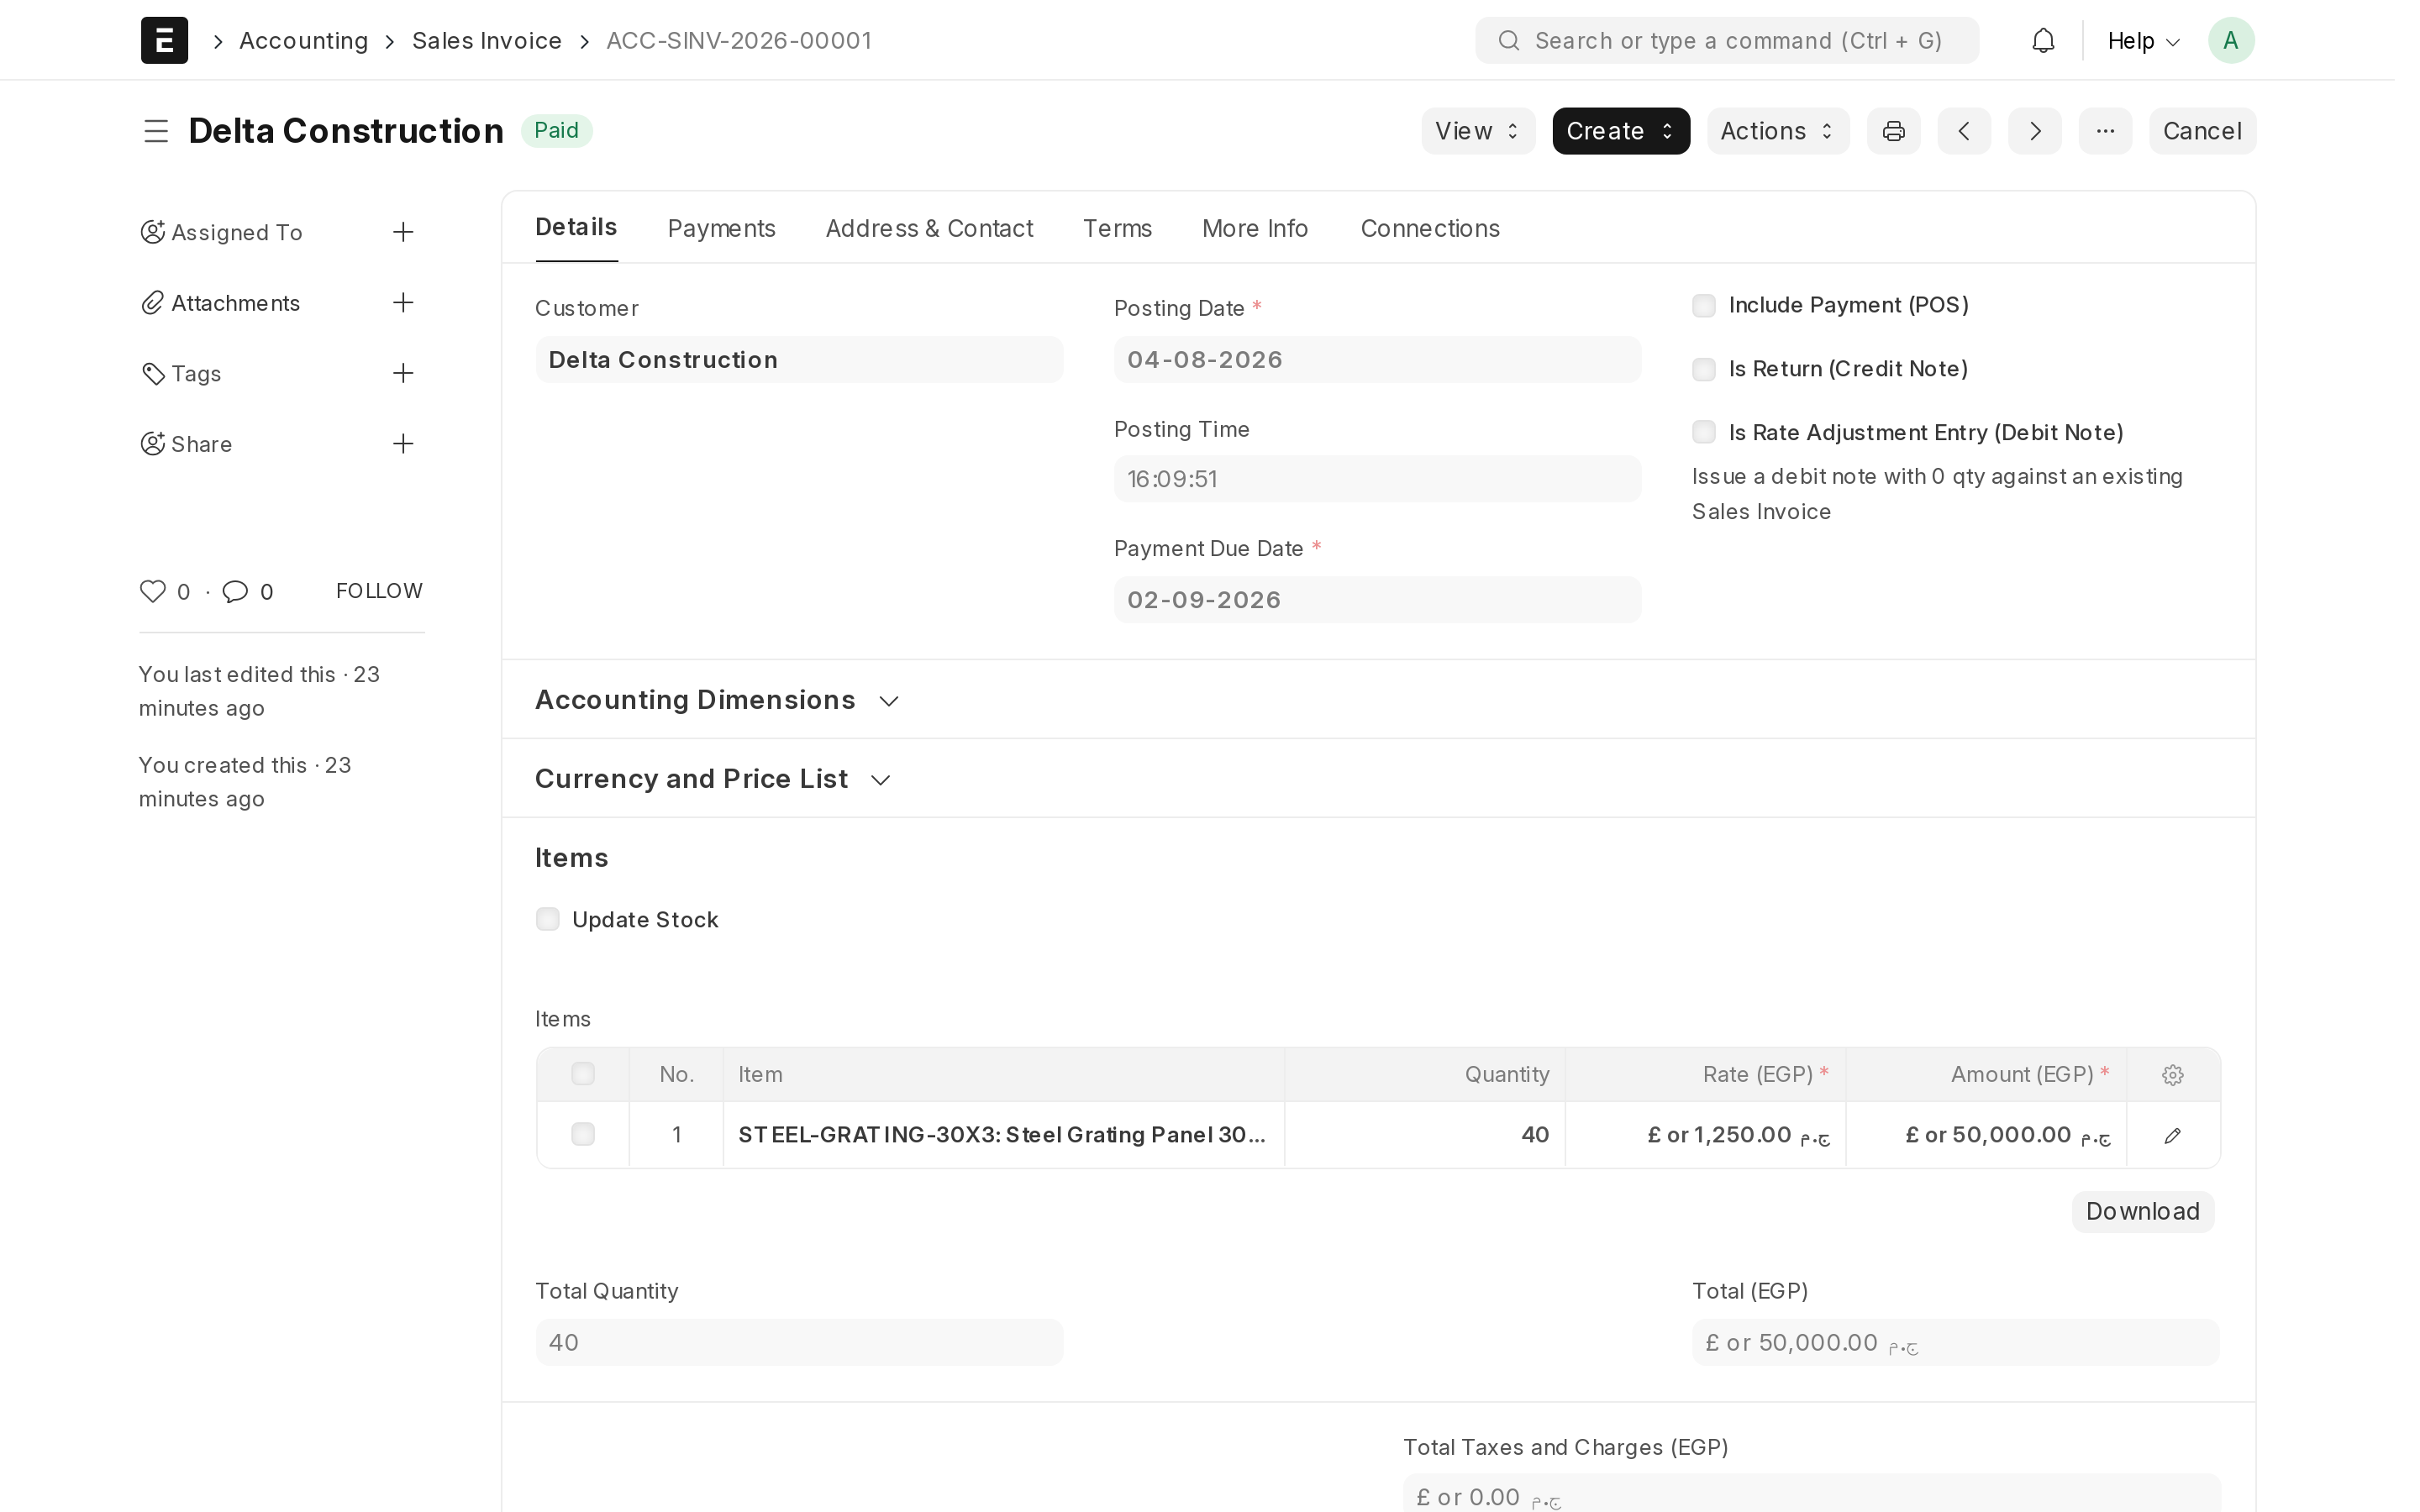
Step 4 — Sales Invoice
The invoice is where the sale finally reaches your accounts, and where the customer's debt to you starts.
- Open the sales order, or the delivery note if you made one.
- Click Create, then Sales Invoice.
- Check the Due Date, which comes from the payment terms on the customer's record, and check the taxes at the bottom.
- Click Save to keep it as a draft, and read it once more.
- Click Submit. This is the moment the income and the customer's debt are recorded in your accounts. The status becomes Unpaid.
- Use Print or Email to send it to the customer.
Choosing how your invoice looks
When you click Print, the document opens in a print layout, and there is a Print Format box at the top of that screen where you can switch between layouts. Two of them are ours, installed in your system from the day it was built:
- Bilingual Tax Invoice — for sales invoices. Arabic and English together, in your brand colour, with your logo and company details.
- Bilingual Delivery Note — the same treatment for delivery notes.
One of them is already selected for you, so you do not have to choose every time you print. Saudi companies are the exception for invoices: there the ZATCA Phase 2 Print Format is the default instead, because where the law sets the wording, the compliant layout should win. Ours stays in the list if you prefer it.
The other entries you will see — Commercial Invoice, Sales Auditing Voucher, Sales Invoice Print and so on — are the system's own standard layouts. They work perfectly well; they are simply not branded.
Making your own version
You can change how a layout looks, but change a copy of it, never ours:
- Type Print Format into the search bar and open that list.
- Open Bilingual Tax Invoice, then use the menu to Duplicate it, and give the copy a name of your own.
- Edit your copy, and pick it from the Print Format box whenever you print.
That also means the default can move back to ours after you save your branding. If you have chosen a different default, check it once after any branding change, or simply pick the layout you want from the Print Format box at the moment you print.
Recording the money when it arrives
Submitting an invoice records that the customer owes you. Recording the payment is a separate step, and until you do it the customer keeps appearing on your list of debtors.
- Open the submitted invoice.
- Click Create, then Payment. In some versions this is labelled Payment Entry; either way it opens the same form.
- Choose the account the money actually arrived in — your bank account or your cash box.
- Confirm the amount. If the customer paid only part of it, change the amount to what they really paid.
- Click Save, then Submit.
The invoice status changes to Paid, or to Partly Paid if some is still outstanding, and the customer's balance drops accordingly.
An invoice that issues itself every month
Rent, a maintenance contract, a retainer — the same invoice to the same customer on the same day of every month. You can raise the first one and let the system issue the rest.
This is set up on an invoice you have already submitted, because the repeat copies that invoice: the same customer, the same lines, the same amounts.
- Open a submitted sales invoice that looks like the one you want repeated.
- Open the Menu (top right) and choose Repeat.
- Set Frequency to Monthly — or Weekly, Quarterly or Yearly.
- Set the Start date, and an End date if the arrangement finishes.
- Optionally add an email address under Notify by email so someone is told each time a new invoice appears.
- Save.
From then on the system creates the next invoice on schedule, as a draft. It is not sent to anyone and it is not in your accounts until you open it and submit it — deliberately, so a price change or a month the customer paused never becomes an invoice you did not check.
Where to see them all. Your home page has a Repeating invoices tile; it opens the list of every repeat you have set up, where you can pause one (Disable) or change its dates. The morning brief mentions any invoices that were issued overnight.
Only the Company edition sets this up on invoices. If you run a shop, a pharmacy or a restaurant, the counter is your selling screen and this section does not apply.
Correcting a document you already submitted
Submitted documents cannot be edited, because quietly changing a figure that has already reached your accounts is exactly what an ERP must never allow. Instead you reverse the document and issue a corrected copy, and both stay on the record.
- Open the document that is wrong.
- Click Cancel and confirm. Its effect is reversed: an invoice no longer counts in your accounts, a delivery note puts the stock back.
- Click Amend. You get an editable copy carrying the same information, numbered
after the original — invoice
ACC-SINV-0007becomesACC-SINV-0007-1. - Correct what was wrong, click Save, then Submit the corrected copy.
The cancelled document stays visible in the list on purpose. That trail — what was issued, that it was reversed, and what replaced it — is what an accountant or a tax inspector will ask to see. Deleting mistakes instead of cancelling them is precisely what an audit looks for.
Checking where you stand
Three reports answer the questions owners ask most. Press Ctrl+G, type the
report name and open it.
- Accounts Receivable — who owes you money, how much, and how long it has been outstanding.
- Sales Analytics — your sales broken down by customer, item or period.
- Item-wise Sales History — what actually sells, and to whom.
Sending a customer their statement
At the end of each month, send a customer one page that shows where they stand with you: the balance they carried into the month, every invoice and payment during the month, and the balance at the end. It is the first step of a collection call, and it answers "how much do I owe you?" before anyone asks.
- Open the customer.
- Click Send statement (top right).
- Choose the Statement month. Last month is already chosen.
- Tick By email, On WhatsApp, or both. The customer's email address and mobile number are filled in; correct them if they are out of date.
- Click Preview the PDF to see exactly what the customer will receive, then Send now.
The statement comes from your own accounts, on your own letterhead. A customer who bought nothing that month but still owes you still gets a statement, showing the balance they are carrying.
Each way of sending tells you what happened. If the email went and WhatsApp did not, you see both lines, and the email is not undone.
Email leaves from your own outgoing email, set up in the Nezmaro control panel under Marketing. WhatsApp leaves from your own WhatsApp number, set up under Marketing → WhatsApp. Until one is set up, the button says so instead of sending. Only people who can see your accounts can send a statement.
Common questions
The customer changed the quantity after the order
If nothing has been delivered or invoiced yet, cancel the sales order and amend it, as described above. If part of it has already gone out, leave that order alone and create a new one for the difference — that way both the delivered part and the extra part keep an honest record.
Can I invoice without a sales order?
Yes. Create a sales invoice directly and add the item rows yourself. You lose the record of what was promised in advance, which for a walk-in sale you did not need anyway.
Why does an old customer still show as owing money?
Almost always because a payment was received but never recorded. Open the invoice and check its status: if it says Unpaid, follow the payment steps above.
Buying and stock
How goods come in, where they are stored, and how you keep the quantity in the system equal to the quantity on the shelf.
Buying is selling in reverse
Purchasing uses the same chain of documents as selling, pointing the other way: you order from a supplier, the goods arrive, the supplier bills you, and you pay. If you have read the selling chapter, most of this will already feel familiar.
Two words are used throughout this chapter, and both mean something ordinary:
- A supplier is the company or person you buy from — the mirror image of a customer. Create each one once (search for Supplier and choose New) and reuse it from then on.
- A warehouse is any named place where stock can sit. It does not have to be a building: a delivery van, a shop floor, a locked cabinet of spare parts or a shelf at a second branch all count as warehouses in the system.
Items are shared with sales — the same item record is used whether you buy it, sell it, or both.
The four documents
Each document creates the next one with a single button, so you never retype the lines.
| Document | What it means | Effect |
|---|---|---|
| Material Request (optional) | Someone inside your company asks for something to be bought | Nothing yet — no stock and no money recorded |
| Purchase Order | Your commitment to the supplier | Commits the purchase; still nothing recorded in your accounts |
| Purchase Receipt | The goods arrived at your warehouse | Increases stock |
| Purchase Invoice | The supplier's bill, which you now owe | Records the cost and the money you owe the supplier |
As with sales, the chain is a tool and not an obligation. For a small cash purchase you can enter a Purchase Invoice on its own and tick Update Stock on it, so one document both records the bill and brings the goods into the warehouse.
Step 1 — Material Request (optional)
A material request is an internal note — the workshop needs cable, the office needs paper. It is worth using when the person who knows what is needed is not the person who places orders. Skip this step entirely if you order things yourself.
- Search Material Request → New.
- Set Purpose to Purchase.
- Add the item rows with quantities, and the date they are needed by.
- Click Save, then Submit. No supplier has been named and nothing has been promised to anyone.
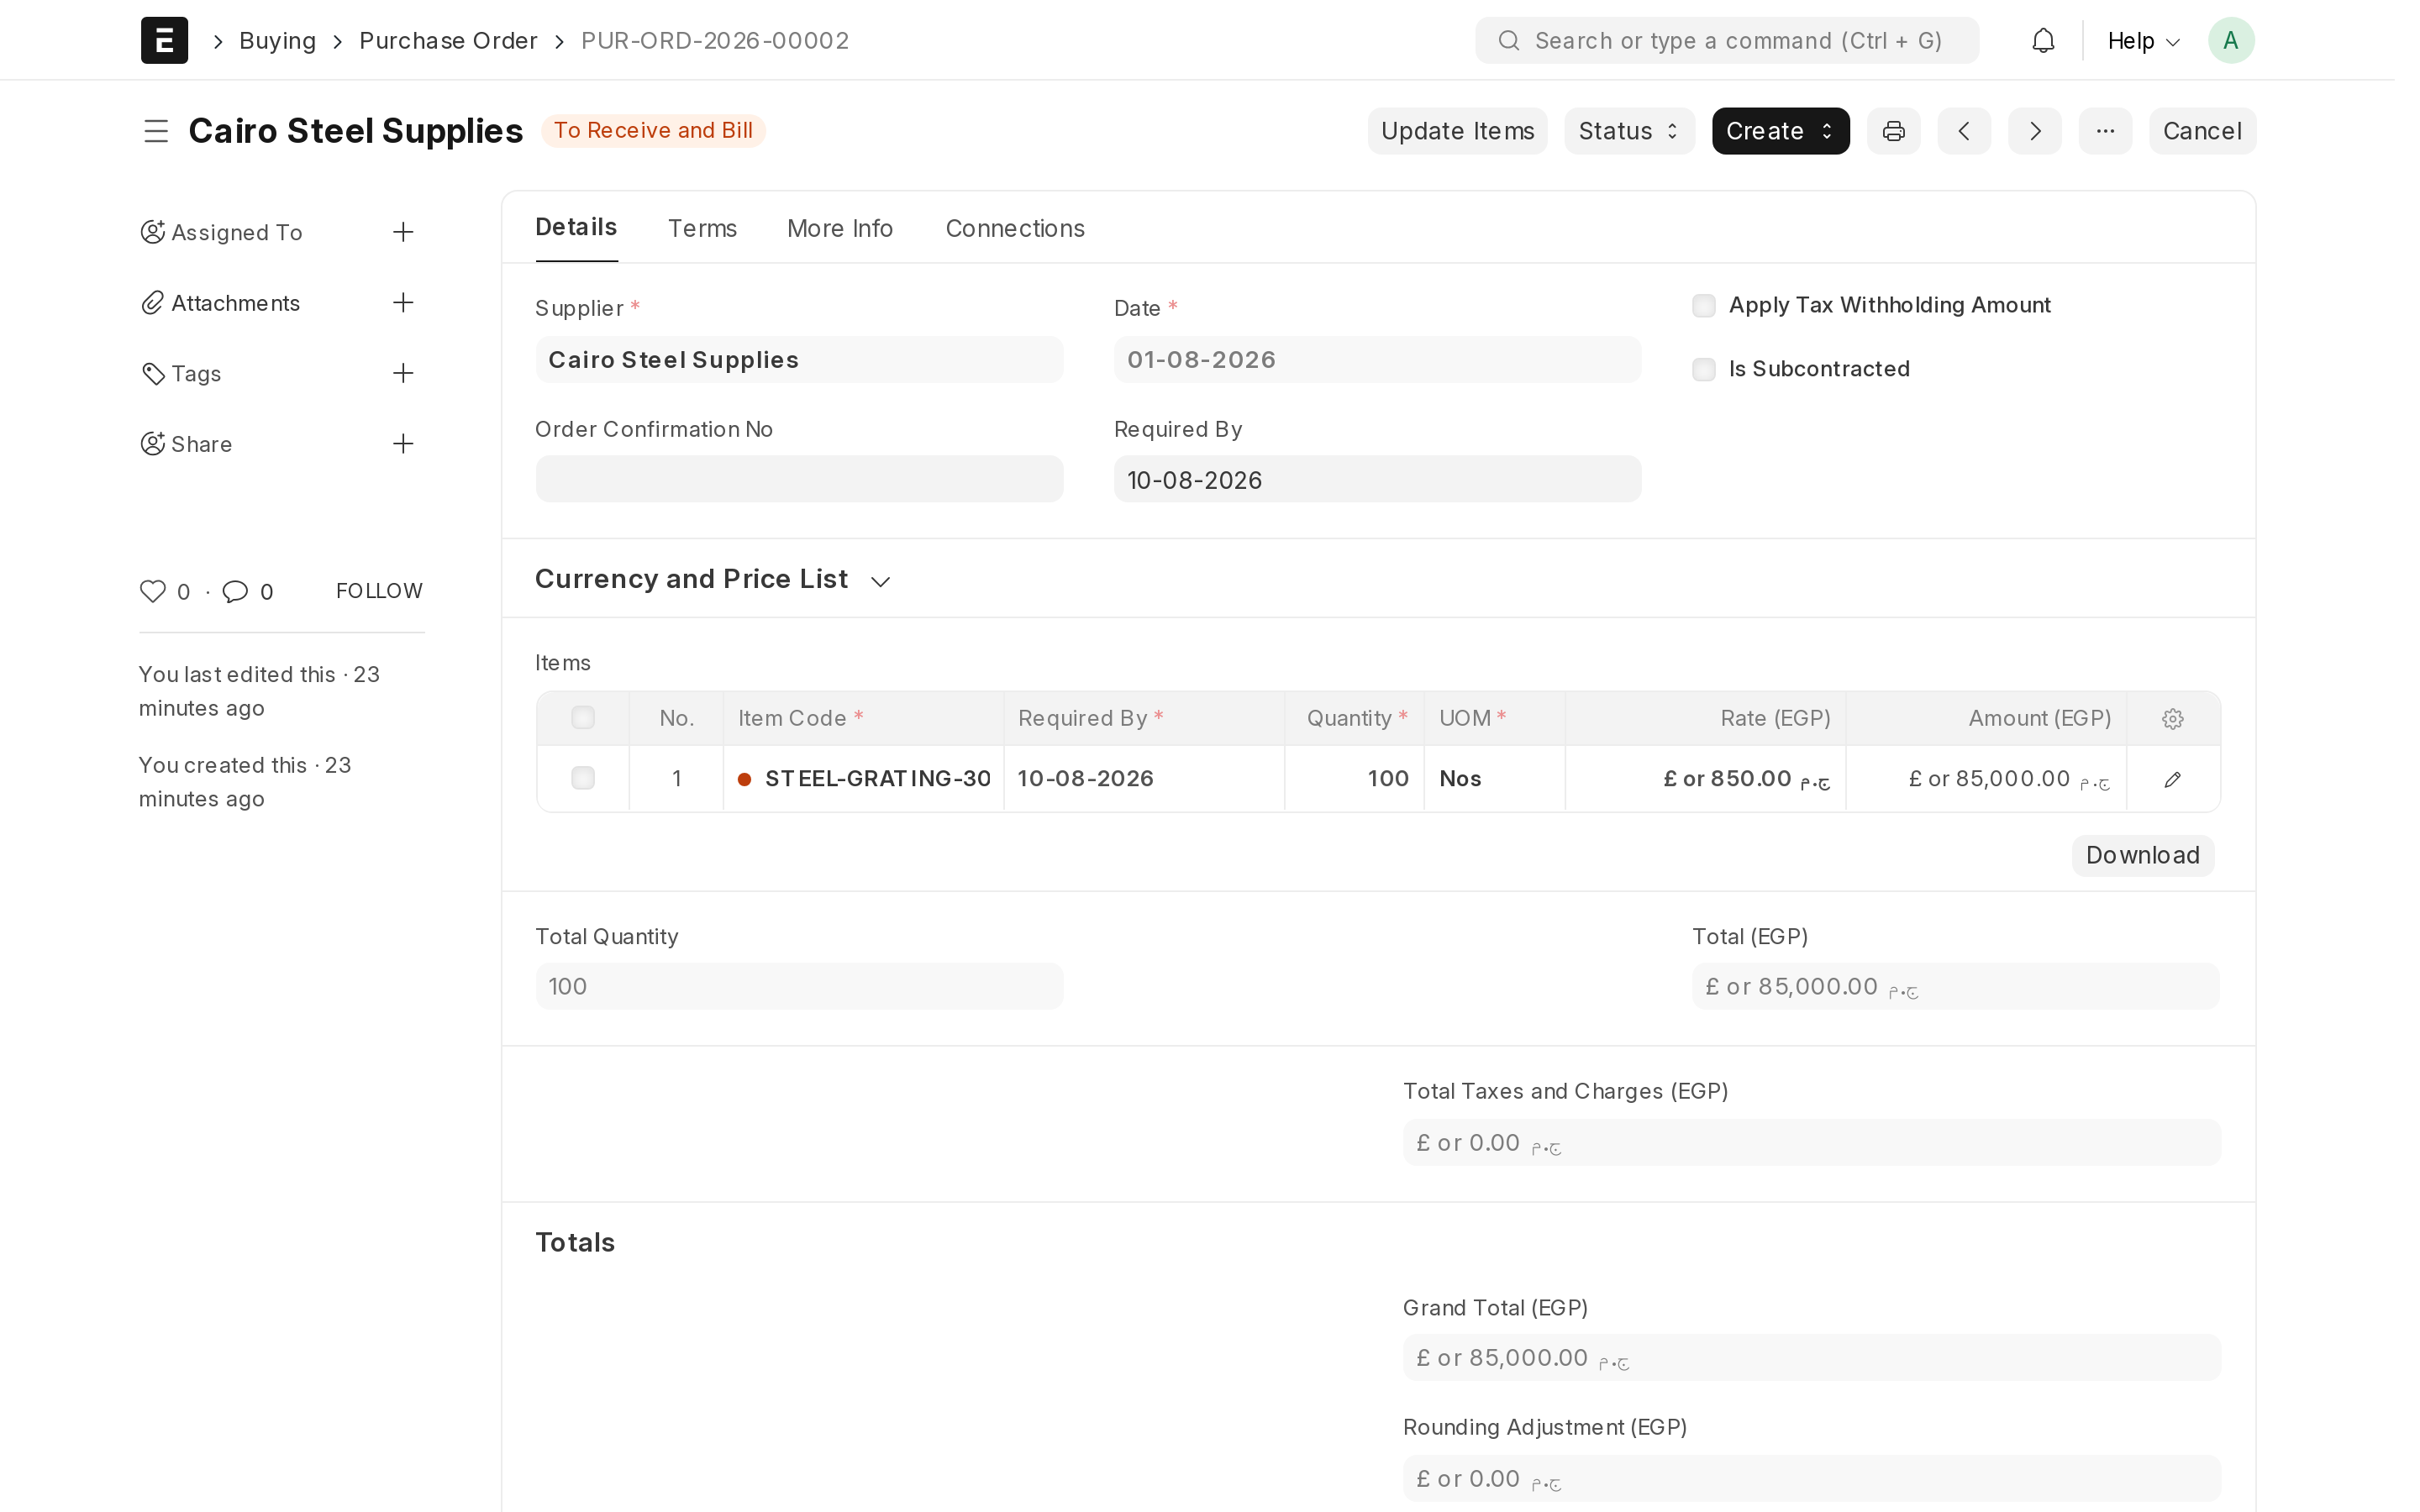
Step 2 — Purchase Order
The purchase order is what you send to the supplier: this much, at this price, wanted by this date. It is also what you check the delivery and the bill against later.
- Search Purchase Order → New (or open the material request and click Create → Purchase Order, which fills the lines in for you).
- Choose the supplier.
- Add item rows with quantity and rate — the rate is what the supplier charges you, not your selling price.
- Set the Required By date and check the target warehouse on the rows.
- Click Save, then Submit. The status changes to To Receive and Bill.
- Click Print or Email to send it to the supplier.
Step 3 — Purchase Receipt
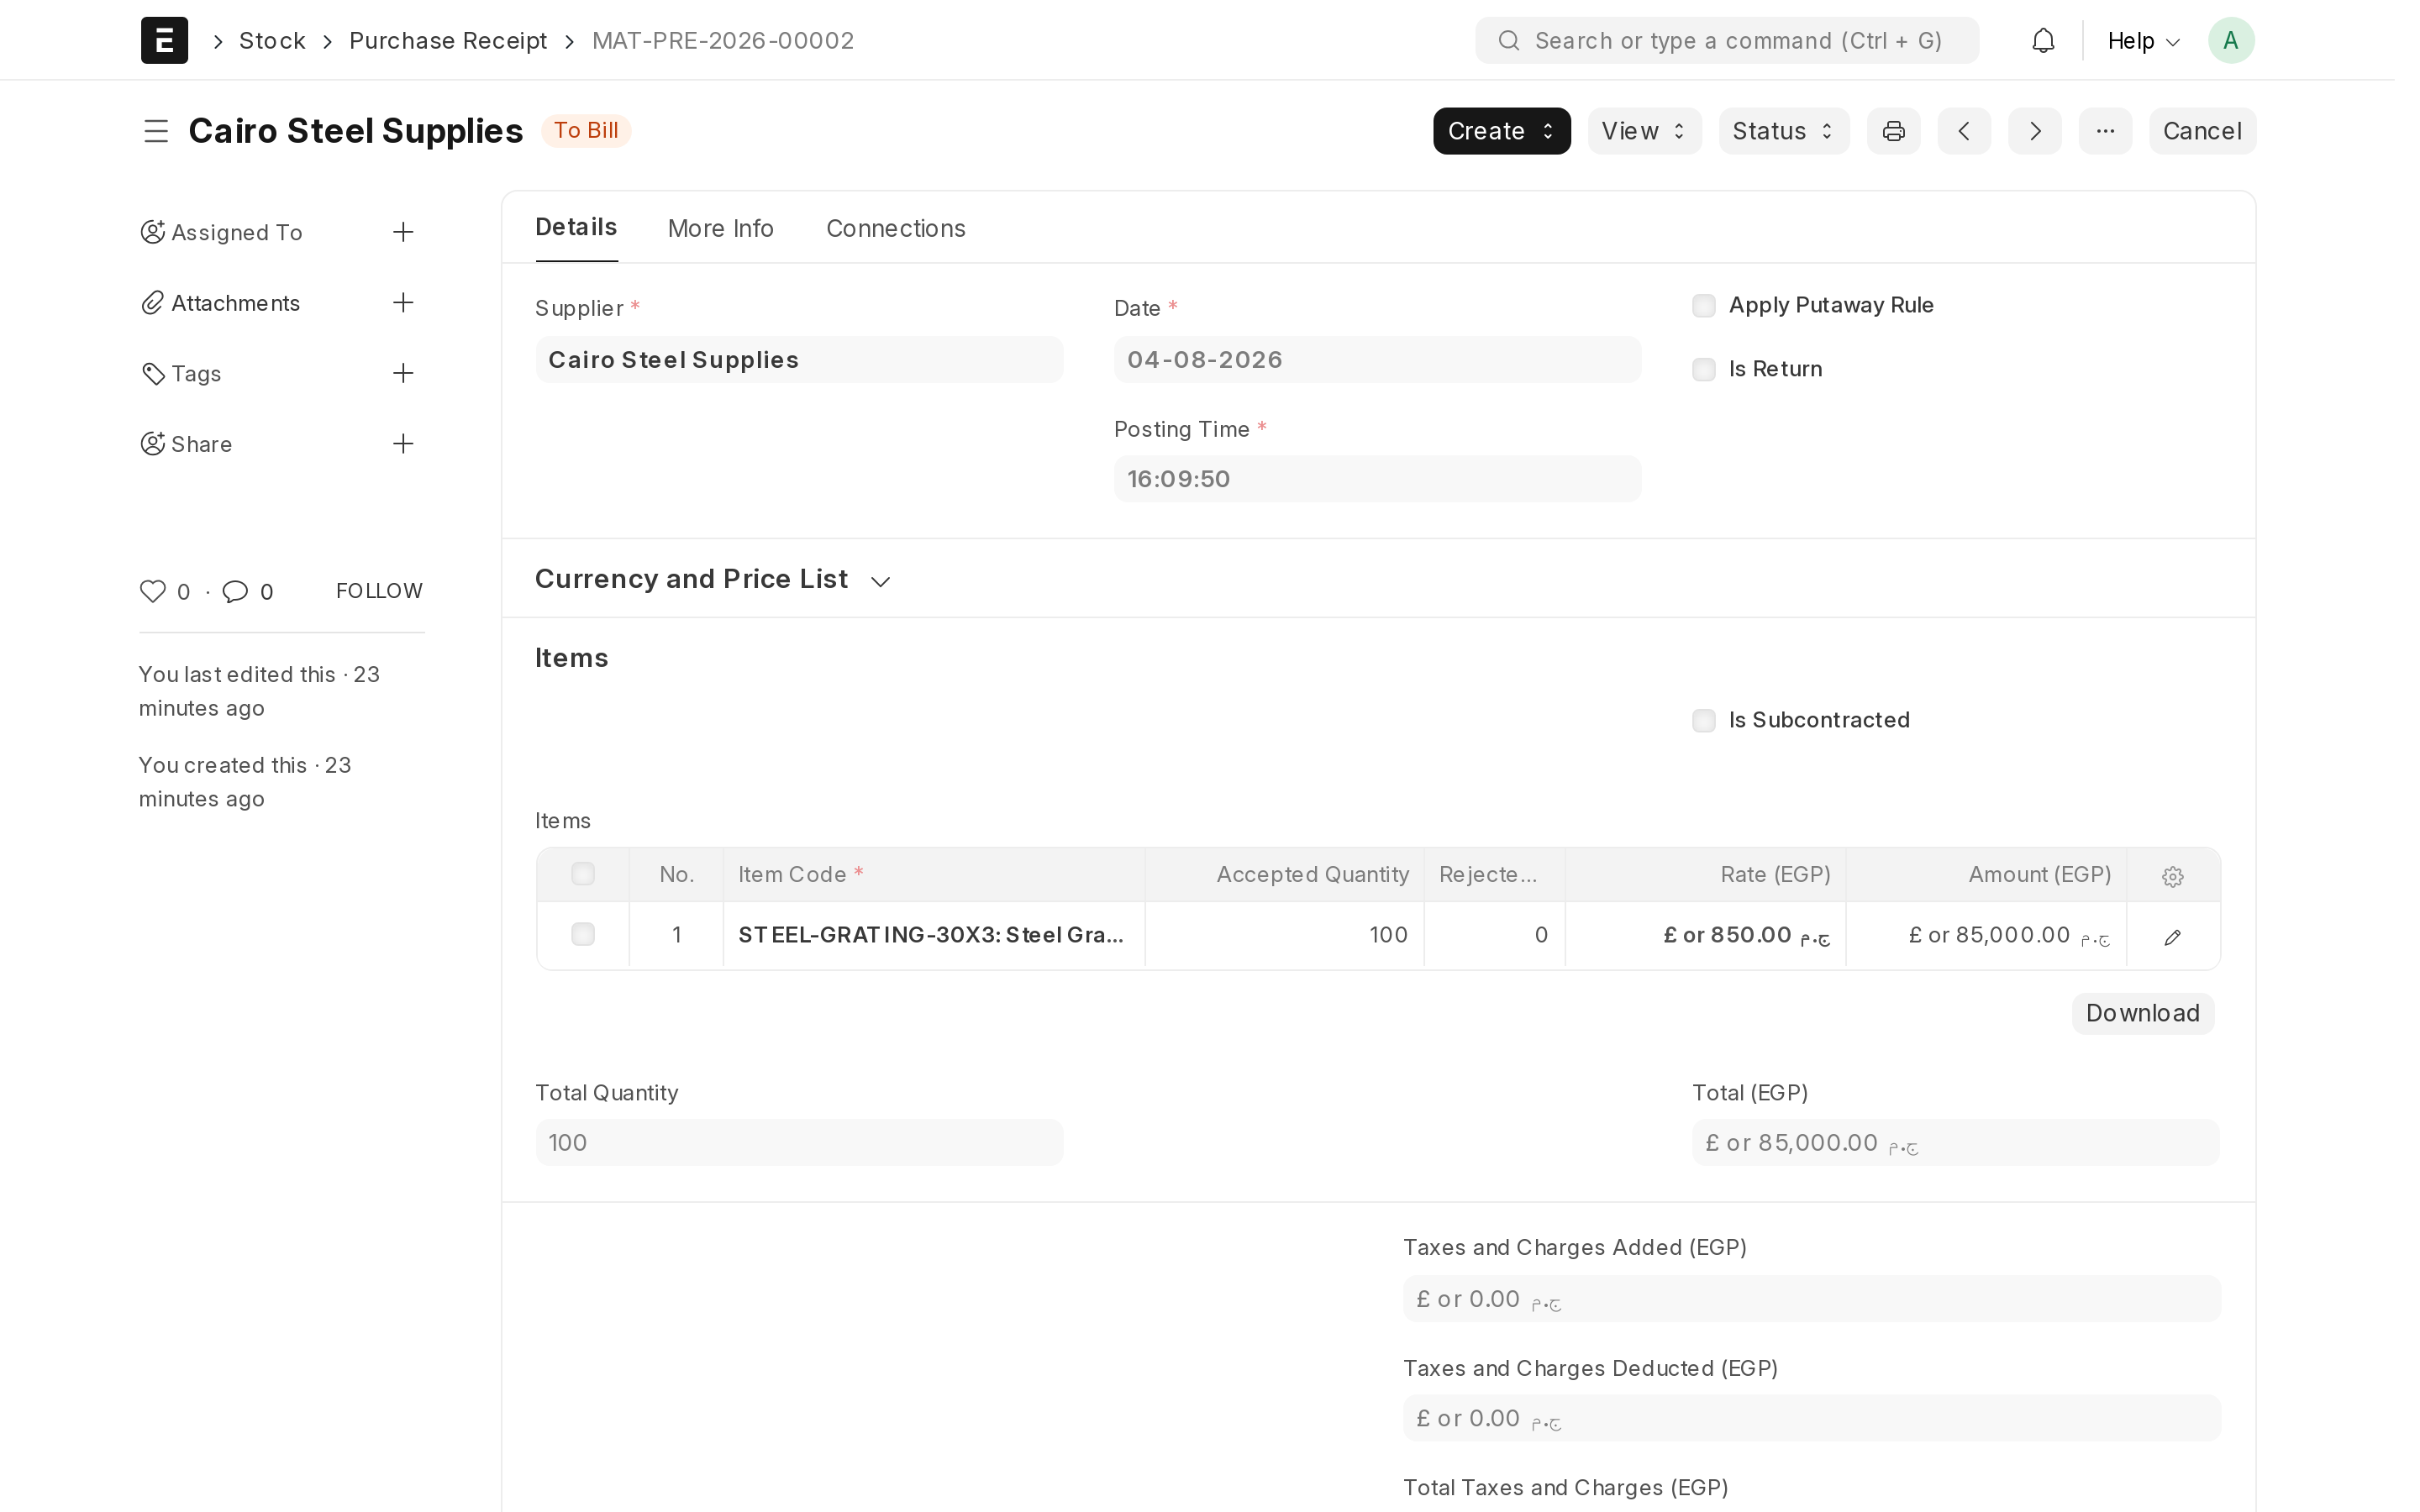
The purchase receipt records that the goods physically arrived. It is the document that puts them into stock, so enter it when the delivery actually lands, not when you order.
- Open the submitted purchase order and click Create → Purchase Receipt. A new receipt opens with the ordered lines already filled in.
- Change the quantity on any line that arrived short or over, so the receipt shows what was really delivered.
- If part of the delivery is damaged or wrong, put the good quantity in Accepted Quantity and the rest in Rejected Quantity, and name a rejected warehouse. The two are then tracked separately instead of mixing into your usable stock.
- Confirm the warehouse on each row.
- Click Save, then Submit. Your stock goes up at the moment you submit.
Step 4 — Purchase Invoice
The purchase invoice records the supplier's bill. This is the document that reaches your accounts, so enter it when the bill arrives.
- Open the submitted purchase receipt (or the purchase order) and click Create → Purchase Invoice.
- Enter the supplier's own invoice number and its date, so your records match the paper you were given.
- Check the taxes on the lines.
- Click Save, then Submit.
Two things are now recorded. The cost is filed either as an expense (things you use up, such as electricity or stationery) or as an asset (things you still own, such as stock and equipment). And the amount you owe this supplier is added to what the reports call payables — money you owe but have not yet paid.
Paying the supplier
The invoice says you owe the money. A payment entry says the money actually left. Until you enter one, the bill keeps showing as unpaid.
- Open the submitted purchase invoice.
- Click Create → Payment Entry.
- Choose the account the money left from (bank or cash), confirm the amount, and Submit.
The invoice status changes to Paid and the supplier's unpaid balance drops. A part payment is fine — enter the smaller amount and the rest stays unpaid.
Warehouses
Your ERP was created with a few standard warehouses already in place. Add one for each real place you keep stock, so reports can tell you not only how much you own but where it is.
- Search Warehouse → New.
- Give it a clear name that matches how your team speaks — "Main Store", "Cairo Branch", "Van 2".
- Choose the parent warehouse, so it appears in the right place in the list.
- Click Save.
Create one warehouse per real physical location. This is the single decision that determines whether stock reports are useful: if two locations share one warehouse record, the system can tell you that you own twelve units but never where they are, and no report will fix that afterwards.
Stock movements that are not a purchase or a sale
Purchases bring goods in and deliveries take goods out. Everything else — moving stock between your own locations, using it up, correcting it — is recorded with a Stock Entry.
- Search Stock Entry → New.
- Choose the type that matches what happened:
- Material Transfer — stock moves from one of your warehouses to another. Set both the source and the target warehouse. Your total stock is unchanged; only its location moves.
- Material Issue — stock leaves without a sale: consumed in production, used internally, scrapped, or given away as a sample. Set the source warehouse only.
- Material Receipt — stock appears without a purchase: found during a count, returned from a job, or your very first opening balance. Set the target warehouse only.
- Add the item rows with quantities.
- Click Save, then Submit. As always, nothing moves until you submit.
After a physical count: Stock Reconciliation
Sooner or later the shelf and the screen will disagree — breakage, an unrecorded issue, a miscount at receipt. Stock Reconciliation is how you make the system match reality after you have physically counted.
- Count the stock properly, on paper or on a phone, warehouse by warehouse.
- Search Stock Reconciliation → New.
- Click Fetch Items from Warehouse. The quantities the system currently believes you have are listed.
- Type the counted quantity next to each item. Leave rows you did not count untouched.
- Click Save, review the differences, then Submit.
The same document is used to enter your opening stock on day one: list what you already own, with the quantity and the value per unit you want the system to carry it at, and submit it once.
The three reports worth knowing
Each of these answers one everyday question. Find them by typing the report name into the
search bar at the top (Ctrl+G).
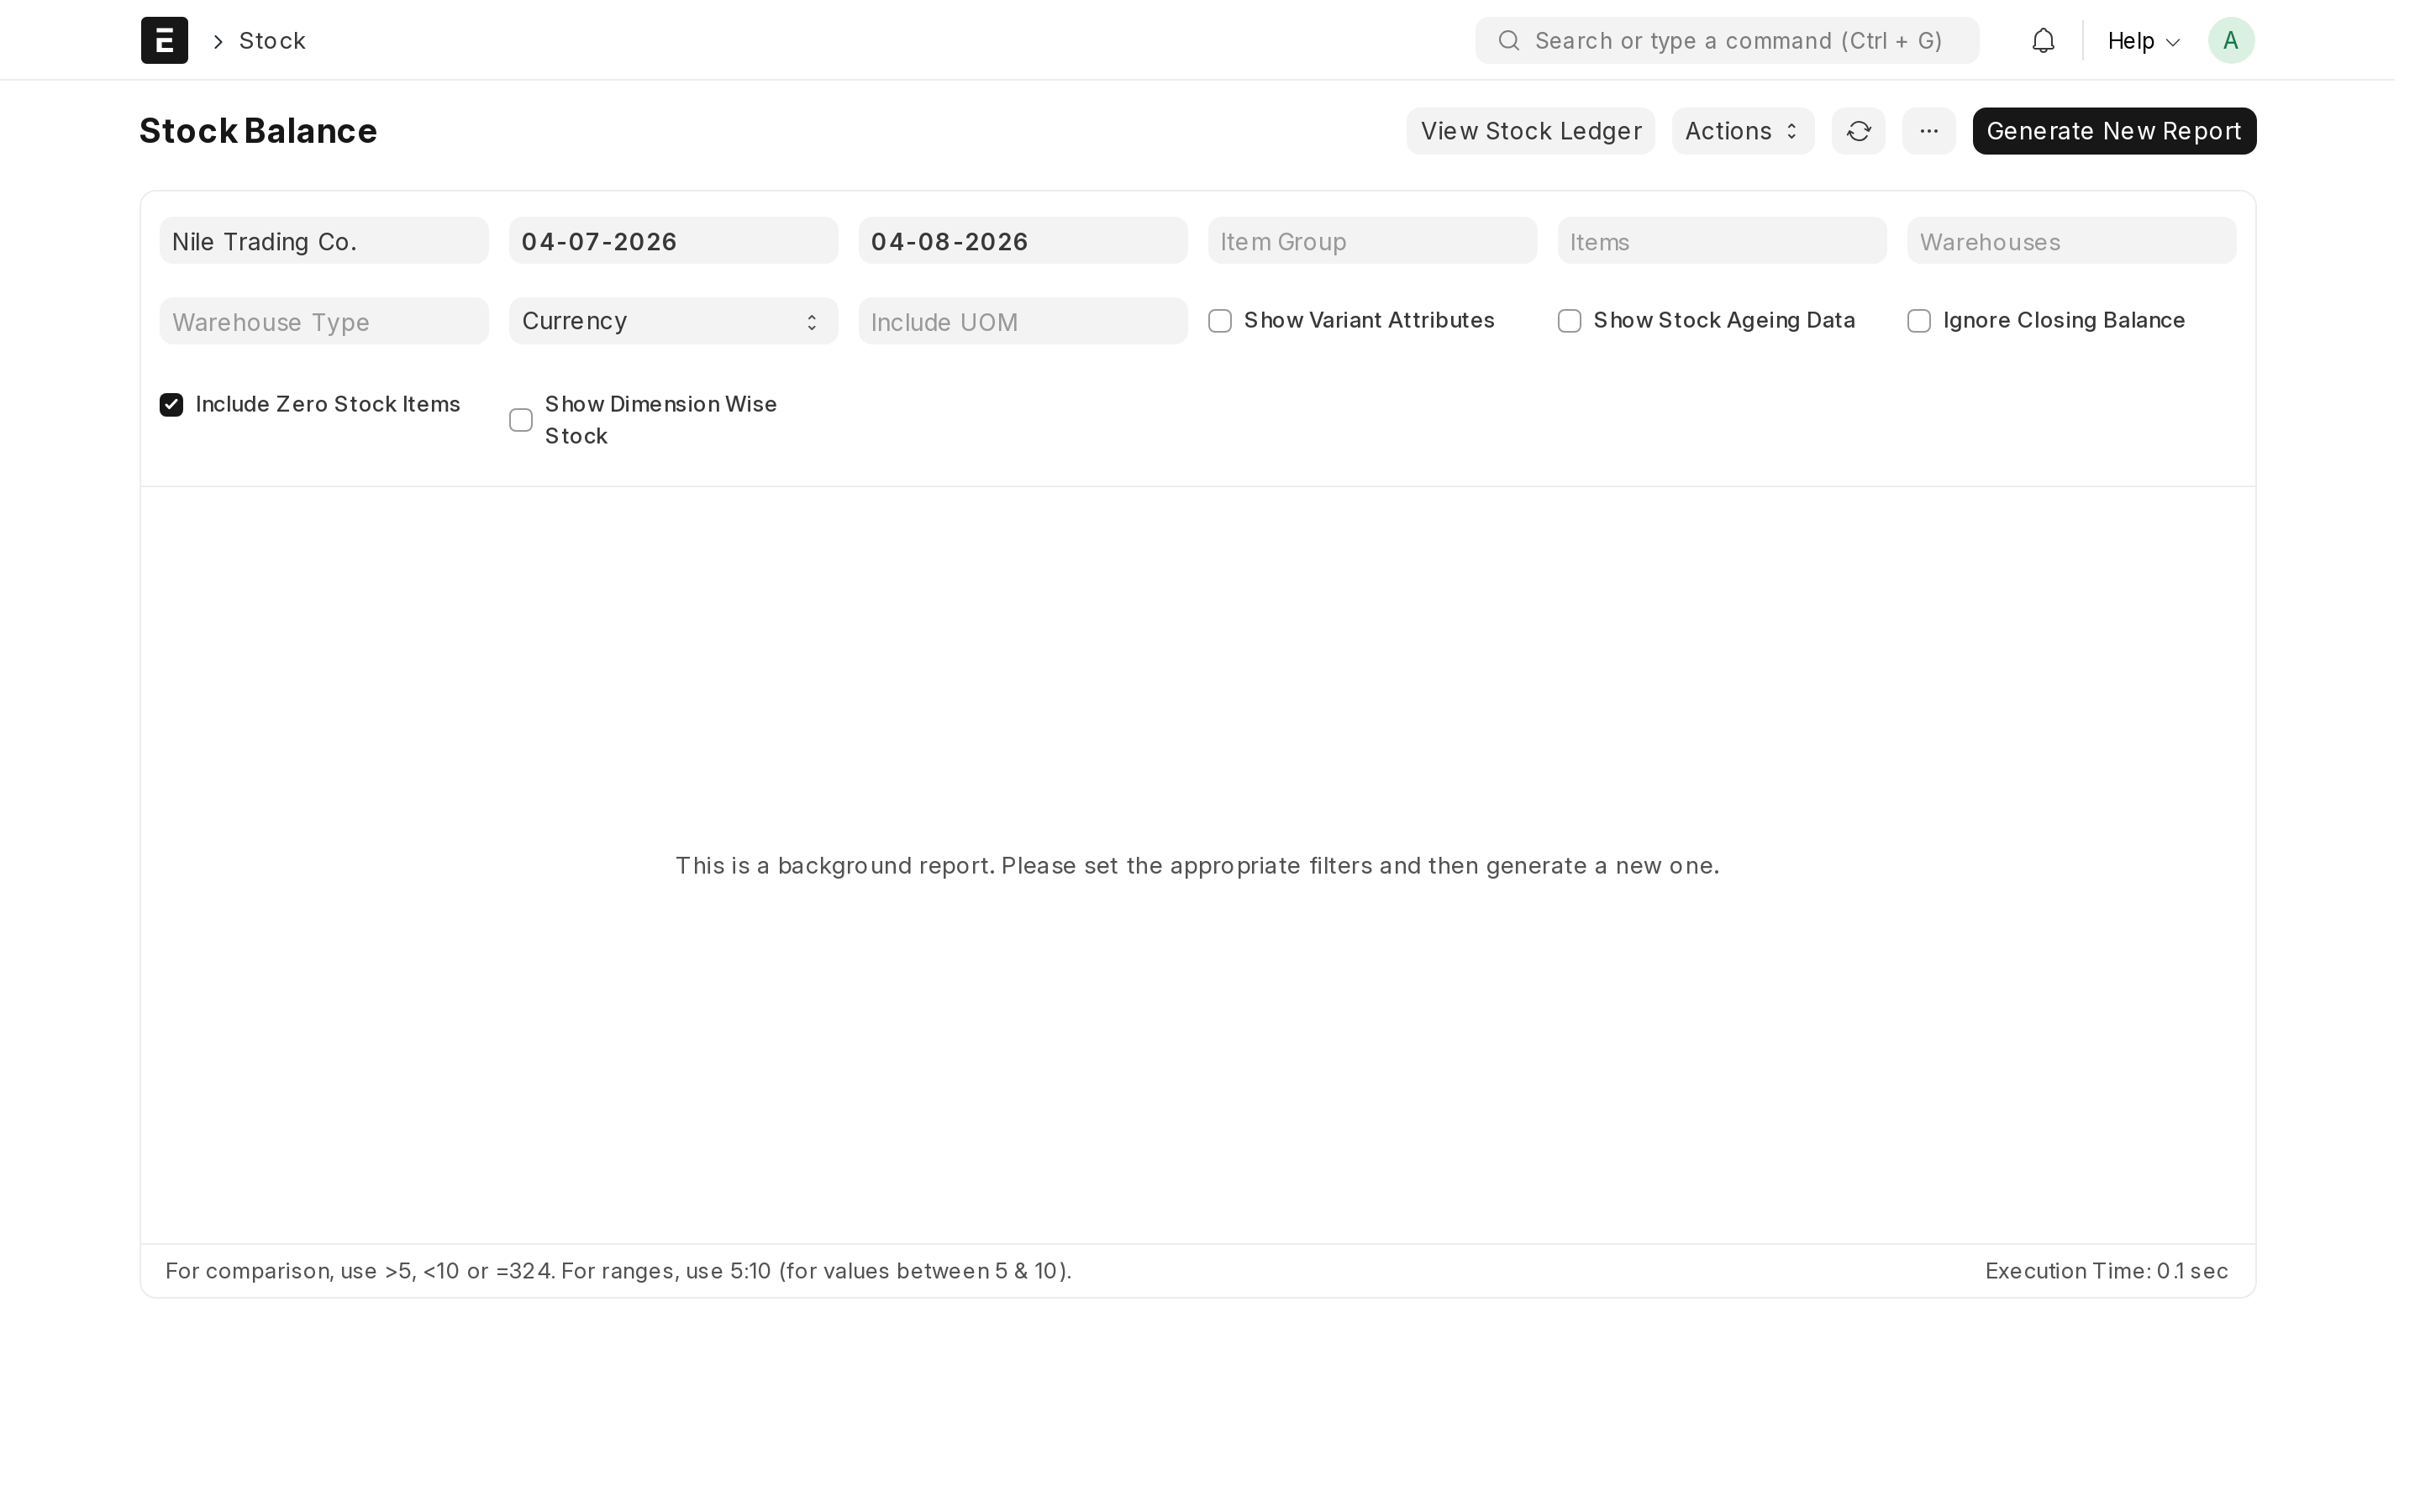
- "Do we have any left?" — Stock Balance shows what you have right now, per item and per warehouse, with its value.
- "Where did it go?" — Stock Ledger lists every movement of an item in order, each one naming the document that caused it.
- "Do I need to order more?" — Stock Projected Qty shows what you will have once the goods you have ordered arrive and the confirmed sales orders ship.
Reorder levels
If an item stops your work whenever it runs out, the system can raise the material request for you instead of you having to remember.
- Open the item and scroll to the Reorder section.
- Click Add Row, then choose the warehouse, the level at which you want to be warned, and the quantity to request.
- Click Save.
- Open Stock Settings once and switch on the option that raises a material request when stock reaches the reorder level. Without it the levels are stored but no request is ever raised.
Set this for the handful of items that hurt when they run out, and leave the rest alone.
Common questions
The supplier sent more than I ordered
Receive what you actually accepted. A purchase receipt can be for a different quantity than the purchase order — the order then shows as partly or over-received.
Can I skip the purchase receipt?
Yes. Enter a Purchase Invoice with Update Stock ticked and it will both bill and receive in one step. This suits cash purchases; separate documents suit credit purchases where the goods and the bill arrive on different days.
I need to return goods to a supplier
Open the purchase receipt and click Create → Return. Submitting the return reduces stock again and leaves a clear trail on both sides.
Something still does not add up
Open the Stock Ledger for that item before changing anything — the document at fault is almost always visible there. If it still looks wrong, email support@nezmaro.com with the item code and your ERP address.
Your counter: supermarket, pharmacy, restaurant
If you chose the Supermarket, Pharmacy or Restaurant edition, your ERP is set up around a till. This chapter is the day at the counter: opening, selling, receiving a delivery, counting the shelf, closing.
Your first page
The page you land on is called Counter (a supermarket or a pharmacy) or Service (a restaurant). Across the top are today's figures, read live from your data: Counter sales today, Takings yesterday, Stock value and what is Expiring in the coming 30 days (90 for a pharmacy); a restaurant sees its takings, the month so far and the ingredients out of stock. Under them are the tiles for the daily jobs — Open the counter (Take an order in a restaurant), Receive delivery, Stock count, Close the till, Items and prices (The menu), Customers or Suppliers, the Expiry report and the Sales register. Nothing on that page changes your data; it only shows it.
Selling at the till
- Open Open the counter — Take an order in a restaurant — (or press
Ctrl+Gand type Point of Sale). - The first time, pick the profile called Main counter. It was created for you: it sells from your Stores warehouse, at your standard prices, in cash by default.
- Scan a barcode, or start typing an item's name and pick it. Change the quantity with the keypad. The till shows the running total with tax.
- Press Checkout, pick the payment (cash is preselected; add cards under Mode of Payment once), enter the amount received; the change is shown.
- Complete order saves and submits the sale and prints the receipt.
Every sale is a POS Invoice. It moves stock out and books the income the moment it is completed — there is no separate "post" step. A return is made from the same screen with Return: pick the original receipt, the refund is recorded and the stock comes back.
The receipt
Your counter prints an 80 mm receipt: your logo and name, the lines as quantity × price, VAT, the total, what was paid and the change. When your company has a VAT number the heading reads Simplified Tax Invoice, which is what a tax authority expects from a shop; otherwise simply Receipt. Both languages are on it. A business customer who needs a full invoice gets the A4 Tax Invoice from the Sales Invoice screen instead.
The receipt prints from the browser's print dialog; choose your receipt printer there once and the browser remembers it. The printer's driver sets the paper width.
Barcodes and prices
Barcodes live on the item: open the Item, section Barcodes, one row per code (most products carry one EAN-13 on the pack; add a second row for a multipack). The till finds the item by any of them. The quickest way to load a whole range is the Your data page (under Data & shop) in the control panel: download the items, prices and barcodes template, fill one row per product, upload it back. Prices come from the Standard Selling price list; change a price there and the till uses it from the next sale.
Receiving a delivery
Receive delivery opens a Purchase Receipt: pick the supplier, add the items and quantities from the delivery note, submit. Stock is on the shelf immediately. When the supplier's bill arrives, make the Purchase Invoice from that receipt (the button on the receipt) so nothing is entered twice; the owed to suppliers figure updates.
Counting the shelf
Stock count opens a Stock Reconciliation: pick the warehouse, the items appear with what the system believes; type what you counted; submit. The difference is written off or found, and the figure on your first page follows. Counting a section a week keeps the whole shop honest without a night of stocktaking.
Pharmacy: batches and expiry
Medicines are set up with Has batch number ticked, so every delivery carries a batch and an expiry date. From then on the pharmacy rule applies by itself: the till and every outward document take the earliest expiry first, the Expiring in 90 days figure on your first page counts what must leave the shelf, the Expiry report lists it batch by batch, and the daily brief names it. Use the medicines, batches and expiry template on the Data page to load a stock with batches.
Restaurant: the menu
The menu is item groups: Starters, Mains, Drinks, Desserts and Extras were created for you. File each dish under one of them and the till shows the groups as tabs, the sales register groups by them, and the brief tells you the best-selling group. Rename or add groups freely under Item Group.
Tables. The till has no table box, but it always has a customer box — so the tables are customers: Table 1 to Table 12, Takeaway and Delivery were created for you in the group Tables. Pick the table as the customer when you take the order; the receipt and the kitchen ticket print it, and the sales register can group by it. Rename or add tables under Customer, keeping the group Tables.
The kitchen ticket. Every order can print a second slip with no prices — the table, the time, who took it, and the dishes by category in large type. From the till, open Recent orders, pick the order, Print → choose Kitchen Ticket; from an order's page, the printer icon offers the same. And it prints by itself: when the till is set to print the receipt on completion (it is, for a restaurant), the kitchen ticket follows the receipt the moment an order is completed, and the order summary has a Kitchen button to print it again. Choose the kitchen printer in the print dialog once and the browser remembers it — allow pop-ups for your ERP's address, since each print opens in its own window.
Staff at the till
A cashier does not need an email address. In the control panel, Users → Add till staff: type their name and a short sign-in name (say sara), and a password is made for you — write both on a card. At your ERP's login box they type the sign-in name where it says "Email Address" and the password below. They can sell, open and close the till and see customers; they cannot reach the accounts or the settings. Lost the card? New password on the Users page makes another; Deactivate ends their access the day they leave. Every till login counts as one of your plan's users.
Egypt: e-receipts
A shop in Egypt must report every counter sale to the Tax Authority as an e-receipt. Your ERP does it by itself once it is set up: in the control panel, My business → E-receipts. You need three things from the taxpayer portal: your registration number, your branch code, and a registered POS device (its Client ID, Client Secret and serial number). Press Prepare, then Connect. From then on each completed sale is reported the moment the receipt prints, and the receipt carries the Tax Authority's number at the bottom.
One thing only you can do: the Tax Authority must know your products. Prepare gives every item a code made of EG, your RIN and the item code, such as EG-123456789-TEA01; register those codes in the taxpayer portal (GS1 barcodes work too — put the GS1 code on the item instead). Until a code is registered the Tax Authority rejects receipts for that item; the E-receipts page shows each submission and what came back.
Closing the till
At the end of the day, Close the till opens a POS Closing Entry: it lists the day's sales by payment method against what you counted in the drawer, and submits them into the accounts as one batch. Then the daily brief the next morning tells you how the day went — and, if you set it up on the WhatsApp page, it arrives on your phone.
Your clinic
If you chose the Hospital edition, your ERP knows about patients, practitioners and appointments, and bills a visit the way a clinic does. This chapter follows one patient from the phone call to the paid bill.
Your first page
The page you land on is Clinic: Appointments today, Patients, Open encounters (visits started and not yet closed) and who is Admitted now, and the tiles for the daily jobs — New appointment, Register patient, Start encounter, Lab tests, Admit patient, Billing, Patients and the Appointments calendar. The daily brief sends the same figures every morning and lists today's appointments.
Who is who
| Record | What it is |
|---|---|
| Patient | The person treated: name, mobile, date of birth, notes. Created once, reused for every visit. A patient is also a customer in the accounts, automatically. |
| Healthcare Practitioner | A doctor, dentist, physiotherapist… with their schedule and their consultation fee. |
| Healthcare Service Unit | A room, a chair, a bed — where an appointment happens. |
| Item | Everything you charge for: a consultation, a procedure, a lab test, a medicine. Set up as items with a price (press Ctrl+G, Item). |
The practitioners and procedures and services templates on the Your data page (under Data & shop) load a whole team and a price list in one upload.
Booking an appointment
- New appointment: pick the patient (or Register patient first, or type a new name and create them on the spot), the practitioner, the date. Free slots appear from the practitioner's schedule; pick one.
- Save. The appointment is on the calendar and on tomorrow's brief.
- When the patient arrives, Check in on the appointment. When the visit is over, the practitioner records the Patient Encounter: diagnosis, notes, prescribed medicines and procedures.
Billing the visit
Billing makes a Sales Invoice for the patient. Use Get items from → Healthcare services to pull the consultation, the procedures and the lab tests of the encounter onto the bill in one go; add medicines from stock as ordinary items. Submit, then record the payment — at the desk with Payment Entry, or tick Is paid on the bill for a cash payment on the spot.
The bill prints as a Patient Bill: the patient and the practitioner at the top, the services as lines, VAT if you charge it, what was paid and the balance due — in both languages. If the company has a VAT number the bill is also a tax invoice.
Medicines and consumables
Stock works exactly as in the Buying and stock chapter: a Purchase Receipt puts medicines on the shelf, batches carry expiry dates, the running out figure warns you, and a medicine on a bill leaves stock when the bill is submitted.
Who can see what
The admin user created in the wizard can do everything. Give a doctor the Physician role and a nurse Nursing User: they see patients, appointments and encounters, not the accounts. The Your team chapter shows how roles are given.
Your online shop
If you chose the Online Seller edition, your ERP has a web shop built in: the products you publish are for sale on your own address, orders land in your ERP, and the same stock serves the shop and the counter. This chapter follows one product from being published to being packed.
Your first page
The page you land on is Shop: orders today, what is to deliver, sales this month, how many items are on the website, and the tiles — Website items, New orders, Shipments, Payment gateway, Stock levels, Returns, Customers, Sales register. The daily brief tells you every morning what is waiting to be packed.
Putting a product on the website
- Create the Item as usual (name, price, a photo under Image), or load a range with the items, prices and barcodes template on the Data page.
- Open Website items → New, pick the item, write the description shoppers will read, tick Published. The website items template on the Data page does this for many products at once.
- Your shop is at /all-products on your ERP's address. Shoppers browse, add to the cart, and check out; they create their own account on the way.
The shop shows the Standard Selling price and, when Stock levels are enabled in the shop settings, whether an item is in stock in your Stores warehouse.
Taking payment online
Payment gateway is where cards and wallets are connected. Set up your provider's account once (Stripe, PayPal, or a regional gateway — the settings screen lists what is available), then enable Enable checkout in the shop settings. Until then, the shop takes orders and you collect payment on delivery.
From order to parcel
- A checkout creates a Sales Order. New orders lists them; open one and Submit it to confirm.
- Create → Delivery Note from the order: the items to pack, the address to ship to. Submit it when the parcel leaves — that takes the stock out.
- Print the delivery note: it prints as a Packing Slip — the order reference, the items with a tick box for the packer, the address, and no prices (the invoice has those). Put it in the parcel.
- Create → Sales Invoice from the delivery note. For a card payment the invoice is paid already; for cash on delivery record the Payment Entry when the courier settles.
Returns
Returns makes a credit note against the invoice and a return delivery note that brings the item back into stock. Refund through the gateway or by Payment Entry.
Your own address
The shop lives at yourcompany.nezmaro.com. To use shop.yourcompany.com instead, open Data & shop → Your domain in the control panel: type the name, add the one DNS record it shows at the company that manages your domain, press Check. The certificate is issued automatically; your old address keeps working.
Receipts and orders on WhatsApp
With a WhatsApp Business number connected on the WhatsApp page (Marketing → Set up WhatsApp), every invoice with a mobile number on it reaches the customer as a PDF on WhatsApp the moment it is submitted, and your daily brief can reach you the same way.
Accounting basics
The accounting side of your ERP, explained for someone who runs a business rather than someone who trained as an accountant.
You are not starting from zero
When your ERP was created, the accounting foundation was set up for you. Before you touch anything, you already have:
- A Company record carrying your company name, currency and country. Every document you create belongs to it.
- A complete Chart of Accounts — the standard list of accounts a business needs, generated from your country's template. More on this below.
- A Fiscal Year — the twelve months your profit is measured over. It does not have to run January to December; it is whatever period your tax authority uses. Reports use these dates to know which period they cover.
In other words, you can issue an invoice on your first day and the figures will land in the right places. What follows is how to adjust that foundation to your own business, and how to read what comes out of it.
The chart of accounts
An account is a labelled box that one kind of money goes into: rent, sales, the bank, what customers owe you. The chart of accounts is the full list of those boxes. Every invoice, payment and expense ends up in one of them, and every report is those boxes added up in a particular way.
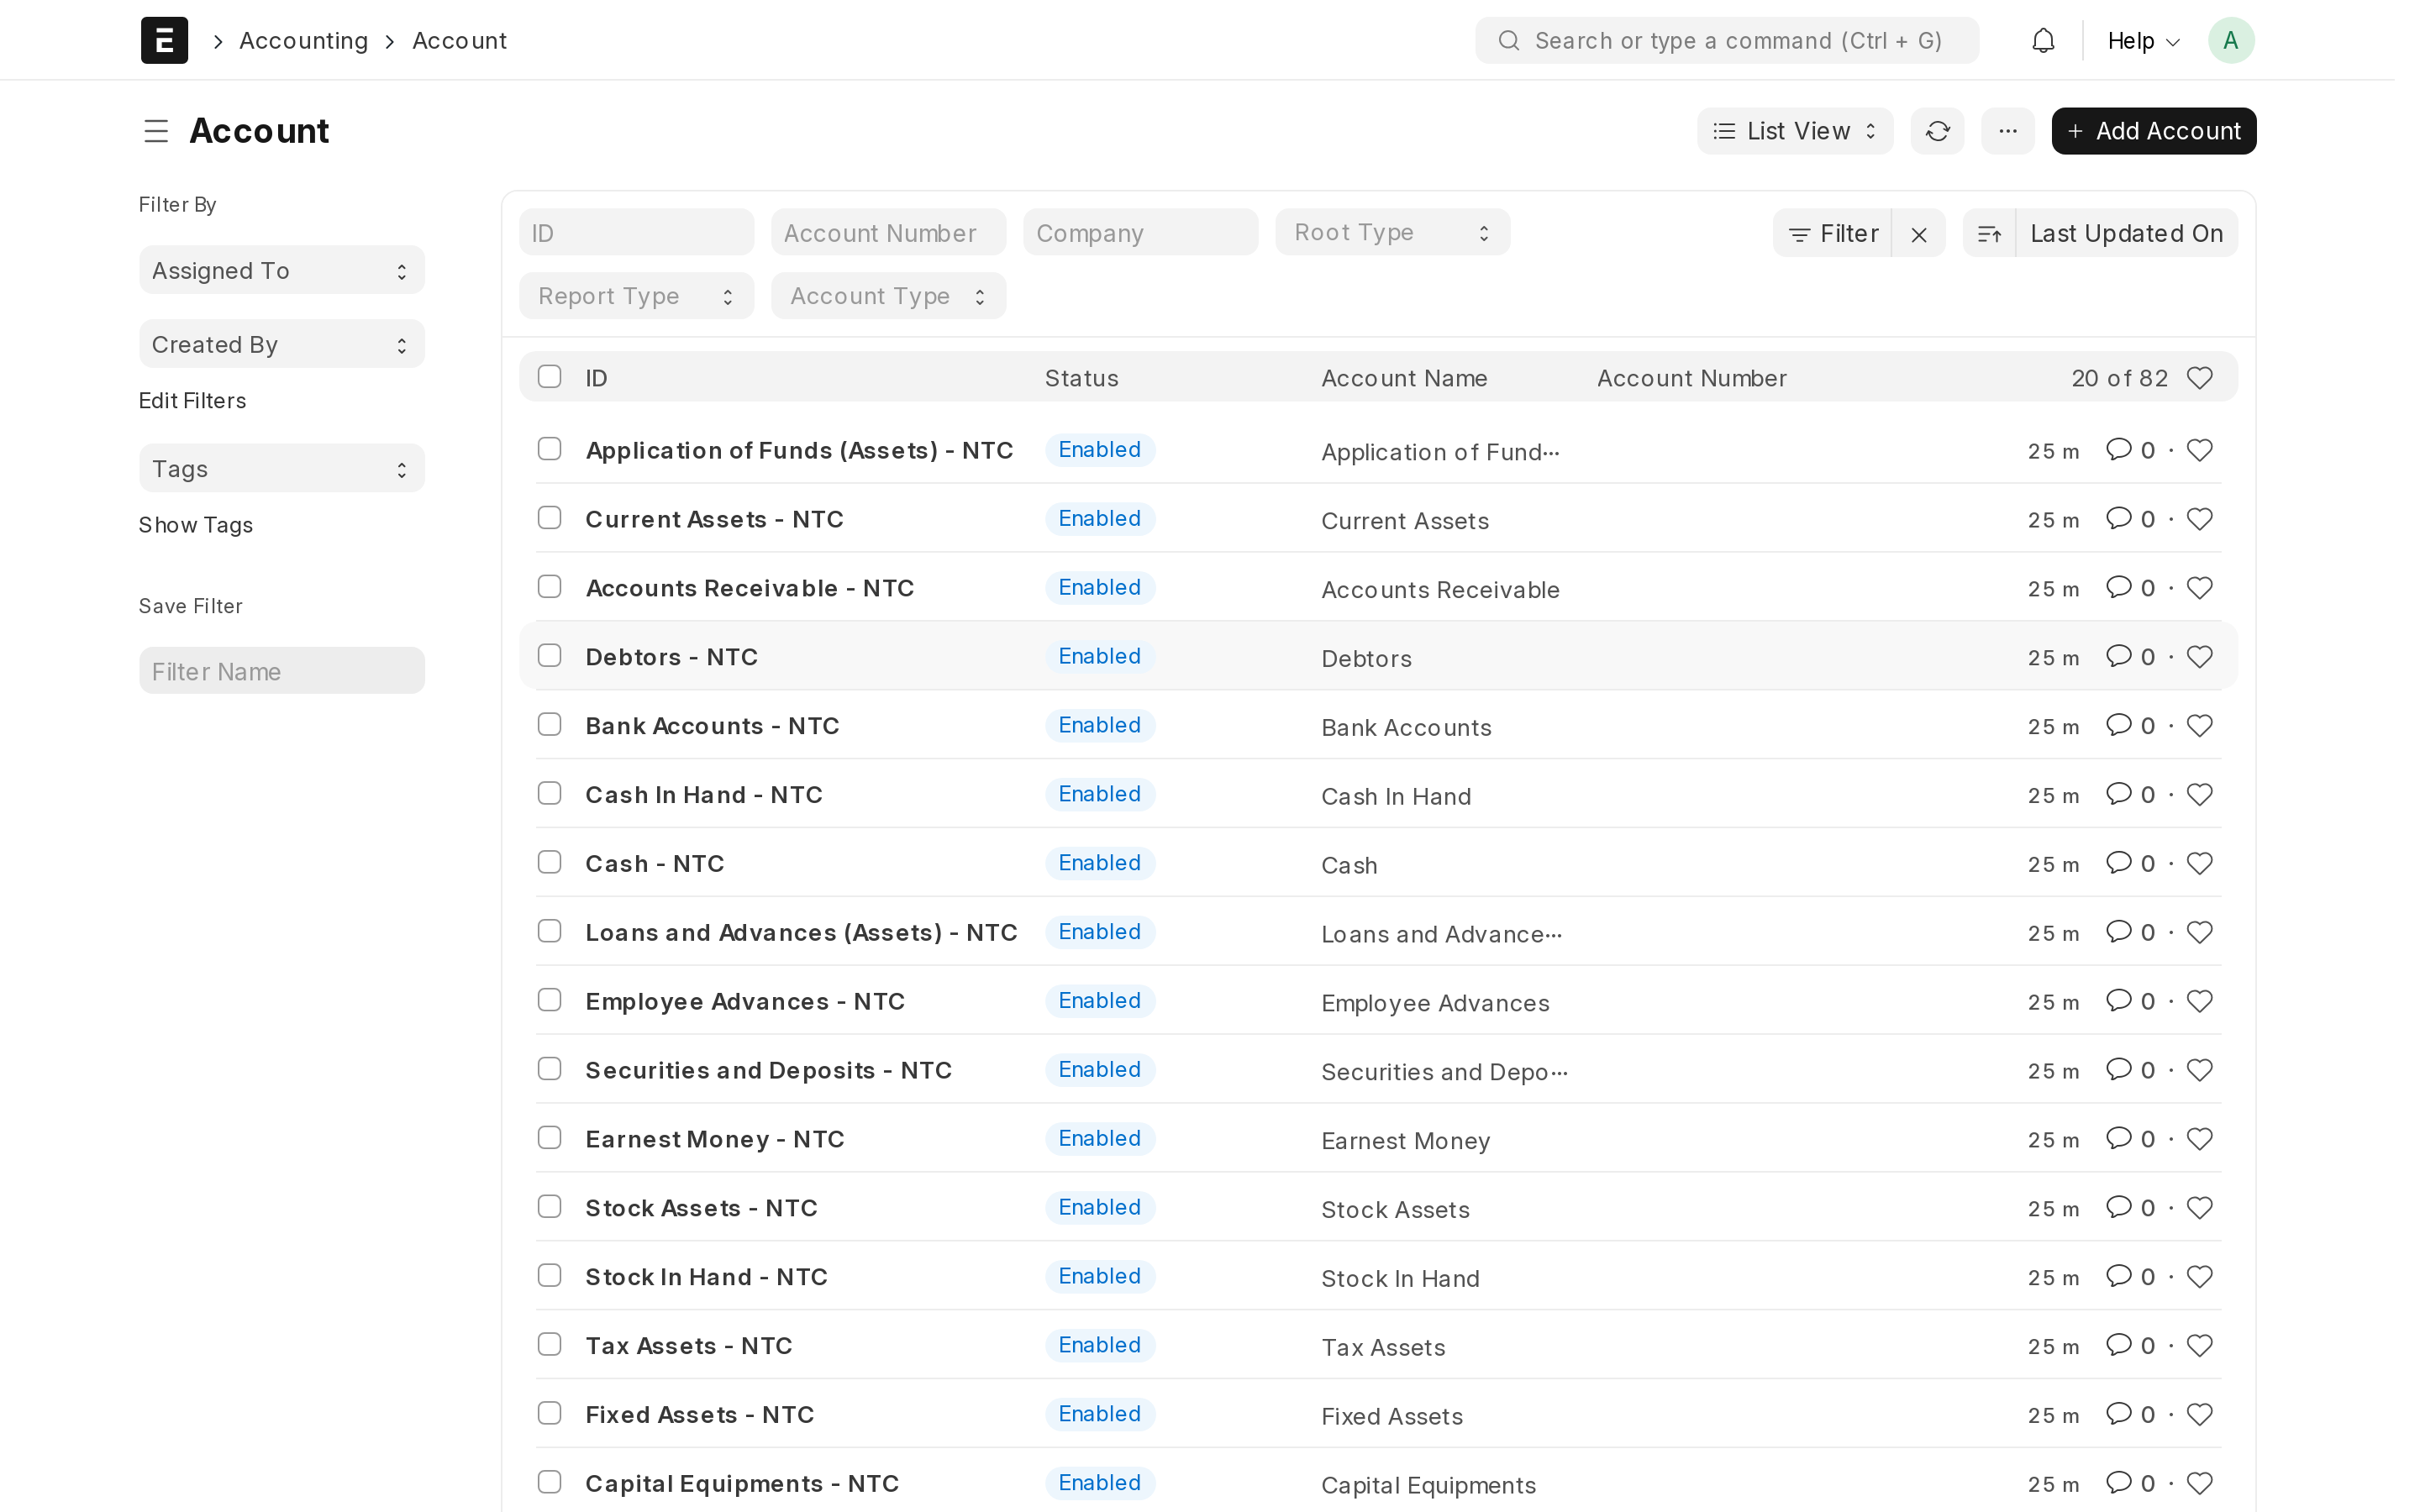
Open it by typing Chart of Accounts into the search bar at the top
(Ctrl+G). It is shown as a tree you can expand.
The five kinds of account
| Type | What it holds | Examples |
|---|---|---|
| Asset | What you own | Bank, cash, stock, equipment, money customers owe you |
| Liability | What you owe | Suppliers, loans, tax due, salaries due |
| Income | What you earn | Sales, service revenue, other income |
| Expense | What you spend running the business | Rent, salaries, electricity, the cost of the goods you sold |
| Equity | What would be left for the owners after everything owned was sold and everything owed was paid | Capital put in, profit kept in the business |
Everything in the tree sits under one of these five. If you are ever unsure where a new account belongs, decide which of the five it is first — the rest usually follows.
Folders and the accounts you can actually use
Two kinds of row appear in the tree:
- A group is a folder. It holds other accounts and shows their total, and nothing is ever recorded straight into it — for example "Direct Expenses".
- A ledger account is one of the boxes themselves, and this is where amounts actually land — for example "Electricity Expense". Ledger is the old word for a running list of entries kept in date order, which is exactly what sits behind each of these accounts.
When the system records an amount into an account, that is called posting. If an account does not appear in the list while you are filling in a document, it is almost always because it is a folder, and postings only go to ledger accounts.
Adding an account
Add an account when a cost or an income stream matters enough to you that you want to see it on its own line in a report.
- Open Chart of Accounts.
- Expand the tree and click the group the new account belongs under — for instance "Indirect Expenses" for a new running cost.
- Click Add Child. A small panel opens.
- Type the account name and leave Is Group unticked, so the account can receive postings. Set the account type if the system asks for one.
- Click Save. The new account appears under the group you chose.
Taxes
Tax rules differ from country to country, so the ERP does not assume any rate. You describe your tax once as a template — a saved set of tax rows — and from then on it is applied with one click on every document.
Creating a sales tax template
Do this before you issue your first invoice, so tax appears on it correctly rather than being added by hand.
- Search Sales Taxes and Charges Template → New.
- Give it a name people will recognise — "Standard rate", "Exempt", "Export".
- In the table, click Add Row, choose On Net Total, pick the tax account (under Duties and Taxes in your chart of accounts), and type the rate that applies where you operate.
- Tick Default if this is the template most of your sales use, so it is filled in for you on new invoices.
- Click Save.
The rate is a plain number you type, and it must be the rate your own tax authority sets — the system has no opinion about it. As an example only: a business whose rate was 15 percent would type 15 in the Rate column. Create one template per situation you actually face — your standard rate, a zero rate for exports, an exempt category — rather than editing a single template back and forth.
Purchase tax templates
Do the same with Purchase Taxes and Charges Template for tax your suppliers charge you. It is a separate template because it usually points at a different account: tax you charge customers is money you will hand over, while tax you pay suppliers can often be claimed back. Your accountant will tell you which accounts to use.
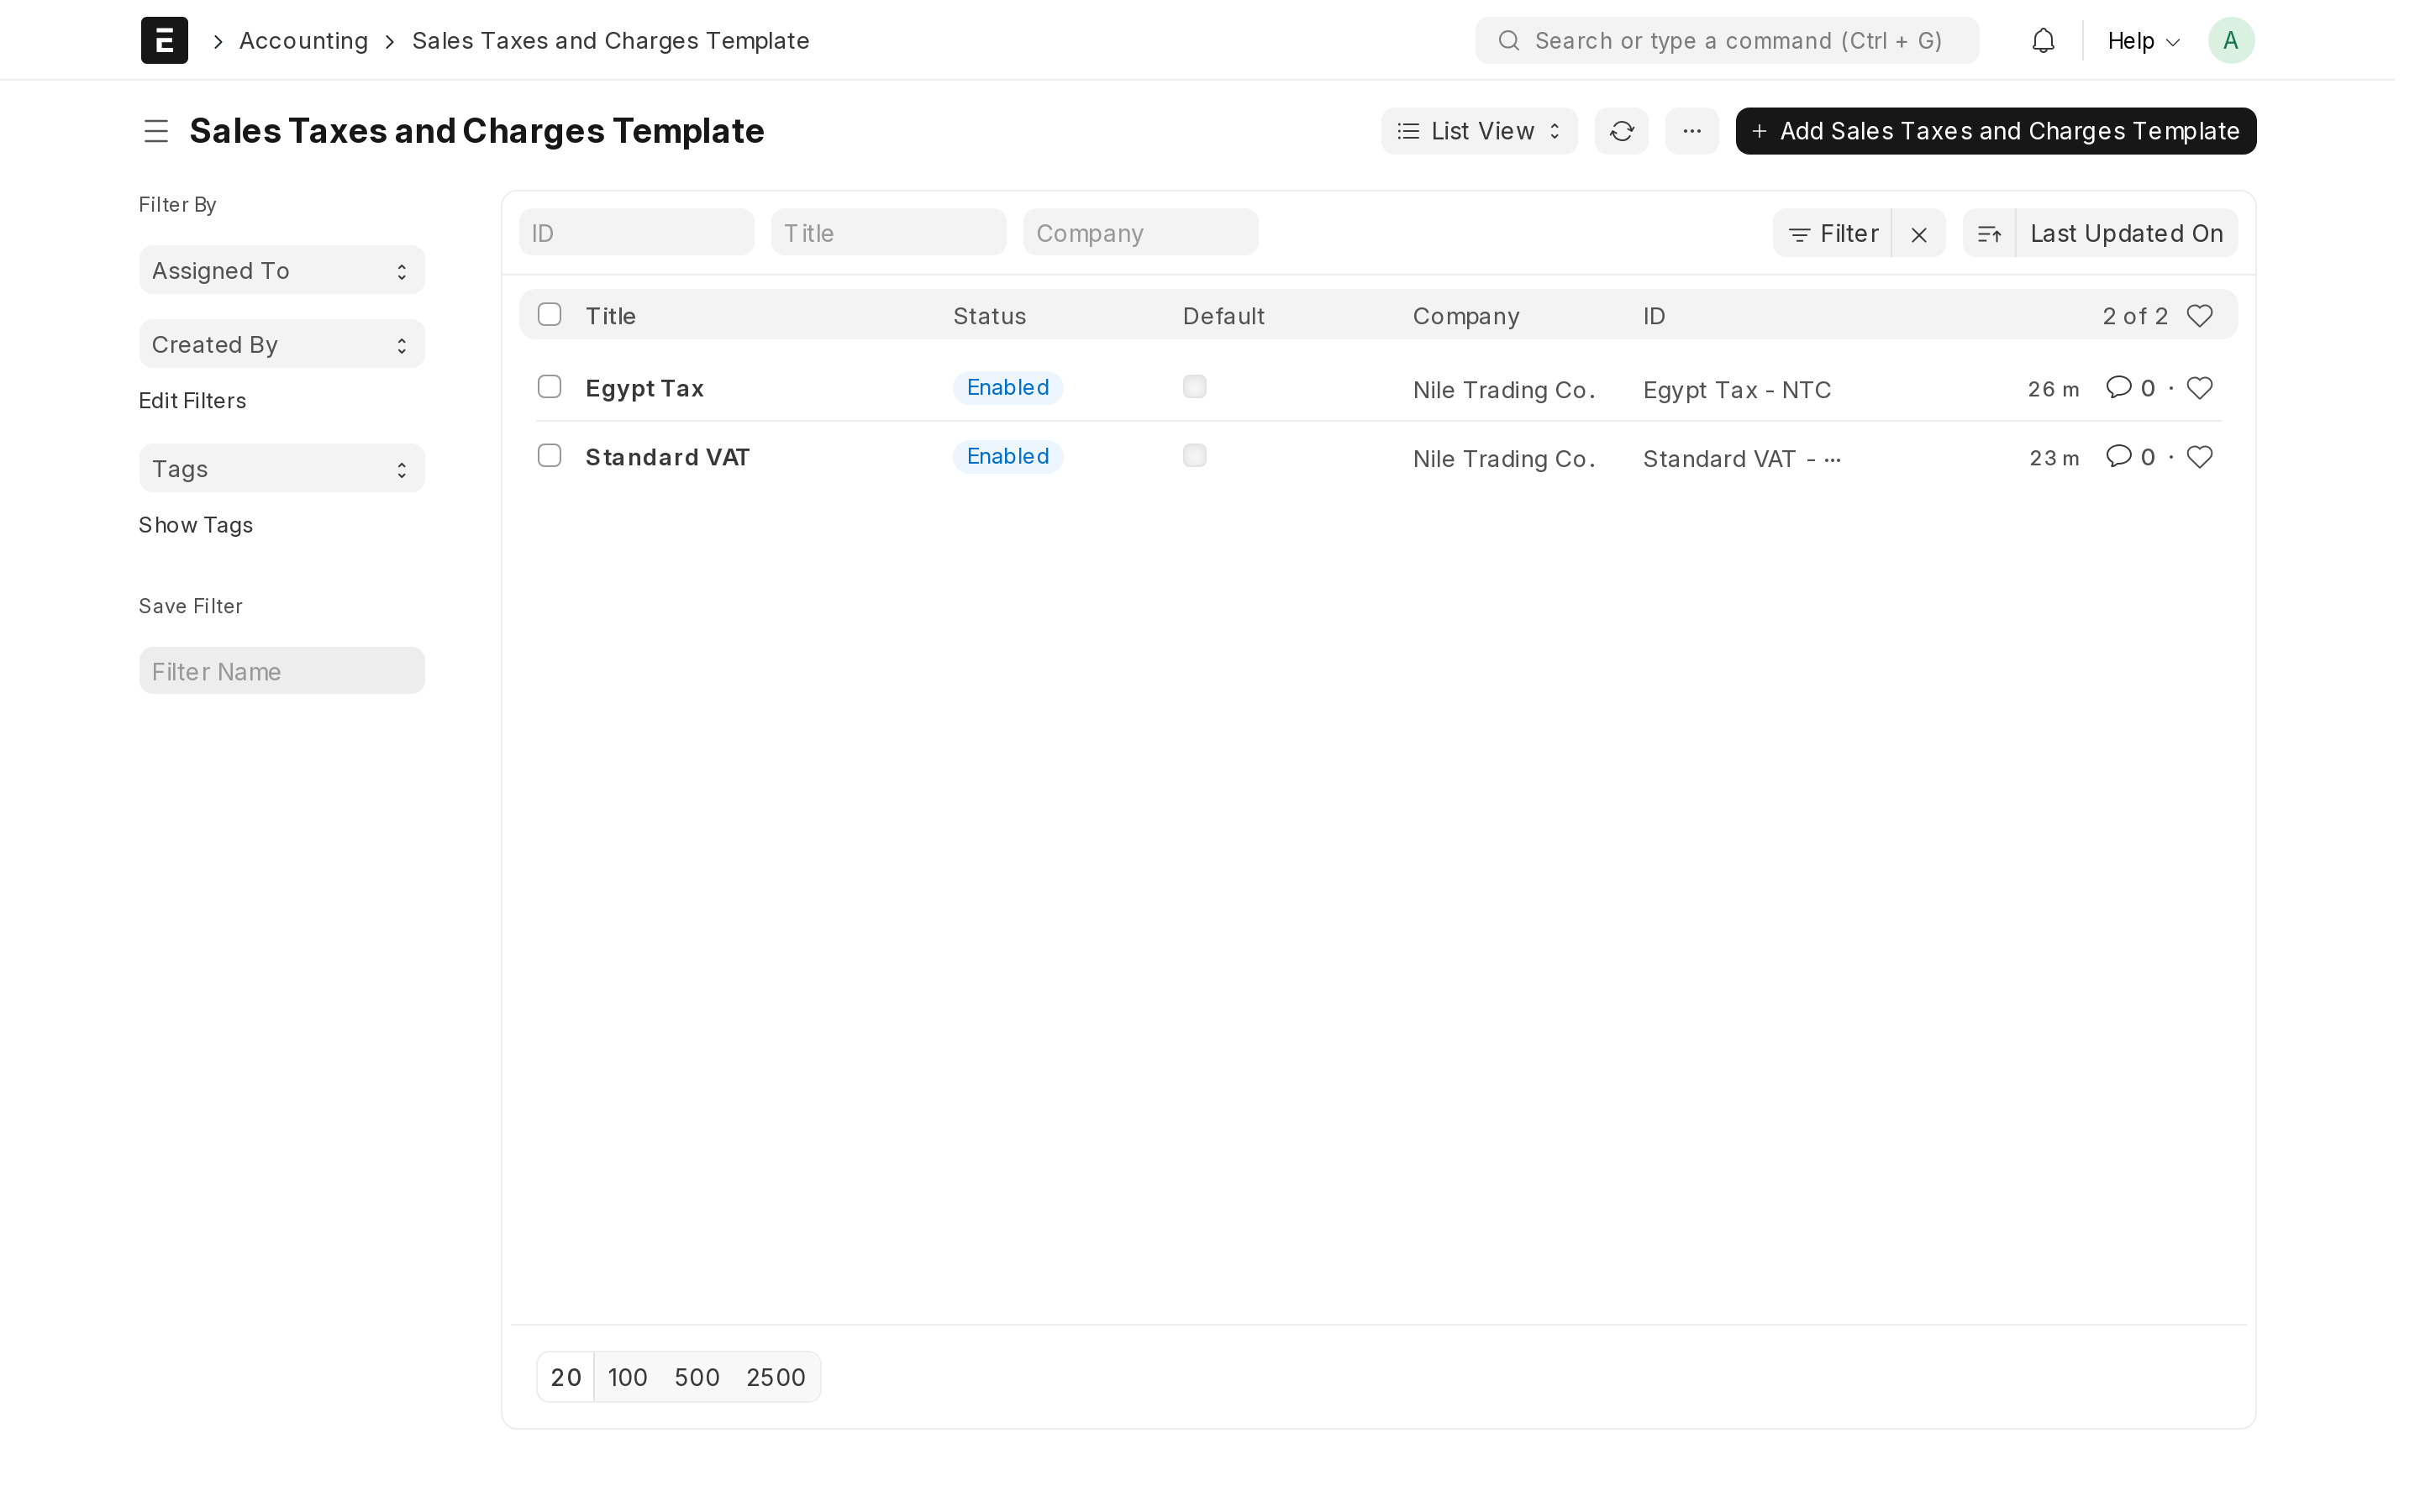
Recording payments
An invoice records who owes what. A Payment Entry records that money actually moved. Both are needed: until the payment entry exists, the invoice keeps showing as unpaid.
Money coming in
- Open a submitted sales invoice.
- Click Create → Payment Entry. The customer and the amount are filled in for you.
- Choose the bank or cash account the money arrived in, confirm the amount, and Submit.
Money going out
- Open a submitted purchase invoice.
- Click Create → Payment Entry.
- Choose the account the money left from, confirm the amount, and Submit.
Either way, the invoice is marked Paid and the customer's or supplier's unpaid balance changes. Part payments are normal: enter the smaller amount, and the rest stays unpaid.
You can also record a payment that has no invoice yet — a customer paying in advance, or a deposit you put down with a supplier. Search Payment Entry → New, choose whether you are receiving or paying, and name the customer or supplier. It can be matched against an invoice later.
Bank and cash accounts
Every place money physically sits needs its own account: each bank account, the petty cash box, the till at each branch, and any payment wallet you use. Your ERP starts with one general bank account and one cash account. Add the real ones the same way you add any account, under the Bank Accounts or Cash In Hand group.
Keeping them apart is what lets you check the ERP against a real bank statement at the end of the month — going down both lists line by line until they agree. Accountants call that reconciling, and it is the main way errors get caught early. A single lumped-together "money" account cannot be checked against anything.
The reports you will actually use
Every report answers one question. Start from the question you have, not from the report name. Find each one by typing its name into the search bar.
| The question you are asking | The report to open |
|---|---|
| Who owes me money, how much, and since when? | Accounts Receivable — receivable is the accounting word for money owed to you. Open it before chasing customers for payment. |
| Who do I owe, and when does it fall due? | Accounts Payable — payable is money you owe. Open it before deciding what to pay this week. |
| Did we make money last month? | Profit and Loss — everything you earned over a period, minus everything you spent in it. |
| What is the business worth on paper today? | Balance Sheet — what you own and what you owe at a single date. This is the one a bank, an investor or your accountant will ask for. |
| Where exactly did this figure come from? | General Ledger — every individual entry, filtered by account, customer or supplier, and date. |
| Does anything look out of place across all my accounts? | Trial Balance — every account in one list with its balance. It is mainly your accountant's overview, and a quick way to spot an account holding an amount that cannot be right. |
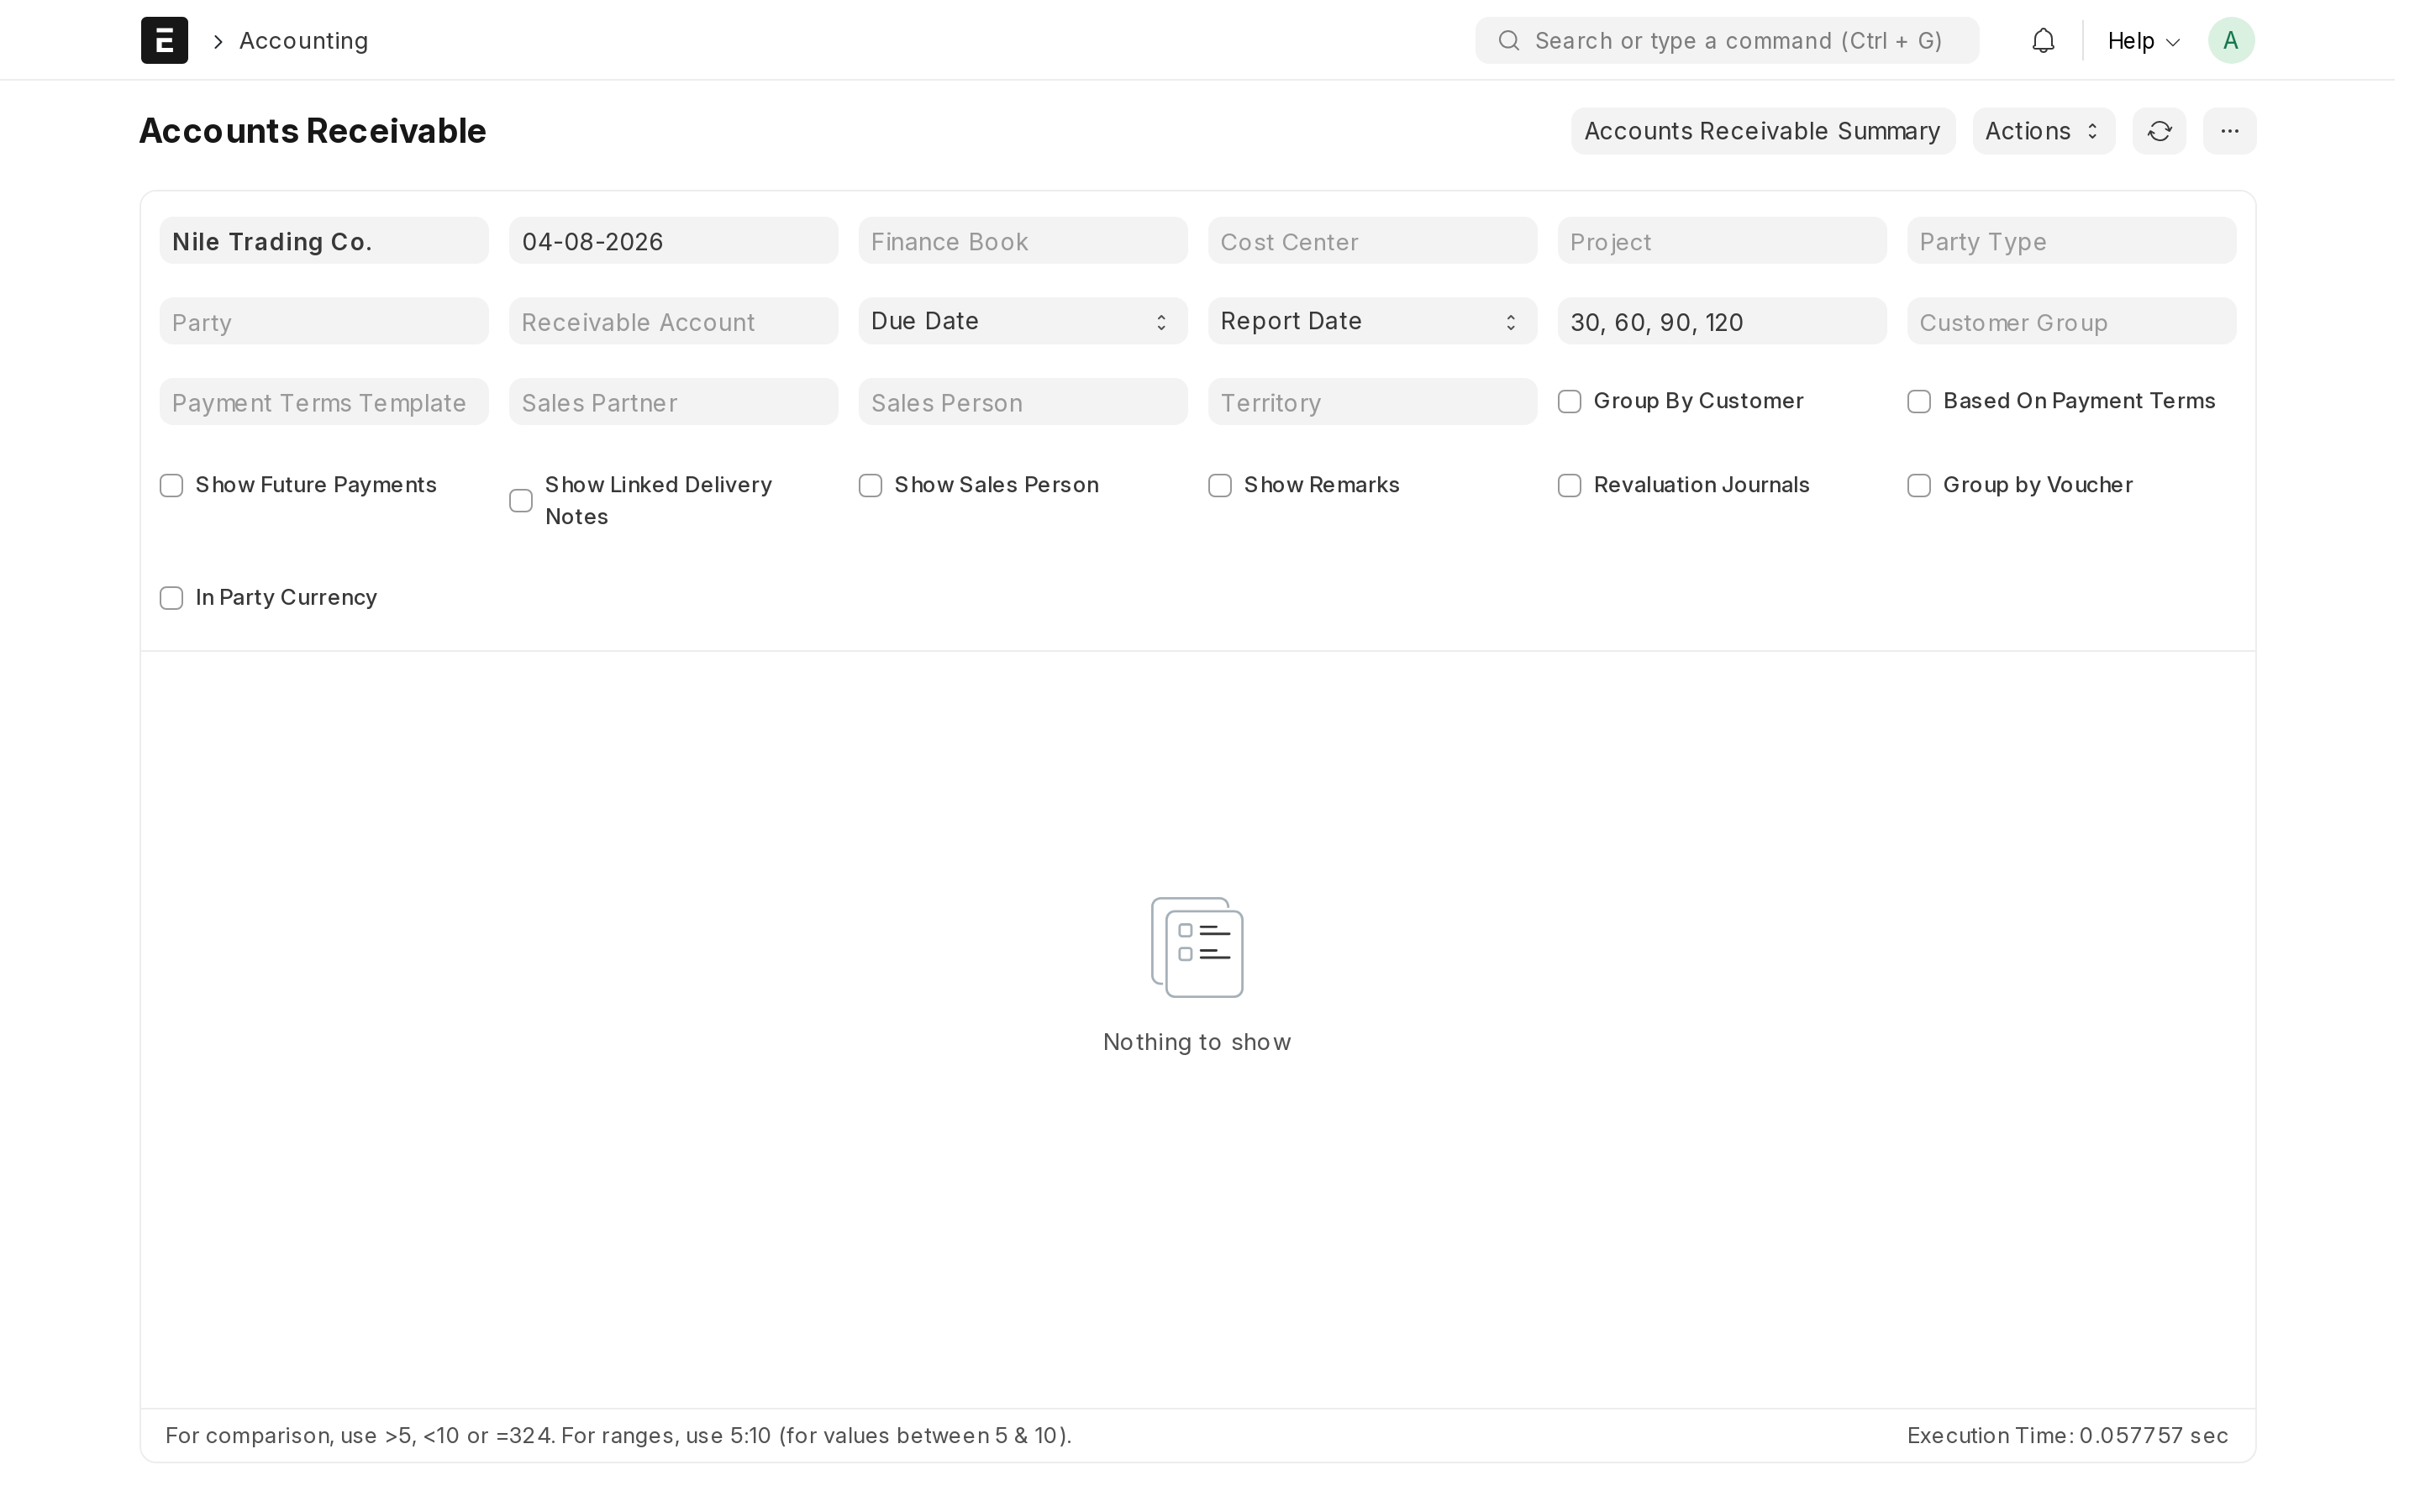
Closing a year
At the end of a financial year, a Period Closing Voucher moves the year's profit or loss into equity, so the new year starts clean. This is a once-a-year step that your accountant should lead — do not run it out of curiosity mid-year. Many small companies leave it to their accountant entirely.
Common questions
Do I have to understand debits and credits?
No. Enter the documents — invoices, bills, payments — and the entries behind them are made for you. Knowing the five kinds of account is enough to read your own reports and to hold a sensible conversation with your accountant.
A figure looks wrong in a report
Open the General Ledger, filter it to that account and that period, and read the entries. Each line links back to the document that created it, so the cause is usually two clicks away.
Can my accountant have access?
Yes, and it is the easiest way to work. Invite them from the Users page of your control panel at app.nezmaro.com and give them the Accounts User role. They then work directly in your ERP instead of asking you for exports. The team and roles chapter covers this in full.
Something still does not look right
Email support@nezmaro.com with your ERP address and the report you are looking at, and we will help you trace it.
Marketing tools
Your ERP already contains the tools to find customers and stay in touch with them — this chapter switches them on and connects your own email address.
What is already in your ERP
You do not need to buy a separate customer database or a separate mailing tool. All of this comes with Nezmaro and is already switched on in your system:
| Tool | What it does |
|---|---|
| CRM | Follows a prospect from first contact to a paying customer: Lead → Opportunity → Customer |
| Email Campaign | Sends a planned series of emails to a lead or contact over days or weeks |
| Newsletter | Sends one email to a whole list of subscribers at once |
| Web Form | A public form on your website; every submission creates a record — a lead, for example — directly inside your ERP |
| Website / blog | Public pages and blog posts, hosted by your ERP at your own address |
CRM stands for customer relationship management, which in practice means one place that holds every person who might buy from you and every conversation you have had with them. The advantage here is that it sits on the same data as your invoices and your stock: a lead that becomes a customer keeps its whole history, and you never copy information between two separate systems.
Switching the tools on
The modules are installed but hidden until your account has permission to see them. This button grants that permission.
- Open the control panel at app.nezmaro.com and open Team & messages → Marketing tools in the menu.
- On the first card, click Enable now. If it has been applied before, the button reads Re-apply now instead.
- Wait for the confirmation message at the top of the page.
- Go to your ERP and open the CRM and Website workspaces — the tools are now visible in the menu down the side.
Behind the scenes this does two small things: it gives your ERP's administrator the roles that unlock these modules (Sales Manager, Newsletter Manager, Website Manager), and it makes sure the CRM and Website workspaces are visible. Nothing is installed, and no role you already have is removed.
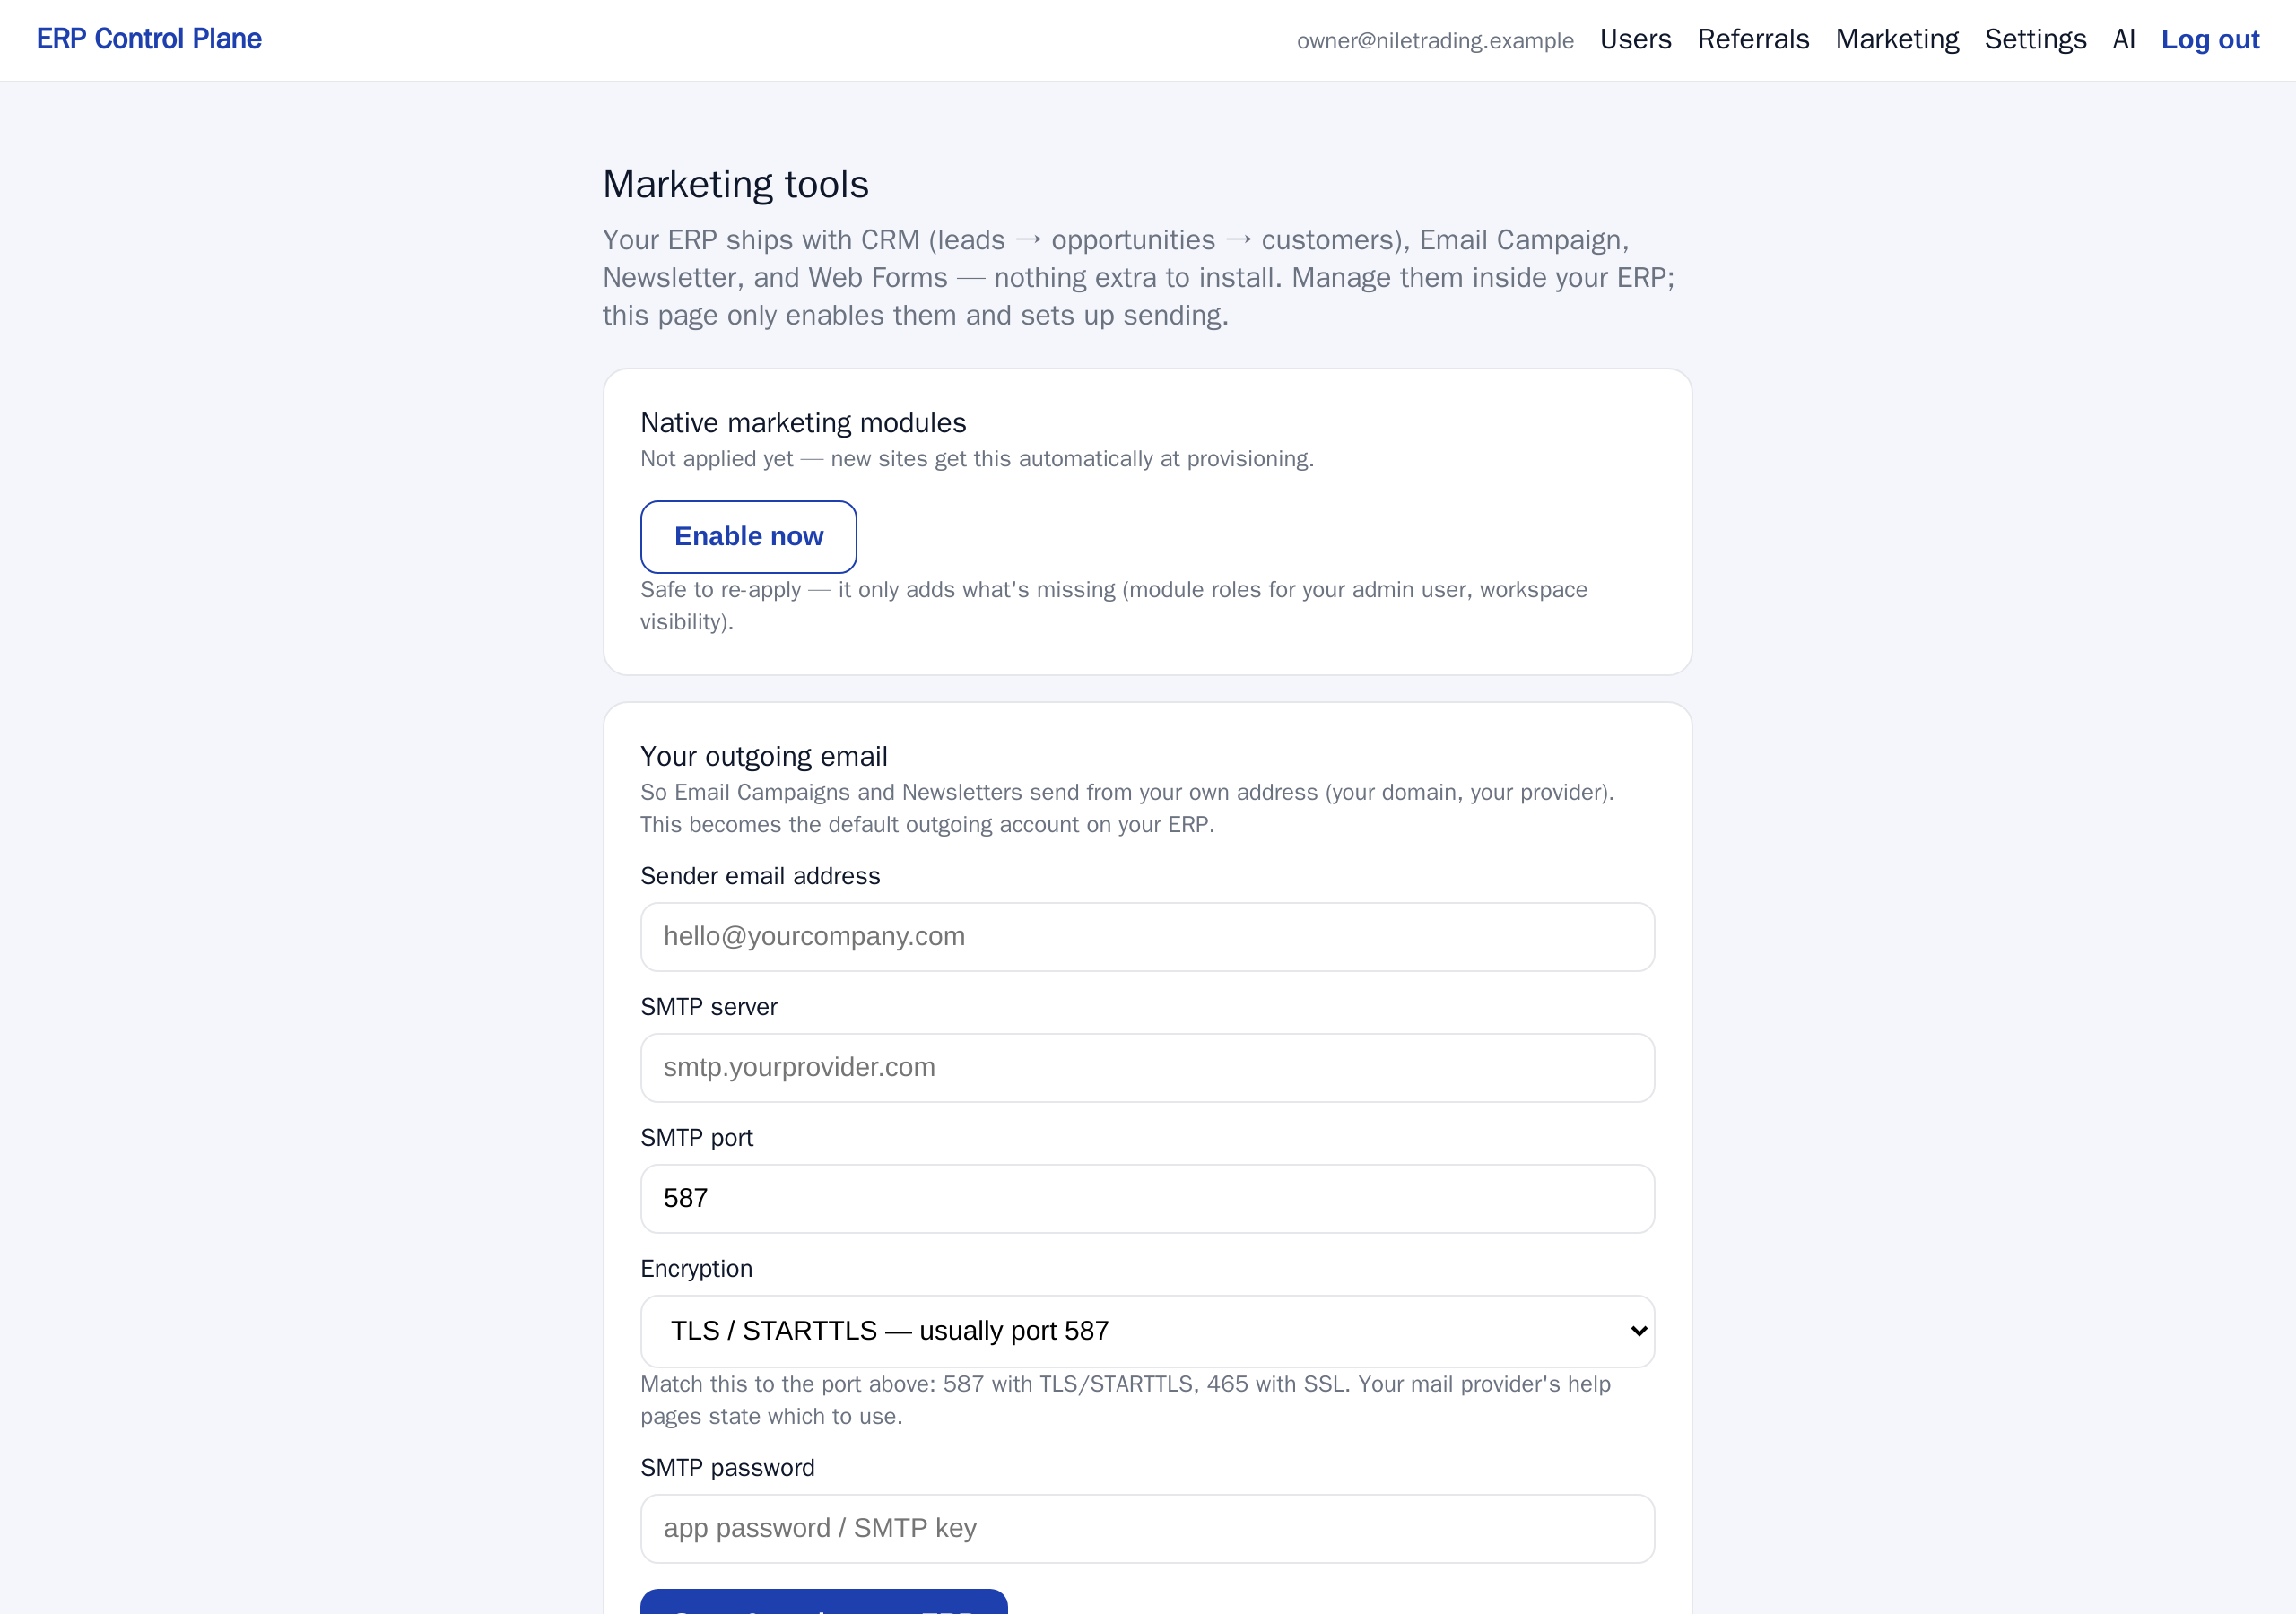
Sending from your own email address
Campaigns and newsletters must go out from your address — something like
hello@yourcompany.com — and not from ours. Recipients trust an address at your own
domain, and replies then come back to you. So before you send anything to anyone, connect the
mailbox your company already uses.
The details come from your email provider: Google Workspace, Microsoft 365, your hosting company, or a dedicated sending service. Their help pages list all of them together, usually under a heading such as "SMTP settings". Fill in the second card on the Marketing page:
| Field | What to put in it |
|---|---|
| Sender email address | The address your mail will appear to come from, for example hello@yourcompany.com |
| SMTP server | Your provider's outgoing mail server, for example smtp.yourprovider.com. SMTP is the standard every mail system uses to hand messages to one another. |
| SMTP port | The numbered door on that server your provider tells you to use — almost always 587 or 465 |
| Encryption | A dropdown with three choices. Pick the one that matches the port — see below |
| SMTP password | The password — or the app password — for that mailbox |
Which encryption to choose
Encryption keeps your password and your messages unreadable while they travel to the mail server. The Encryption dropdown offers three choices, and your provider expects one specific choice for the port you entered:
- TLS / STARTTLS — usually port 587. The connection opens as an ordinary one and then upgrades itself to an encrypted one. That upgrade step is what the word STARTTLS means. This is by far the most common setting today; choose it if your provider does not say otherwise.
- SSL — usually port 465. The connection is encrypted from the very first moment, with no upgrade step.
- None (unencrypted). No protection at all. Choose this only when your provider explicitly asks for it — typically an internal mail relay that recognises your server by its address and requires no password.
- Fill in the five fields.
- Click Save & push to my ERP.
- Read the message at the top of the page. It confirms that the outgoing account was created or updated on your ERP, and names the sender address it will use.
Prove it works before you run a campaign
A campaign that fails silently is worse than no campaign at all. Once your sender address has been saved, a third card appears on the Marketing page: Test it.
- Click Send test email. The message is sent by your own ERP, through the account you set up above, to the email address you log in with.
- Check that inbox — and the spam folder too, because the first message from a brand-new sender often lands there.
- If nothing arrives, or the page reports that the send failed, the settings are wrong. The usual causes are a mistyped server name or port, an encryption choice that does not match the port, or a provider that requires an app password instead of your normal login password.
Only once a test email has actually reached you should you write your first campaign.
From a lead to a customer
The CRM is a three-stage funnel. Each stage is a document in your ERP, and each one creates the next with a single button, so nothing is ever retyped.
| Stage | What it means |
|---|---|
| Lead | Someone who might buy: a name, a company, a phone number. |
| Opportunity | A real, identified deal — you know roughly what they want and what it is worth. |
| Customer | They bought. From here on they belong to the sales side of the ERP: quotations, orders, invoices. |
Capture the lead
Record the contact while it is fresh, so nothing depends on someone's memory or their notebook.
- In your ERP, type Lead into the search bar at the top (
Ctrl+G) and choose New. - Enter at least the person's name, plus the company name, email and phone if you have them.
- Click Save. From now on, record every call and every email against this one record so the whole history stays in one place.
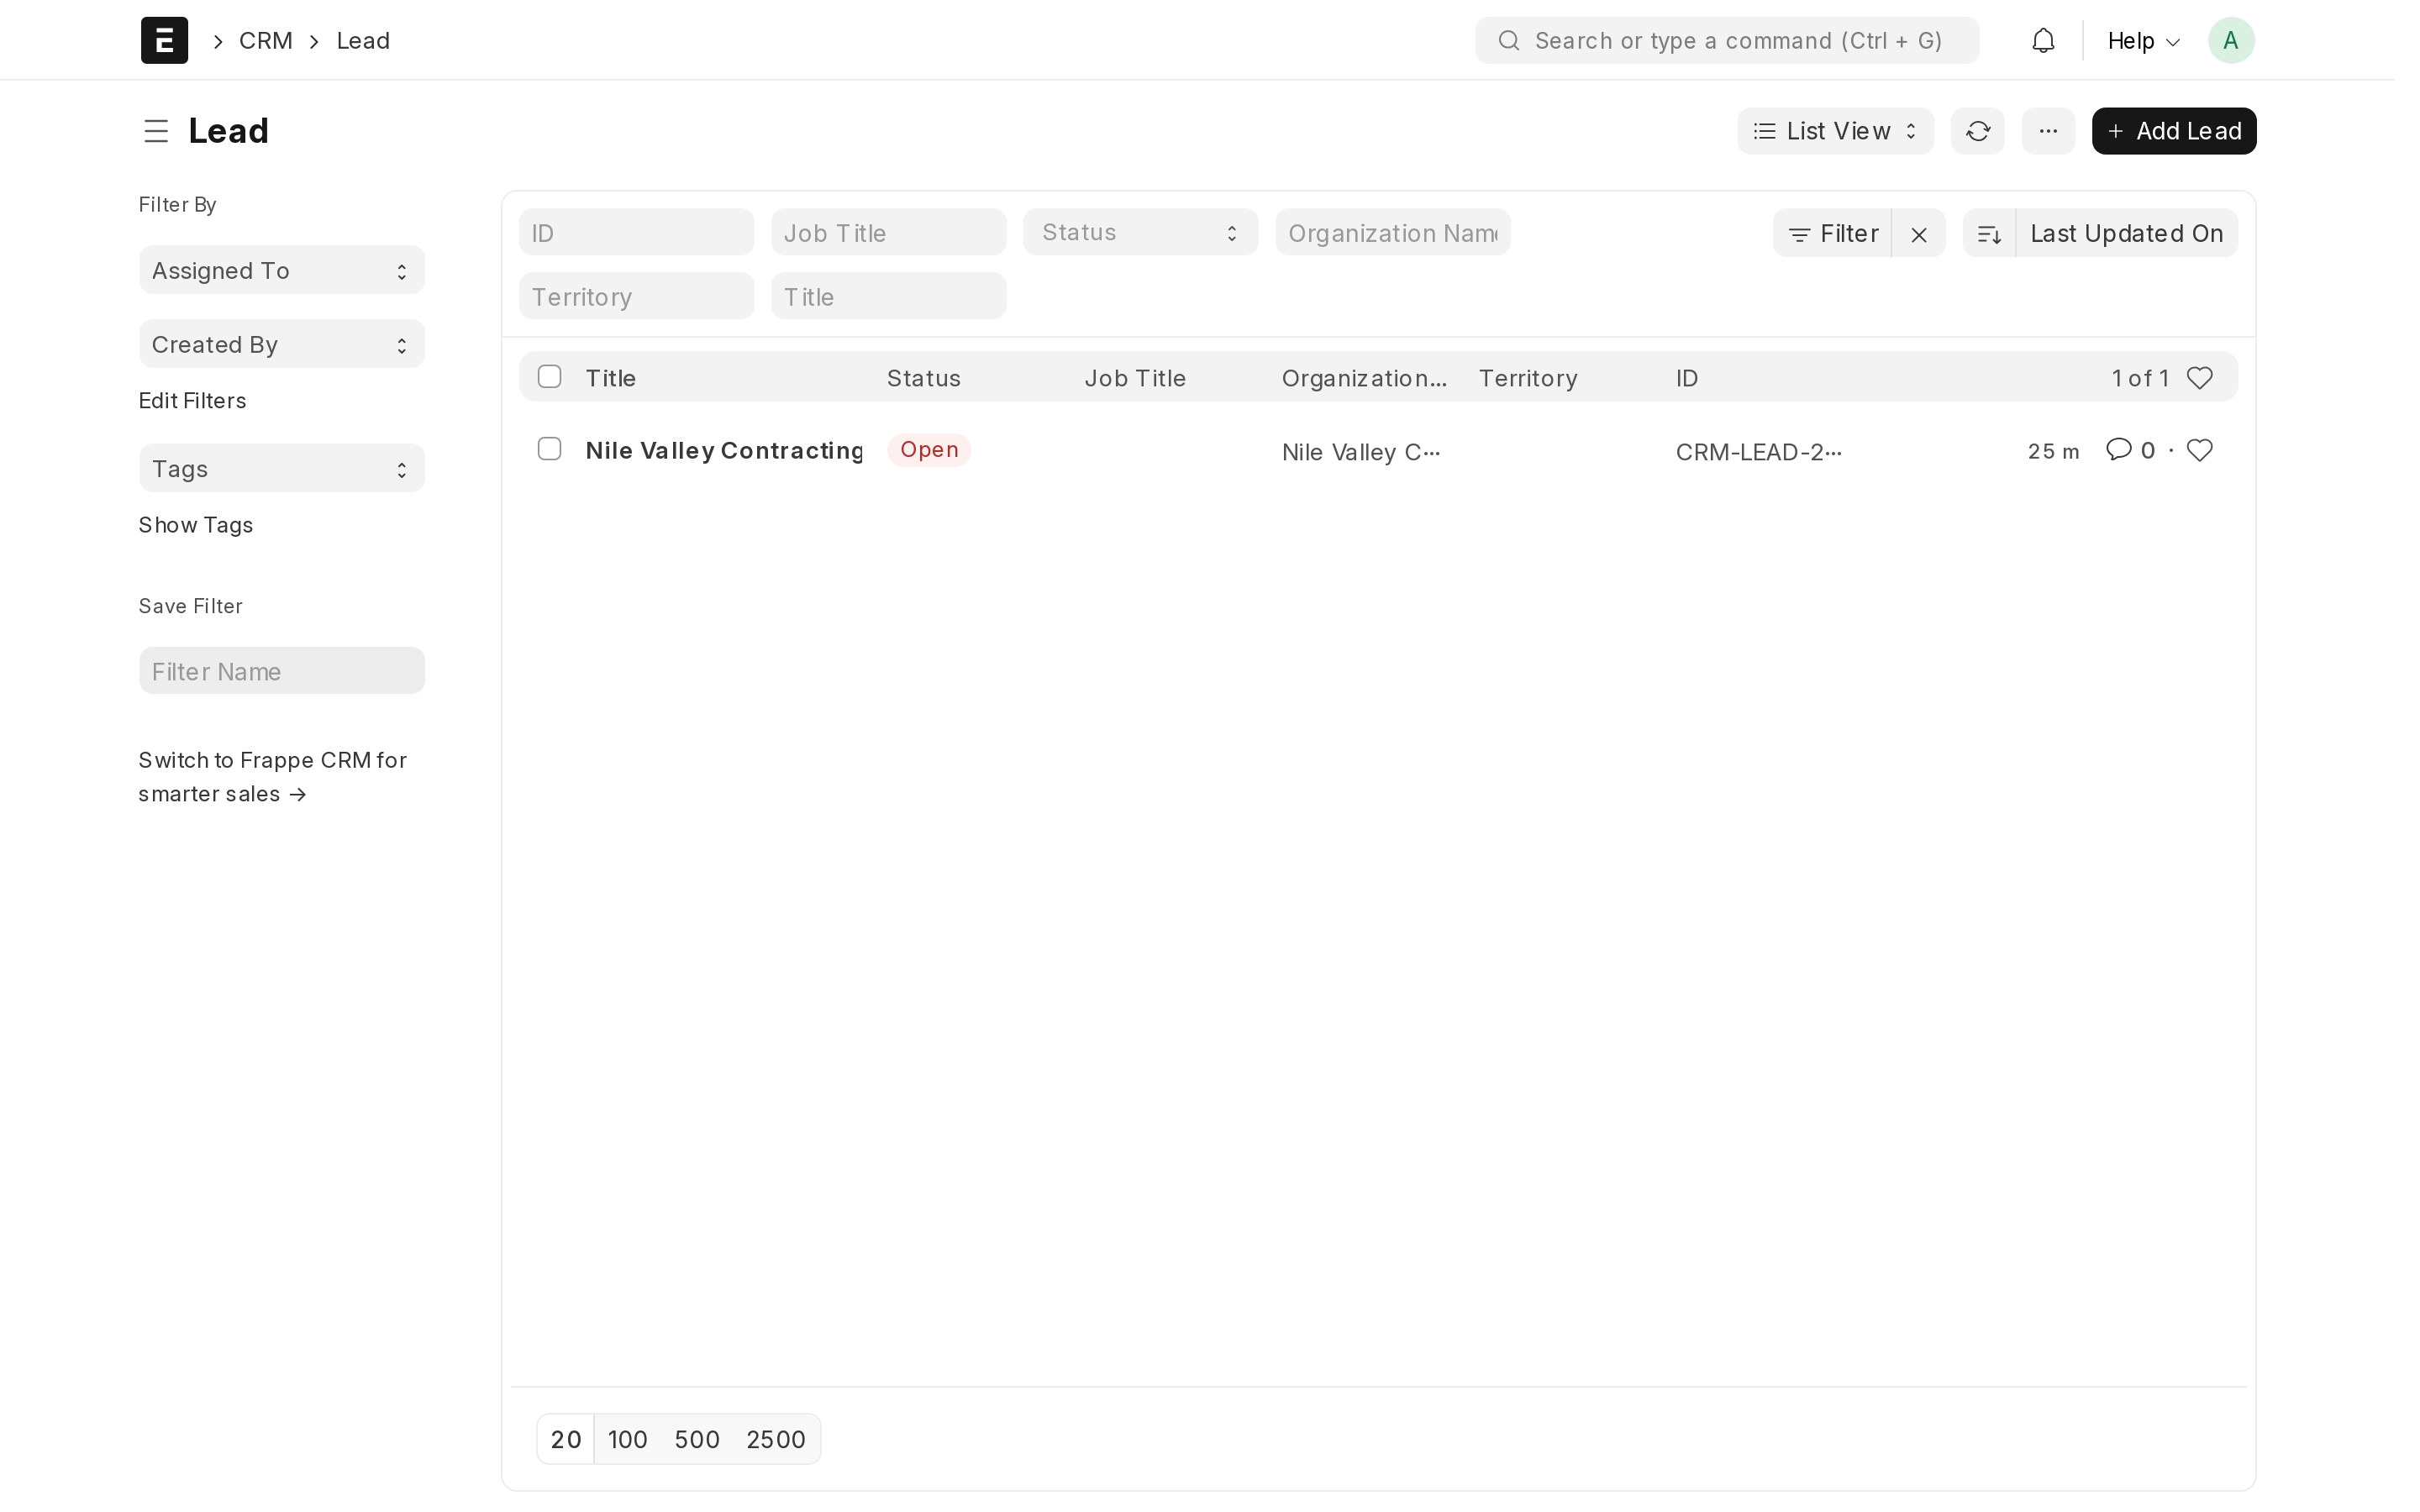
Convert it to an opportunity
Do this once you know what the person actually wants, so the deal can be counted and followed rather than remembered.
- Open the lead and click Create → Opportunity.
- The contact details carry over automatically. Add what the customer is interested in and the value you expect.
- Click Save. You can now send a quotation straight from the opportunity with Create → Quotation, which starts the sales cycle described in the Selling chapter.
Turn it into a customer
When the deal is won, open the opportunity and click Create → Customer. The same button also exists on the lead itself, for the small deals that never needed an opportunity stage. From that moment the record behaves like any other customer, and you can invoice it normally.
Newsletters need an email group
A newsletter is not addressed to individual people. It is addressed to an Email Group, a named list of subscribers. So the order of work is: create the group first, put people into it, then write the newsletter.
- Search for Email Group → New and give it a clear name, such as
CustomersorNewsletter. - Add subscribers to the group — one at a time, or by importing a list.
- Search for Newsletter → New, choose that email group, write the subject and the body, and send.
Keep separate groups for genuinely different audiences — existing customers and cold prospects should rarely receive the same message.
Storage and backups
A backup is a spare copy of everything in your system, kept somewhere else. This chapter shows you where yours goes and how to switch it on.
Why it matters
Most of the time a backup is needed not because something broke on our side, but because of an ordinary day at the office: someone deletes a customer with all its history, a year of stock entries is imported wrongly, or a departing employee clears records on the way out. In each of those cases the fix is a copy of yesterday.
What a backup contains
A backup is a complete copy of your system at one moment in time. It has two parts:
- The database — every invoice, customer, supplier, item, stock movement, accounting entry, user and setting.
- The attached files — the documents and images your team uploaded onto those records: scanned invoices, contracts, product photos, logos.
Both parts are needed. A database without its files restores your numbers but leaves every attachment broken, so the two are always taken together.
Who keeps a copy
A copy that sits on the same server as your system is not a backup, so every copy has to leave that server. Being backed up is not something you can opt out of — what you choose is where the copies go, and there are two arrangements.
- Until you connect storage of your own, we take a nightly copy of your database and files to storage we own, away from the server your system runs on. This needs no setting up. To use it you email us — see the end of this chapter.
- Once you connect an account you own — the rest of this chapter — your backups land there instead, on the schedule described below. That copy is one you can open, download, hand to an accountant or take to another provider, at any hour, without asking anyone. From then on the routine copies live in your account rather than with us; what we always keep, whichever you choose, is the final backup taken before an instance is ever removed.
Moving the copies into an account of your own is less an insurance policy than independence from us. That is the reason to spend the five minutes.
Choosing where your own copy goes
You choose the destination and you own the account it lands in, which means the copy stays under your control. There are two options.
| Google Drive | S3-compatible storage | |
|---|---|---|
| What it is | The Google Drive you already use for documents | Storage rented by the gigabyte from a cloud provider. A bucket is that provider's word for one storage area, rather like a top-level folder. |
| Good for | Companies already using Google | Companies already renting cloud storage, or wanting the cheapest option for large amounts |
| Who runs the backup | Our platform, every night | Your own system, at the frequency you choose |
| What you paste in | A Google authorisation token — a block of text Google gives you, in a format called JSON | Bucket name, region or address, access key and secret key |
| Works with | Google Drive | AWS S3, Backblaze B2, Wasabi, MinIO |
Neither option is better than the other. Pick the account you already have and will still have in two years.
Setting it up
The point of this procedure is to give the platform somewhere to put your backups, and to prove it can write there before you start relying on it.
Open the control panel at app.nezmaro.com and open Advanced → Storage & backups in the menu.
- Choose your Storage target: Google Drive or S3-compatible. The form changes to show only the fields that target needs.
- For Google Drive: paste the authorisation token Google gave you into the Google OAuth token JSON box. It is stored encrypted and is never shown back to you.
- For S3-compatible storage: enter the Bucket name, then the Region or the Endpoint URL. Leave the endpoint empty for AWS S3; set it for Backblaze B2, Wasabi or MinIO, each of which publishes its own address. Then enter the Access key ID and Secret access key you generated in that provider's console.
- Optionally set a Folder / prefix — a name such as your company's, so everything we write stays inside one folder instead of scattering.
- Tick Back up my ERP database (with files) to this target on a schedule. Without this tick you have chosen a destination but scheduled nothing.
- Choose a Frequency, Daily or Weekly. This affects S3 targets only — see the next section.
- Click Test connection & save.
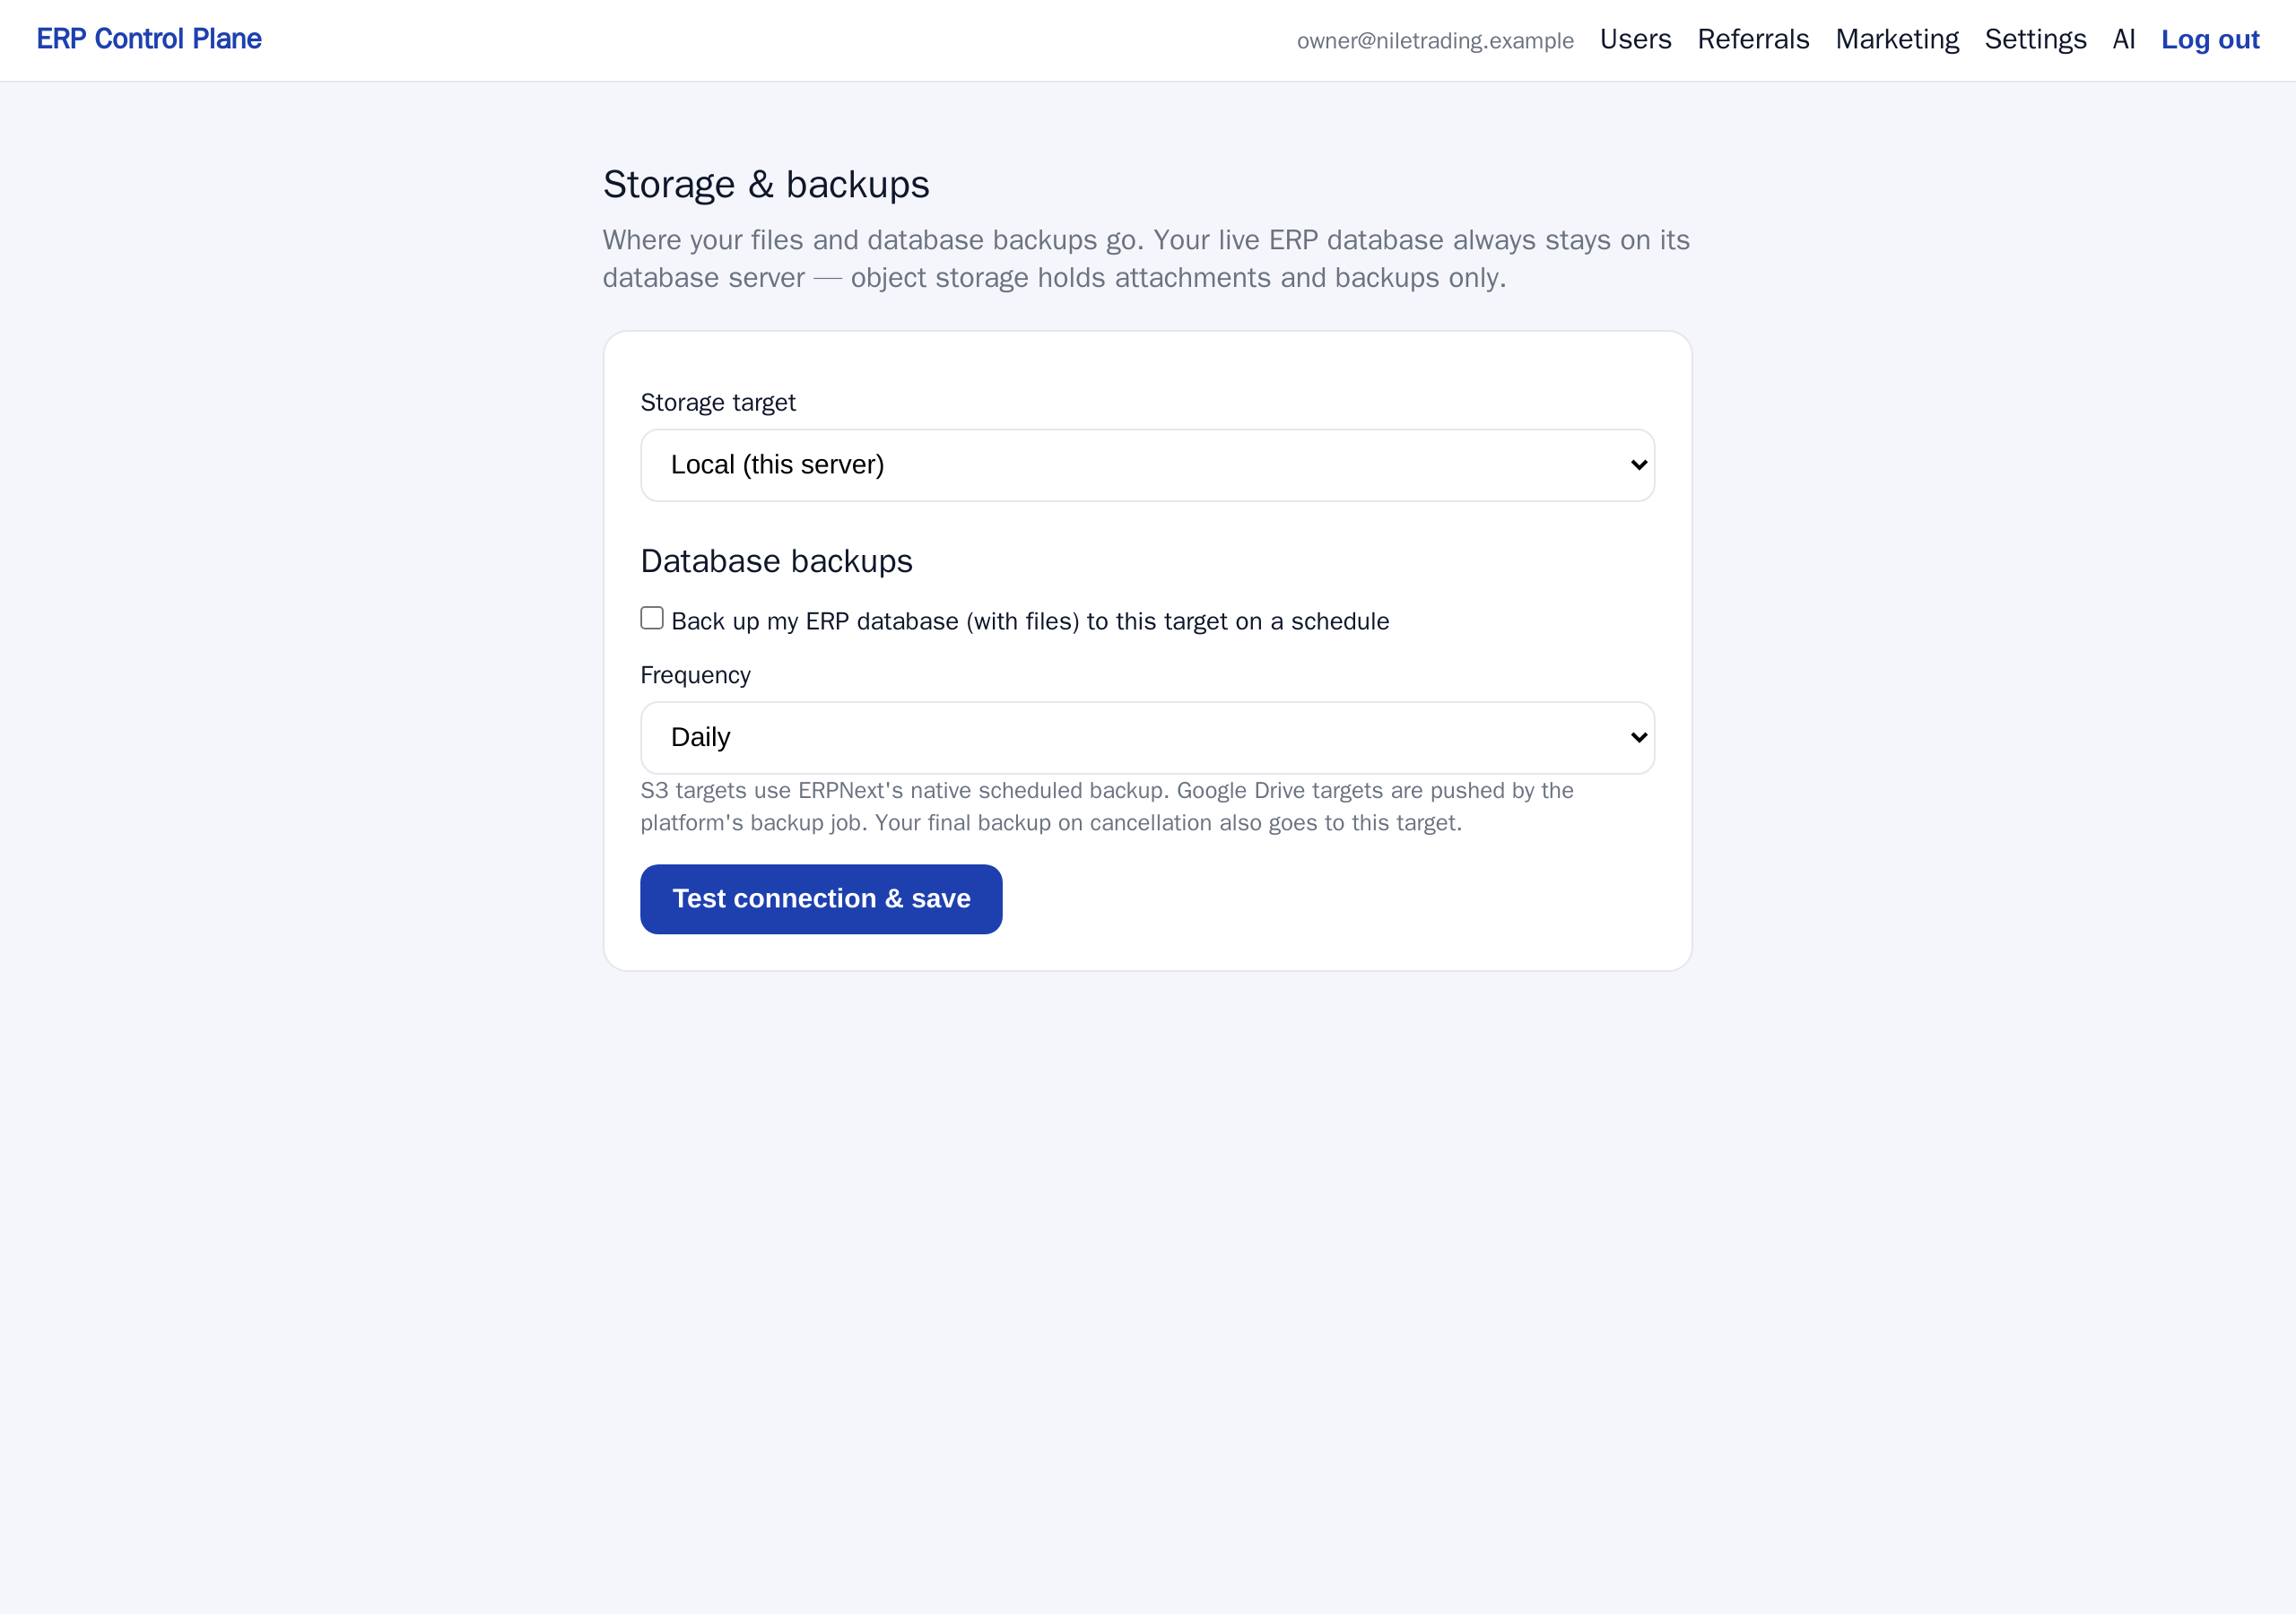
Why a successful save proves the settings work
That button does both of the things it names, in that order. Before anything is stored,
the control panel connects to your Drive or your bucket and writes a small file there, named
erp-control-plane-connection-test.txt.
- If the test fails, nothing is saved and the page shows the reason — wrong key, wrong bucket name, no permission to write.
- If the test succeeds, your settings are saved and that test file is sitting in the destination. Go and look at it. Seeing it is proof that real backups will land in the same place.
The point is to avoid the worst outcome: a backup setting that looks configured and has been failing quietly for six months.
An extra option for S3 users
The S3 target also offers Also store my ERP file attachments in this bucket. With this on, uploaded documents live in your bucket instead of on the server's disk, which keeps that disk small as your archive grows. It needs an add-on to be present in your system; if it is not there, the page tells you. Leave it off if you are unsure — backups work without it.
How often the backup runs
What the Frequency setting does depends on the destination you chose.
- Google Drive. The platform copies your system to Drive every night. The Daily and Weekly choice has no effect on a Google Drive target.
- S3-compatible storage. Your own system uploads the backup at the frequency you picked, daily or weekly.
If you are on S3, choose Daily unless you have a reason not to. Daily means that in the worst case you lose one day of work, which can usually be reconstructed from paperwork and email. Weekly means you could lose six days. Backups are small compared with what they protect, so storage cost is rarely the deciding factor.
What happens if you cancel
Cancelling does not mean your data disappears — and nothing is removed on the day you leave. Your system is locked and then kept, still backed up every night, for 30 days (if it ends after a failed payment: until 30 days from that payment or 7 days from the end, whichever is later). Restart your subscription inside that window and everything comes back, same address and same data. We email you when the lock starts, and again before the window closes.
Only when that window runs out do these steps run automatically, always in this order:
- A final backup of the database and files is taken.
- It is checked, to confirm the database dump really was produced and that it arrived at its destination complete, byte for byte. If a good backup cannot be produced, nothing is removed and we investigate instead.
- Only then is your system removed.
- That final backup is kept for 90 days.
So there are two windows, one after the other: the grace period, with your system still there and one click from working again, then 90 days in which only the backup remains and a restore is something you ask us for. Together they are your margin — time to change your mind, to move elsewhere, or to retrieve one document you had forgotten. If you had set a storage target, the final backup goes there too, so a copy sits in your own account and not only in ours.
Asking for a restore or an export
A restore puts an old copy back over your live data, so a person handles it rather than a button you might click by accident.
Email support@nezmaro.com from the address on your account and tell us:
- Your subdomain — the
yourcompanypart ofyourcompany.nezmaro.com. This is what identifies your system. - What you need: a full restore to a particular date and time, or an export of your data to take with you.
- For a restore, what went wrong and roughly when — it helps us pick the right copy.
A full restore returns your system to how it looked at the moment of that backup. Anything entered after it will be gone, so tell us if there is recent work worth saving first.
One last thing
Billing, trial and subscription
What you are charged and when, who sends your invoices, and exactly what happens if a payment fails or you decide to leave.
The 7-day free trial
You choose your plan at the end of the signup wizard and pay through Paddle, the company that handles payments for us.
- Your card is saved at checkout. Paddle needs it on file to open the subscription.
- Nothing is charged on the day you sign up. No deposit and no setup fee.
- Your system is built straight away and is the real thing, not a limited demo.
- On day 7 the first monthly charge is taken automatically, unless you have cancelled before then.
- We email you about two days before the trial ends, so the first charge is never a surprise.
Your card details are typed into Paddle's own checkout window. They never reach us and we never store them. What we see is which plan you are on and whether the subscription is paid.
Who bills you
Paddle is the Merchant of Record, which means Paddle — not us — is the legal seller of your subscription. Three practical consequences:
- Invoices and receipts come from Paddle. The line on your card or bank statement normally shows Paddle's name, not ours.
- Tax is handled by Paddle. They work out the VAT or sales tax that applies in your country, add it where required, collect it and pay it over. You do not have to work out which tax rules apply to buying software from abroad.
- Refunds are processed by Paddle, back to the card you paid with.
If Paddle's checkout offers a company-name or tax-number field for your country, fill it in while you are subscribing. That is what puts your company details on the invoices your accountant will file.
The plans
| Plan | Price | People who can sign in | Storage |
|---|---|---|---|
| Starter | $29 / month | 5 | 10 GB |
| Pro | $79 / month | 20 | 50 GB |
Prices are per month, before any tax Paddle adds for your country. The plan page at signup always shows the current prices and limits.
Both plans include every module — accounting, stock, selling, buying, CRM, HR, projects and manufacturing. Modules are not sold separately, and no feature unlocks by paying more. The difference between Starter and Pro is two things: how many people can sign in, and how much storage your files and backups may use.
Storage: what counts, and what happens near the limit
Storage is a fair-use allowance. It counts three things on your ERP: its database, the files attached to your documents, and the backups kept on the site. We measure it once a day, and the Billing page shows the latest figure.
Nothing is ever blocked because of storage. When your ERP reaches 80% of the allowance, the account owner gets an email; at 100%, a second one. From there you can remove attachments you no longer need, or move to a larger plan.
Changing plan
Moving between Starter and Pro raises or lowers those two limits without touching any of your data.
If you move to a plan with fewer seats while more people are active, nobody is switched off. The Users page says how many to deactivate, the account owner gets an email, and until you are back within the plan the control panel will not add or re-enable anyone. An accountant you invited never uses a seat.
- Email support@nezmaro.com saying which plan you want to move to.
- Paddle applies the change and charges the difference pro rata — that is, you pay only for the days left in the month, and the part you already paid for is credited against the new price. You are never charged twice for the same days.
- Your system picks up the new limits automatically, usually within a minute. Nothing restarts, nobody is signed out, and no data is touched.
If a payment fails
Cards expire and banks decline things. This is exactly what happens, so it does not surprise you.
- Paddle cannot take the payment, emails you about it, and tries again over the following days.
- Paddle tells us the subscription is past due, and we put your system into maintenance mode: the address stops showing your system and shows a short maintenance page instead, and nobody in your company can sign in.
- Nothing is deleted and nothing is changed. Your database, your documents and your files stay exactly where they were.
- As soon as a payment succeeds, Paddle tells us and maintenance mode is switched off automatically, normally within a minute. You do not need to contact us to have your system turned back on.
- Nothing is removed while Paddle is still retrying. For as long as Paddle keeps trying to collect the payment, your system stays locked but intact, and updating the card is all it takes to get back in.
- If Paddle stops trying and ends the subscription, your system stays locked and nothing is deleted that day. We email you the date it would be removed — never sooner than 30 days after the failed payment, and never sooner than 7 days after the subscription ends. From then on updating the card is not enough: restart your subscription from the control panel, and everything comes back.
If your payment has clearly gone through and your system is still showing the maintenance page fifteen minutes later, email us with your subdomain and we will look straight away.
Cancelling
You can cancel at any time from the Billing page in the control panel — the Cancel button takes you into Paddle's portal, which asks you to confirm — or by emailing support@nezmaro.com. There are two ways to cancel, and the difference matters:
- At the end of the period — what most people want, and what the Billing page does. The subscription stops renewing, and you keep working normally until the last day of the period you have already paid for.
- Immediately — the subscription ends at once. Email us for this one.
What happens after the cancellation takes effect
Nothing is deleted on the day you leave. Your system is locked — the site shows a maintenance page and nobody can sign in — and then kept, exactly as you left it, for 30 days (if it ends after a failed payment: until 30 days from that payment or 7 days from the end, whichever is later):
- The day the subscription ends, your system is locked. We email you to say so, and the email carries the date it would be removed.
- Through that period nothing is deleted and we keep taking nightly backups. Restart your subscription at any point and everything comes back — same address, same data, usually within a minute.
- We email you again before the end of the grace period, while your data still exists.
Only when the grace period runs out is the system actually removed, and that happens in this order:
- We check with Paddle first. If Paddle says the subscription is live after all, nothing is removed and a human looks at it.
- A final backup of your database and all attached files is taken.
- The backup is checked. If a good backup cannot be produced, your system is not removed and we investigate instead.
- Only then is the system removed, and its web address stops working.
- The final backup is kept for 90 days. At any point in that window you can email us and ask for an export of your data.
Refunds
- 14-day money-back guarantee. If you are not satisfied with your first purchase, email us within 14 days of that first charge and we will arrange a full refund through Paddle.
- Cancelled during the trial? No charge was ever made, so there is nothing to refund.
- A renewal charged when you meant to cancel? Contact us within 14 days of that charge and we will review it in good faith. We do not normally refund periods that have already been substantially used, except where the law requires it.
Refunds are issued by Paddle back to the original payment method, and usually take a few business days to appear on your statement. The full policy is on the Refund Policy page, and the billing terms are in the Terms of Service.
Where to find your invoices
Paddle emails an invoice or receipt for every charge to the address you used at checkout. That email is the document your accountant needs.
- Each email contains a link to view and download the invoice as a PDF.
- The same emails link to Paddle's customer portal, where you can update the card on file and see your payment history.
- Nothing is lost if you delete an email — search your inbox for Paddle, or ask us and we will point you to the right place.
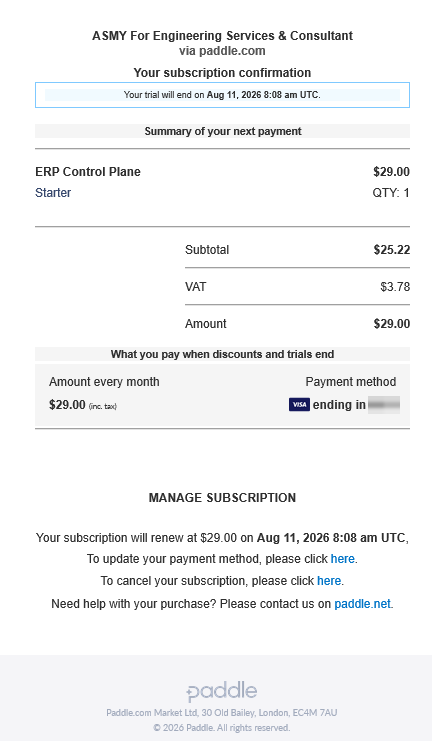
Common questions
Do you keep my card number?
No. Card details are entered into Paddle's checkout and stay with Paddle. We never see them.
Does adding a user cost extra?
No. You pay per plan, not per user. Adding people is free until you reach your plan's limit; after that you either free a place or move to the larger plan.
Will my system be deleted the day I cancel?
No. Cancel at the end of the period and it keeps running until that period ends; cancel immediately and it locks the same day. Either way it is then kept, locked, for 30 days (if it ends after a failed payment: until 30 days from that payment or 7 days from the end, whichever is later) — nothing deleted, still backed up nightly, and one restarted subscription away from working again. Only after that is it removed, and a checked final backup is taken first and kept for 90 days.
Something on my invoice is wrong
Email support@nezmaro.com with the invoice number and what needs correcting, and we will take it up with Paddle for you.
Ask Nezmaro: the assistant
Ask Nezmaro answers three kinds of question: how to do something in your system, what an error message means, and what your own figures say. Ask in English or Arabic; the answer comes back in the language you asked in.
Where to find it
- In your system: the Ask Nezmaro button at the top of every page, next to the notifications bell. On a phone, where the top bar has no room for it, use the round button in the corner of the screen. Either one opens the same window over the page you are on, so you can ask without leaving your work.
- In the control panel: Team & messages, then Ask Nezmaro, at app.nezmaro.com. It is the same assistant, with a box for pasting an error message.
Ask is for your staff. A person who signs in to your online shop or your customer portal cannot use it; they are told “Ask Nezmaro is for staff accounts.”
What you can ask
How do I…?
“How do I add a customer?”, “Where is the statement of account?”. Ask answers from this manual and, where it can, adds a button that opens the right screen in your system. Under the answer it lists the manual sections it used, so you can read the whole section.
What does this message mean?
When your system shows an error, open Ask and press Explain the last message. Ask reads the message that was just on your screen and says what caused it and how to fix it. In the control panel, paste the message under Explain an error message instead. Ask explains; it never changes your data to fix the problem. For a user with the System Manager role, the explanation also takes your system's most recent error records into account.
Questions about your figures
“Which sales invoices are unpaid?”, “What did we order from this supplier last month?”. Ask reads the answer from your own system: customers, suppliers, items, sales and purchase invoices and orders, payments, delivery notes, stock movements, employees and your company record. Reading changes nothing.
Ask only reads what the person asking could already see in full. A user who is limited to some records of a kind (only their own documents, or only what a user permission allows) gets no figures from that kind of record through Ask. Questions about figures need an AI to answer them: see “What answers your questions” below.
Adding a customer, an item or a draft invoice
Ask can also prepare three things for you: a new customer, a new item and a draft sales invoice. It never writes them by itself:
- Say what you want in plain words, for example “add a customer called Al Noor Trading”.
- Ask shows what it would create, line by line, with a Do it button. Nothing has been written yet.
- Check the lines. If they are right, press Do it: the record is created and Ask gives you a link to it. If they are not, ask again in other words.
- A sales invoice is only ever saved as a draft, with up to 20 lines, and only for a customer and items that already exist. Open it, check it and submit it yourself.
The button works for 15 minutes; after that, ask again. Ask offers each of the three only to a user who is allowed to create that kind of record.
What answers your questions
For each question, Ask uses the first of these that is available:
- Your own AI. Once you have set up your own AI provider and switched it on (next section), every question goes to it. You choose the model and pay your provider directly; Nezmaro sets no daily limit on it.
- Nezmaro's AI. After your first payment, if you have not set up your own, Ask uses a free AI model that Nezmaro provides, with a number of questions per company per day. The Ask page in the control panel shows how many are left today. Your question, and the figures Ask reads to answer it, are sent to an outside AI provider through OpenRouter, and only to providers that do not keep them or train on them; every answer ends with a line that says so. When the day's questions run out, or the model is busy, Ask answers from the manual instead.
- The manual alone. During the trial, and whenever neither of the above can answer, Ask replies with the sections of this manual that best match your question. Questions about your figures cannot be answered this way.
Setting up your own AI provider
In the control panel, open Advanced, then AI assistant. Any provider that offers the OpenAI-compatible interface works. Your key is stored encrypted and is only used to call your provider.
- Choose the Provider preset. OpenRouter gives you one key for hundreds of models; OpenAI, xAI, Groq, Together and DeepSeek are listed too. Custom takes any compatible address, and Ollama is for a model server you run yourself, which needs no key.
- Paste the API key from your provider's website. After you save, the field shows as empty: leave it blank to keep the saved key.
- Pick a Model from the list your provider publishes. OpenRouter marks each model
Free or Paid;
openrouter/freeuses whichever free model is up at that moment, while paid models are steadier. - Press Test connection. It asks the model one short question before anything is saved, and says which model replied and how fast.
- Tick Enable the AI assistant for my tenant and press Save. From then on Ask uses it, in your system and in the control panel.
When your model is no longer offered
AI providers retire models, and free ones often go without notice. While the model you saved is no longer offered, Ask answers every question with an error, because your own AI is always used once it is switched on.
Every morning Nezmaro checks whether your model is still in your provider's public list of models. Once two mornings agree that it is gone, Home and the AI assistant page show Your AI assistant needs another model, with the model's name and the date it was noticed. To fix it:
- Open the AI assistant page. Your saved model is marked “not offered by this provider”.
- Pick another model from the list, press Test connection, then Save.
The notice goes as soon as another model is saved, or when the provider lists the model again. If no morning confirms it for two days, it goes by itself. A provider that publishes no list of models cannot be checked this way.
Good to know
- Check figures before you act on them. Ask reads your records as they are, but an AI can still misread or miscount: open the document or report it links to.
- Ask has a short per-minute limit for each company, shared by everyone who asks. If it says there are too many questions, wait a minute and ask again.
- If Ask says it is unavailable and keeps saying so, email support@nezmaro.com with your subdomain.
Troubleshooting and support
Find your problem in the headings below. Each one gives the likely cause in a line, then the steps that fix it.
Nobody can get in
The address shows a maintenance page and nobody can sign in
Likely cause: a payment failed, so your system was put into maintenance mode.
- Check the inbox you used at checkout for an email from Paddle about a declined payment.
- Open the link in that email and update the card. Your bank may need to approve it.
- Wait about a minute. Maintenance mode is switched off automatically as soon as Paddle confirms the payment — you do not need to contact us.
- If the payment has clearly gone through and the maintenance page is still there fifteen minutes later, email us with your subdomain.
Nothing is deleted while Paddle is still retrying the payment, and your data is untouched: once the payment goes through, everyone gets back in exactly as they were. If the payment is never recovered and the subscription ends, we first email you the removal date, and that date is never sooner than 30 days after the failed payment, and never sooner than 7 days after the subscription ends. The billing chapter covers this in full.
My address shows nothing, or an error, right after signing up
Likely cause: your system is still being built, which takes a couple of minutes.
- Go back to the status page the signup wizard showed you. It refreshes on its own
and moves through
pending,provisioning,configuringand finallyactive. Those are the words it uses while a private copy of the system, with its own database, is created for you. - When the status reaches
active, a link to your system appears on that page. Use that link — it is the correct address. - If the page reports a problem, leave it alone. It retries by itself and usually clears.
- If nothing has changed after about fifteen minutes, email us with your subdomain.
Signing in
I cannot sign in
Likely cause: you are on the wrong one of the two addresses, or you have forgotten your password.
- Check which address you are on. The control panel is app.nezmaro.com — subscription, users, settings. Your system is yourcompany.nezmaro.com/app — all daily work. They have separate sign-ins.
- Make sure the system address ends in
/app. Without it you land on the plain customer-portal page that shows only My Account. - Check the email address you are typing. Your sign-in name is the exact address the invitation was sent to, not a shortened or forwarded version of it.
- Use Forgot password on the sign-in page. You set your own password; nobody here can read it or type it for you.
- If the reset email does not arrive, see the invitation-email section below.
It says “Not permitted”
Likely cause: that person does not hold a role that allows them to open that kind of document. It is not a fault.
- Ask them exactly what they were opening — Sales Invoice, Stock Entry, Employee.
- Decide whether they should be doing it at all. Sometimes the answer is no, and the system has done its job.
- If yes, the owner adds the matching role to their user record inside the system, as described in the chapter on your team, users and roles.
- Ask them to reload the page and try again.
Users and invitations
I did not receive the invitation email
Likely cause: your own outgoing email is not delivering — invitations are sent by your ERP through your mail server, not ours — or a spam filter held it, or the address was mistyped when the invitation was sent.
- Check the spam or junk folder, and any quarantine your mail provider runs. Company mail systems often hold the first message from a new sender.
- In the control panel, open Users and confirm the address is spelled exactly right. One wrong letter and the email went nowhere.
- Click Resend invite in that person's row. A fresh link to set a password is sent.
- If they still have an older invitation email, do not reuse it. Those links expire — use the newest one.
- Still nothing fifteen minutes later? Email us with the address you invited.
I cannot add another user
Likely cause: you have reached the number of people your plan allows. Create user answers with a message such as User limit reached: your Starter plan allows 5 active users. Deactivate someone or upgrade.
- In the control panel, open Users. The top of the page shows the count, for example Active users: 5 / 5.
- If someone has left the company, click Deactivate in their row. Deactivate, never delete — their name has to stay on the documents they created. The place is free immediately.
- To raise the limit instead, email support@nezmaro.com and ask to move to the larger plan. Plan changes are made by us: the Billing page in the control panel can update your card or cancel your subscription, but it cannot change your plan.
- After a plan change your system picks up the higher limit on its own, usually within a minute.
Documents
I submitted a document and it is wrong
Likely cause: submitting is final by design — it is the moment an invoice reaches your accounts or a delivery note moves your stock — so submitted documents cannot be edited.
- Open the document and click Cancel. Any accounting or stock effect it had is reversed.
- Click Amend. You get an editable copy carrying the same information.
- Correct it and Submit the amended copy.
The cancelled document stays in the system on purpose. That trail is what an audit asks for.
It refuses to delete because something is linked to it
Likely cause: a customer is never alone. Creating one also creates the contact and the address filed against it, and the engine refuses to remove a record while another one still points at it. The message names both, in this shape: "Cannot delete or cancel because Contact ... is linked with Customer ...".
The instinct is to delete the contact first, and that is the one order that never works. Delete the owner last, and the things it owns go with it:
- Cancel and delete any document that names it — an order, an invoice, a delivery note. Cancel before deleting: a submitted document will not delete.
- Delete the address.
- Delete the customer itself. Its contact goes with it, without being touched separately.
The same order works for a supplier and its contact and address.
Email campaigns
My campaign emails are not sending
Likely cause: the outgoing email settings are wrong — most often the port and the encryption do not match each other.
- In the control panel, open Team & messages → Marketing tools and find Your outgoing email.
- Match the SMTP port to the Encryption choice: port 587 with TLS / STARTTLS, or port 465 with SSL. Your mail provider's help pages say which pair to use.
- Check the Sender email address. That address is also the sign-in name used against your mail server.
- Enter the SMTP password for that mailbox. If your provider requires an app-specific password, use that rather than the normal one.
- Click Save & push to my ERP, then Send test email. It tells you straight away whether the settings work.
- Fix and test again until the test succeeds. Only then start a campaign — a campaign sent on broken settings queues up and goes nowhere.
Language
The screen is in the wrong language
Likely cause: language is set per person, and this person's own setting has not been changed from the company default.
- In your system, click your initials in the top corner.
- Choose My Settings.
- Set Language and save (Ctrl+S).
- Reload the page. Arabic also switches the layout to right-to-left.
One colleague working in Arabic and another in English, in the same system, is normal and supported.
Getting data back
Something was deleted, or I need a copy of my data
Likely cause: a mistake during ordinary work, or a request from an accountant or auditor. Either way, this is what backups are for, and a person handles it.
- Email support@nezmaro.com with your subdomain.
- Say what you need: the whole database, its state at a particular date and time, or specific attached files.
- Give the date and time before the problem happened, as precisely as you can.
Writing to support
Email support@nezmaro.com. A person reads it. What you include decides whether it is solved on the first reply or after four rounds of questions, so include all of this:
- Your subdomain — the address of your system. Without it we cannot tell which system is yours.
- What you were doing — the page or document type, and the document number if there is one.
- What you expected to happen.
- What actually happened — the exact wording of any message on screen.
- A screenshot of the whole window, including the address bar. That one image answers more questions than a paragraph of description.
- Who it affects — one person or everyone — and roughly when it started.
If your whole system is unreachable, say so in the subject line. Anything that stops the entire company working is handled ahead of everything else.